Timing belt
7-43
Removing the timing belt
When the timing belt is not installed, do not
turn the crankshaft or driven sprocket. Oth-
erwise, the pistons and valves could collide
with each other and be damaged.
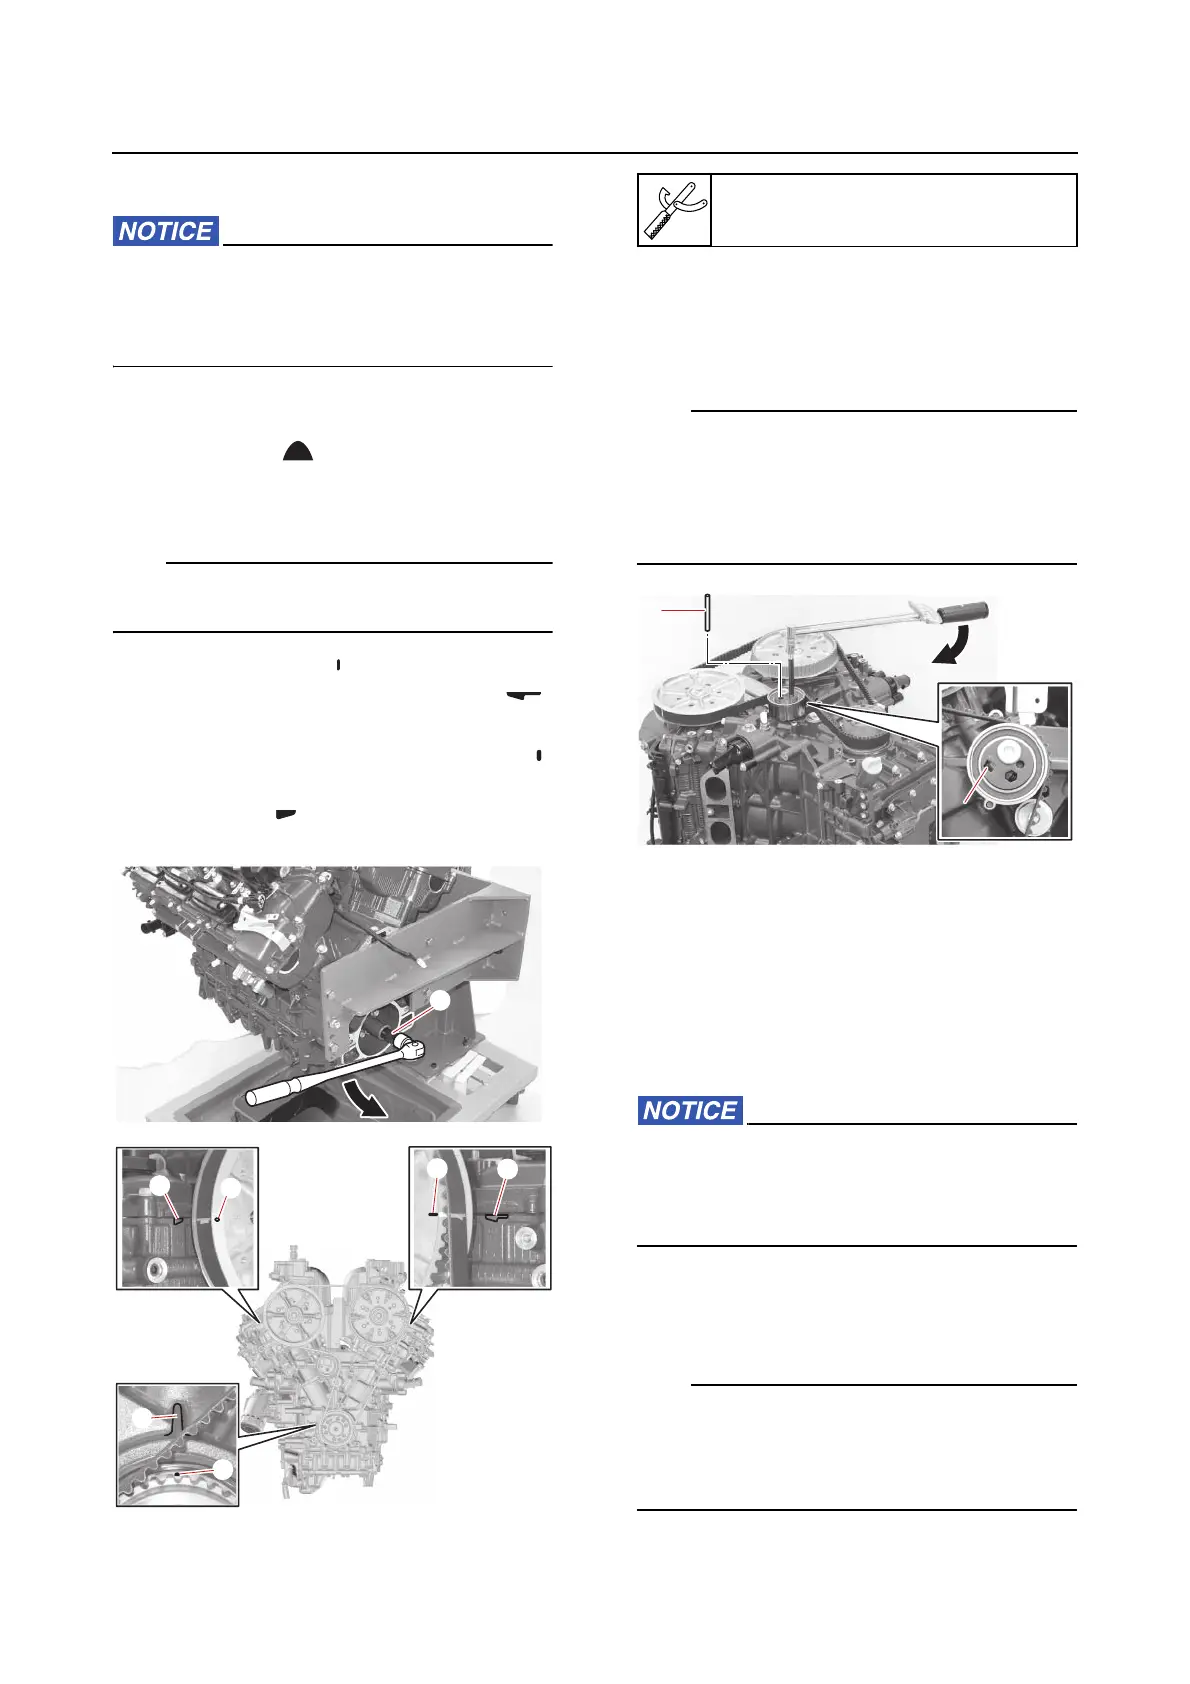
1. Remove:
• Timing belt
a. Align the “ ” mark “a” on the crank-
shaft with the protrusion “b” on the cyl-
inder block.
Turn the crankshaft clockwise using the spe-
cial service tool “1”.
b. Check that the “ ” mark “c” on the driv-
en sprocket (PORT) and the “ ”
mark “d” on the cylinder head (PORT)
are aligned, and check that the “ ”
mark “e” on the driven sprocket (STBD)
and the “ ” mark “f” on the cylinder
head (STBD) are aligned.
c. Turn the timing belt tensioner gradually
clockwise using a hexagon wrench,
and then insert a 5.0 mm (0.2 in) diam-
eter pin “1” into the hole “a”.
• When turning the timing belt tensioner, apply
a force of 15 N·m (1.5 kgf·m, 11 lb·ft) or less.
• Leave the pin “1” inserted into the hole “a” of
the timing belt tensioner until the timing belt
is installed again.
d. Remove the timing belt.
Checking the timing belt
1. Check:
• Interior and exterior of the timing belt
Cracked/damaged/worn → Replace.
Installing the timing belt
When the timing belt is not installed, do not
turn the crankshaft or driven sprocket. Oth-
erwise, the pistons and valves could collide
with each other and be damaged.
1. Install:
• Timing belt
• Timing belt tensioner
Check that the alignment marks on the crank-
shaft and driven sprockets are positioned in
the proper locations. See “Removing the tim-
ing belt” (7-43).
Shaft holder “1”
90890-06949