8-31
Drive shaft and lower case (regular rotation model)
Assembling the forward gear
• Use heat-resistant gloves. Otherwise,
burns could result.
• To prevent fires, remove any flammable
substances, such as gasoline and oil,
around the working area.
• Keep good ventilation while working.
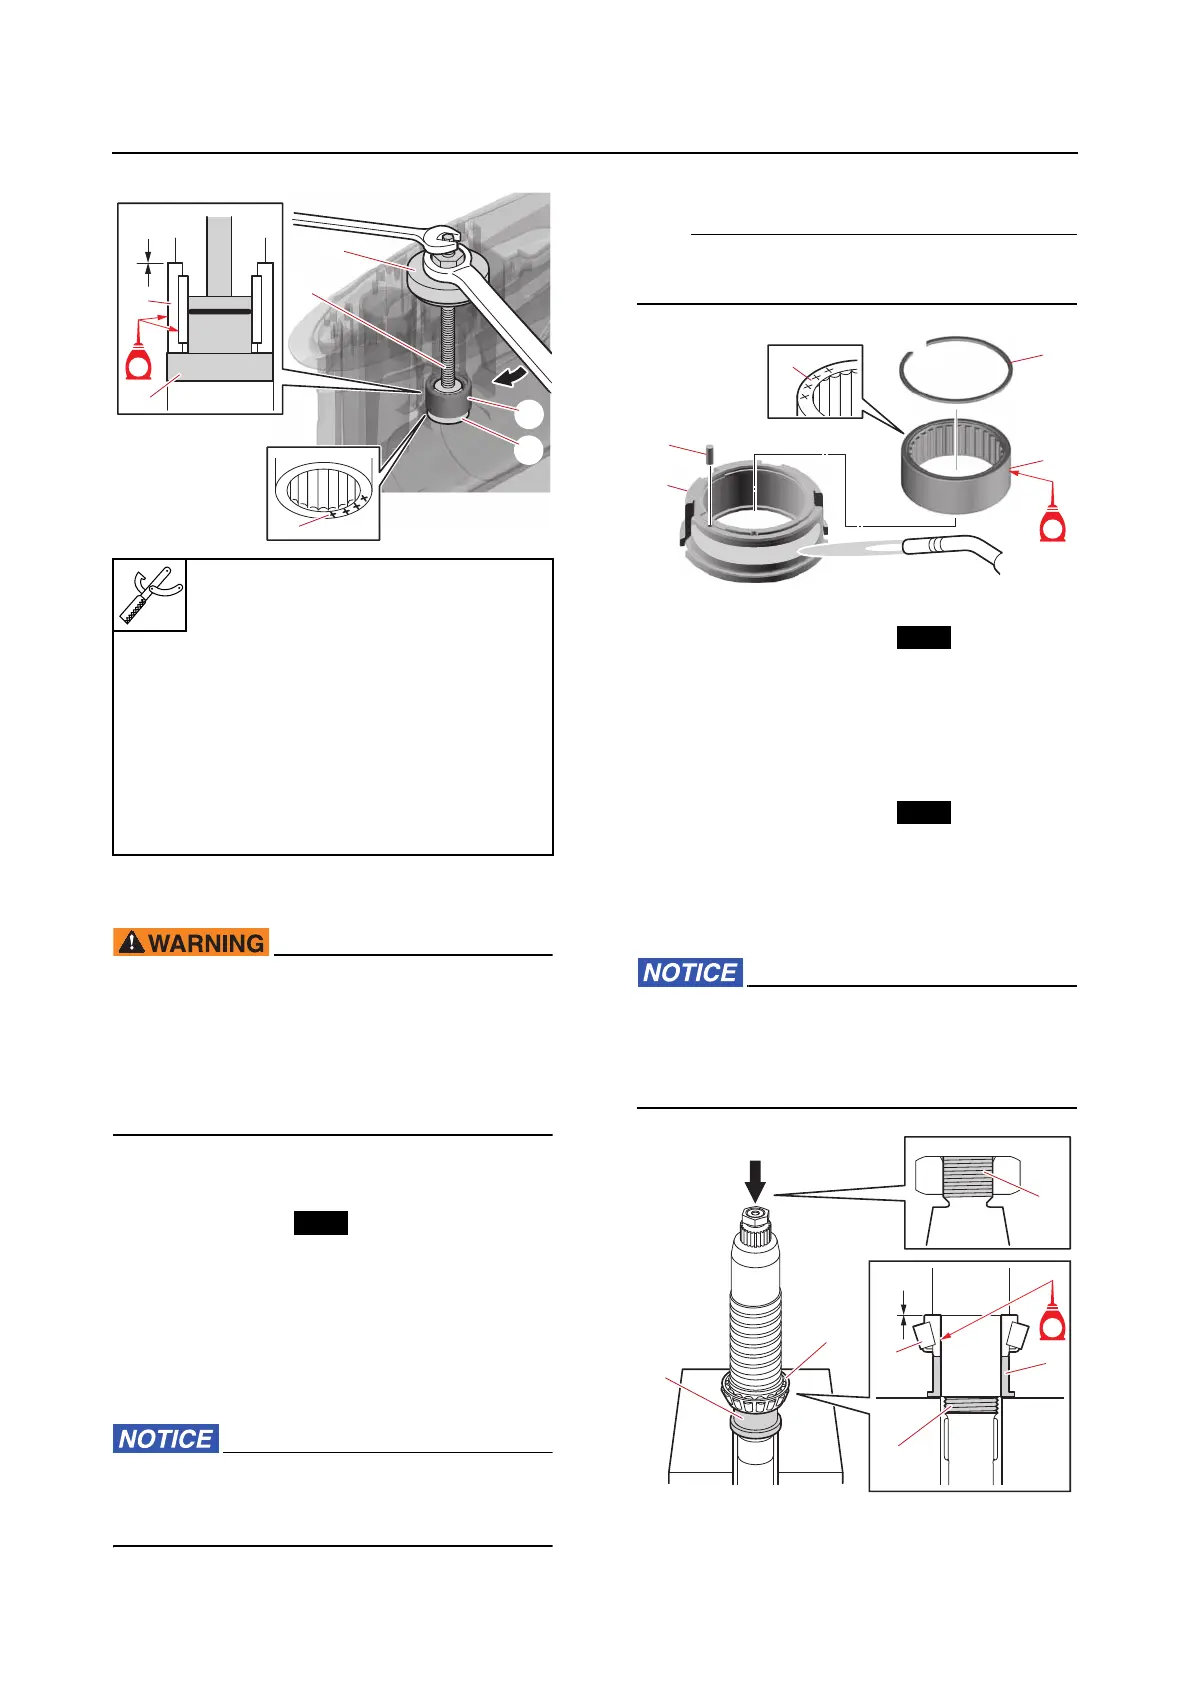
1. Install:
• Adapter
• Roller bearing
•Dowel
•Circlip
a. Heat the installation area of the roller
bearing in the adapter “1” using a gas
torch, and then install a new roller bear-
ing “2”.
When heating the adapter, heat the entire
installation area evenly. Otherwise, the
adapter could be damaged.
b. Install the circlip “3” and dowel “4”.
Face the bearing identification mark “a” on the
roller bearing toward the circlip.
2. Install:
• Tapered roller bearing
•Washer
• Circlip
Assembling the drive shaft
1. Install:
• Tapered roller bearing
• Claw washer
• Drive shaft nut
a. Install a new tapered roller bearing in-
ner race “a”.
Do not press the threads “b” of the drive
shaft directly. Make sure that the special
service tool and blocks do not contact the
threads “c” of the drive shaft.
Needle bearing attachment “2”
90890-06938
Bearing outer race puller assem-
bly “3”
90890-06523
Stopper guide plate “4”
90890-06939
Double ended bolt “3”
(commercially available)
5/8–18 UNF, 350 mm (13.8 in)