Drive shaft and lower case (regular rotation model)
8-34
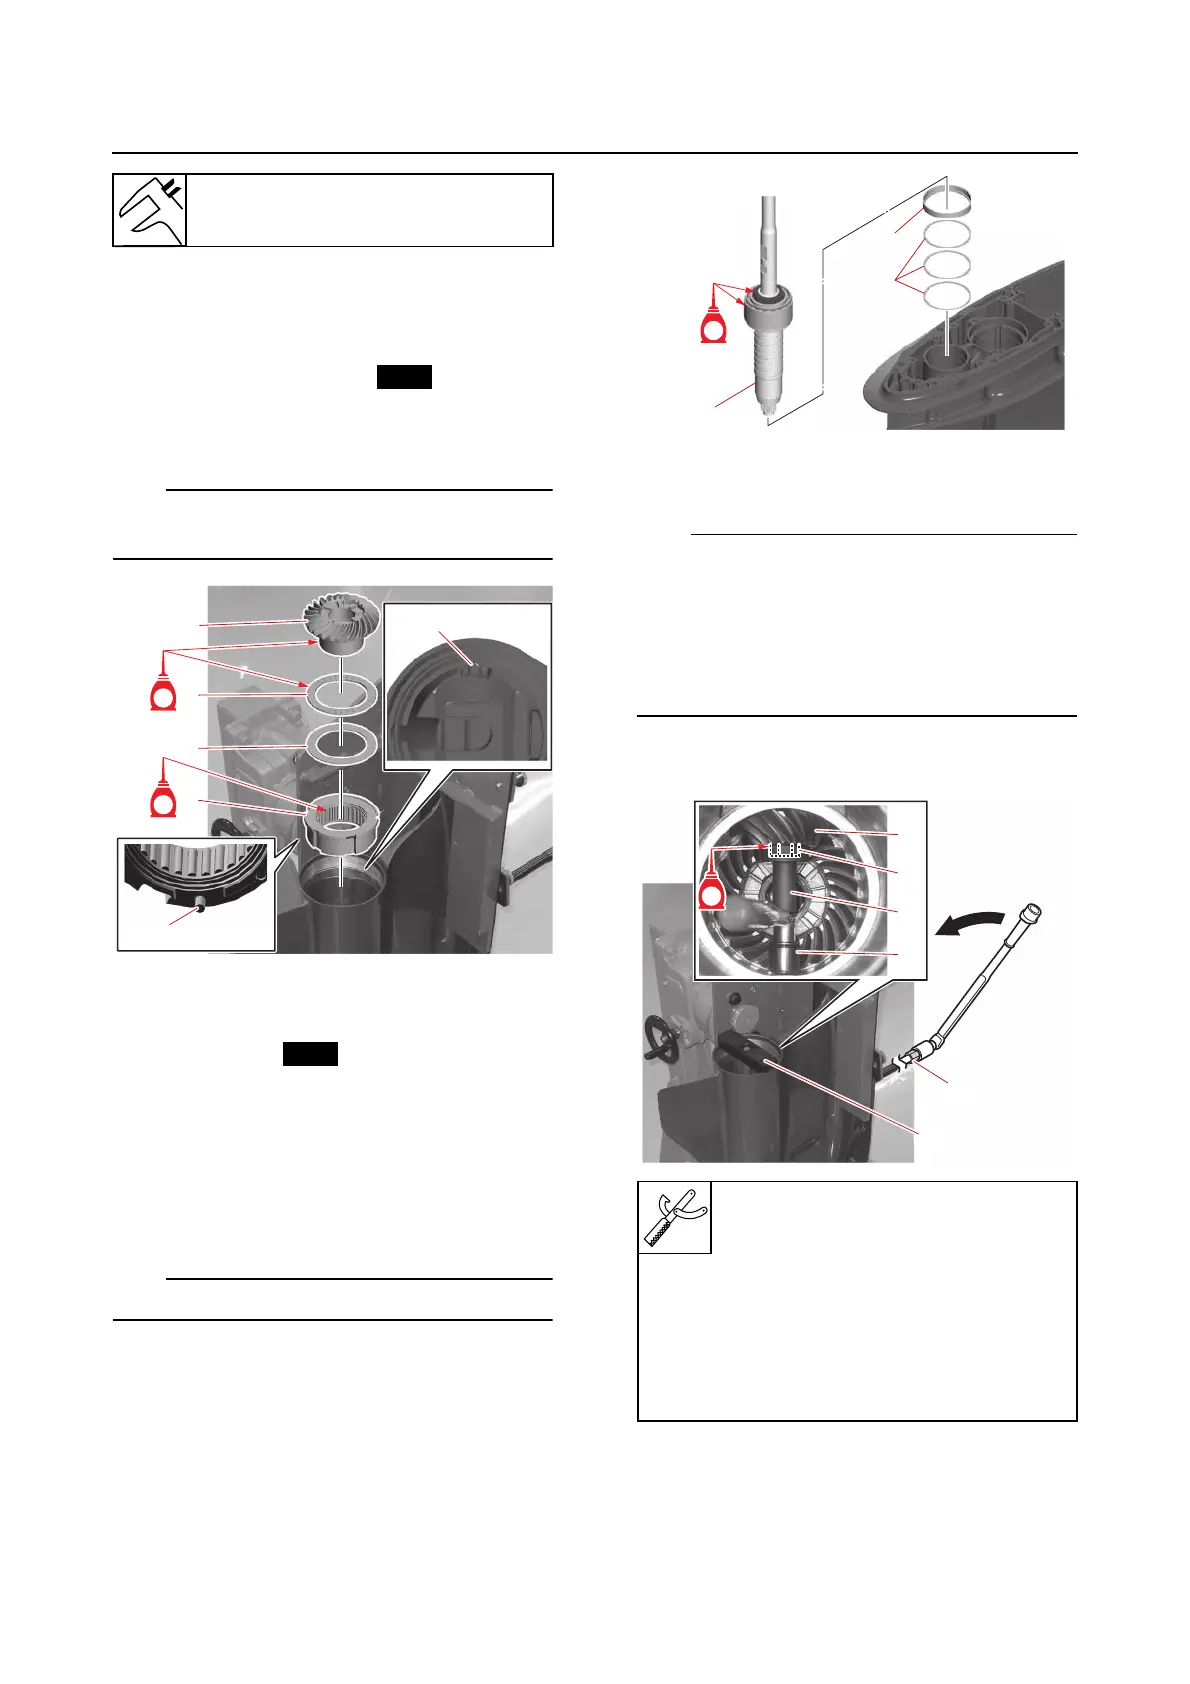
Installing the forward gear
1. Install:
• Adapter assembly “a”
• Forward gear shim “1”
• Thrust bearing “2”
• Forward gear assembly “b”
Make sure to fit the dowel “3” into the slot “c”
in the lower case.
Installing the drive shaft
1. Install:
• Pinion shims
• Spacer
• Drive shaft assembly
•Pinion
• Pinion nut
a. Install new pinion shims “1”, spacer
“2”, and drive shaft assembly “a”.
Position the thickest shim on the bottom.
b. Install the pinion “1” and pinion nut “2”
temporarily.
• When installing the pinion, lift up the drive
shaft slightly and align the splines on the
drive shaft with the splines on the pinion.
• Tighten the pinion nut “2” temporarily until
the tapered portion of the pinion “1” con-
tacts the tapered portion of the drive shaft.
c. Tighten the pinion nut “2” to the speci-
fied torque.
Installation depth “a”
0.75–1.25 mm (0.030–0.049 in)
Drive shaft holder “3”
90890-06935
Pinion nut holder “4”
90890-06451
Socket adapter “5”
90890-06936
Holder guide “6”
90890-06937