9-14
Shift actuator and shift rod
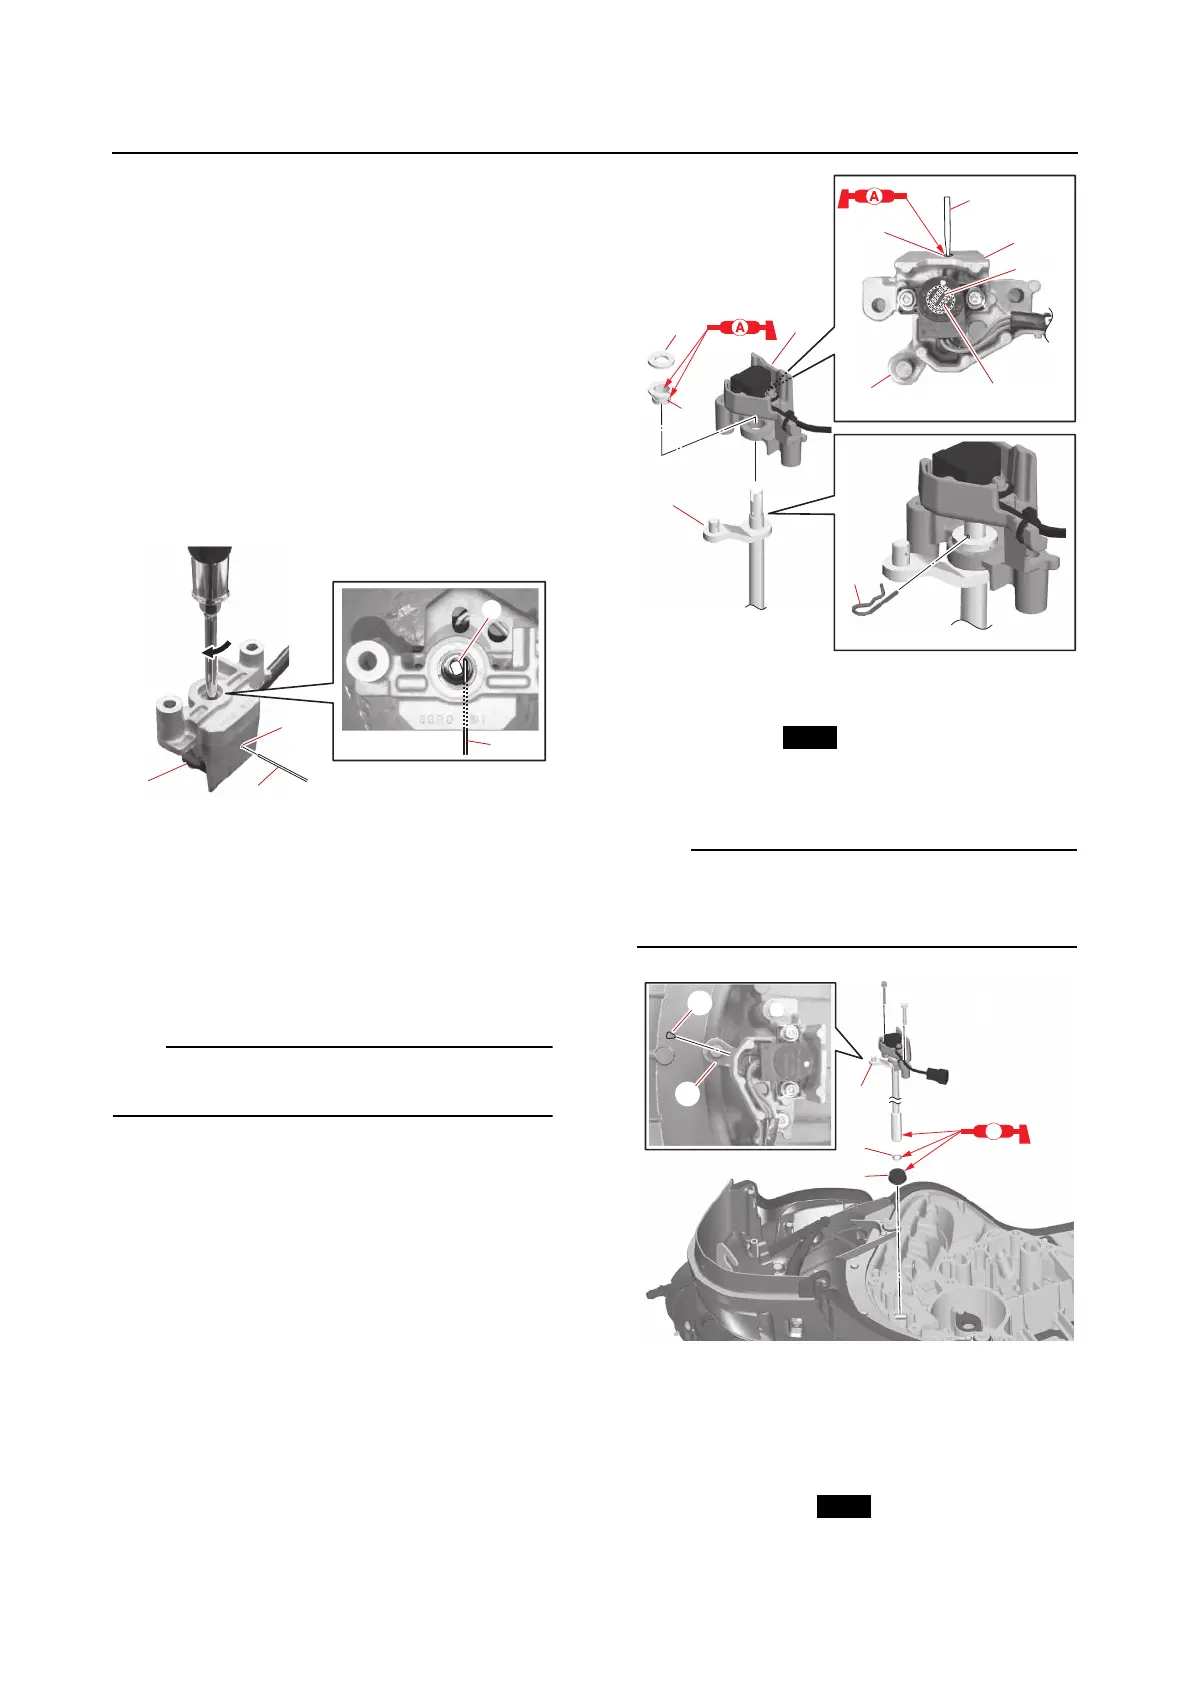
Installing the shift actuator and shift
rod
1. Assemble:
• SPS
• Bushing
•Washer
• Shift rod
•Clip
a. Turn the protrusion “a” on the SPS “1”
in the direction of the arrow using a
slotted screwdriver, and then insert a
suitable pin “b” into the hole “c” to se-
cure the protrusion.
b. Install the bushing “1” into the SPS “2”.
c. Install the washer “3” onto the SPS “2”.
d. Fit the protrusion “a” on the SPS “2”
into the slot “b” in the tip of the shift rod
“4”, and then install the clip “5” in the
direction shown.
e. Remove the pin “c”.
After removing the pin “c”, fill the hole “d” with
a small amount of grease.
2. Install:
•Grommet “1”
• O-ring “2”
(into the shift rod)
• Shift rod assembly “a”
Install the shift rod assembly “a” so that it is
aligned with the mark “b” on the bottom cowl-
ing (front) as shown.
3. Assemble:
• Shift actuator “1”
• Joint pin “2”
•Washer “3”
• Joint pin nut (upper) “4”
• Cotter pin “5”