Optional equipment
3-15
Optional equipment
Installing the isolator lead
1. Install
• Isolator lead
a. Insert the isolator lead into the bottom
cowling.
b. Remove the isolator terminal cover.
c. Install the isolator lead “1” and square
washer to the isolator terminal.
d. Install the rubber cap.
Installing the SCU communication
lead
To improve working efficiency for the rigging
of multiple engine applications, start from the
outboard motor on the port side of the boat.
1. Install:
• SCU communication lead
a. Insert the SCU communication lead
into the bottom cowling.
b. Install the SCU communication lead
coupler.
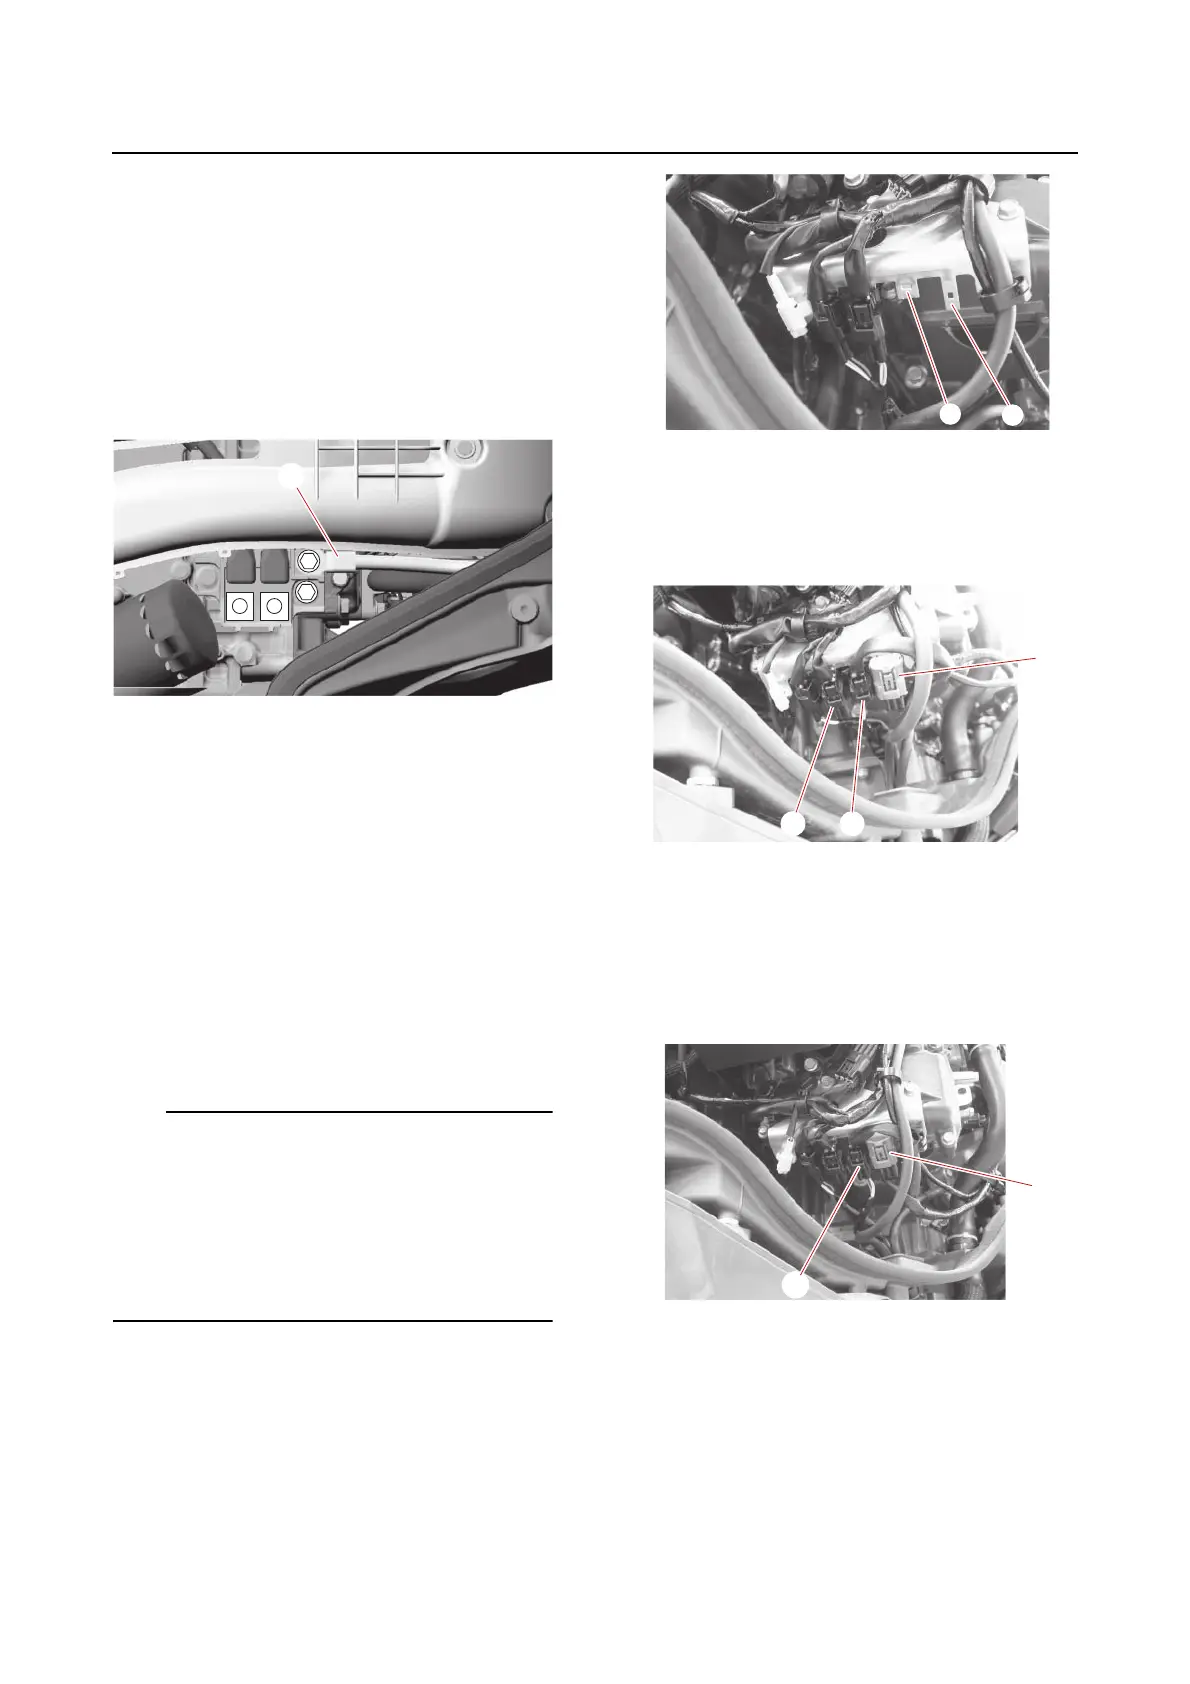
• For the port or starboard outboard motor of
multiple engine applications, install the cou-
pler (6 pins) onto the tab “a” and install the
coupler (4 pins) onto the tab “b”.
• For the center outboard motor of multiple
engine applications, install the coupler (4
pins) onto the tab “b”.
c. Disconnect the SCU signal coupler “1”.
d. Remove the coupler cap from the SCU
communication lead coupler (4P) “2”,
and then install the cap to the SCU sig-
nal coupler (4P) “1” (female section).
e. Connect the SCU signal coupler (male
section) to the SCU communication
lead coupler (4P) “1”.
f. Fasten the SCU communication lead
using the holder “1” shown in the illus-
tration.
a. For the port or starboard outboard
motor of multiple engine applications
only
a. For the port or starboard outboard
motor of multiple engine applications
only