Steering actuator and steering arm
9-37
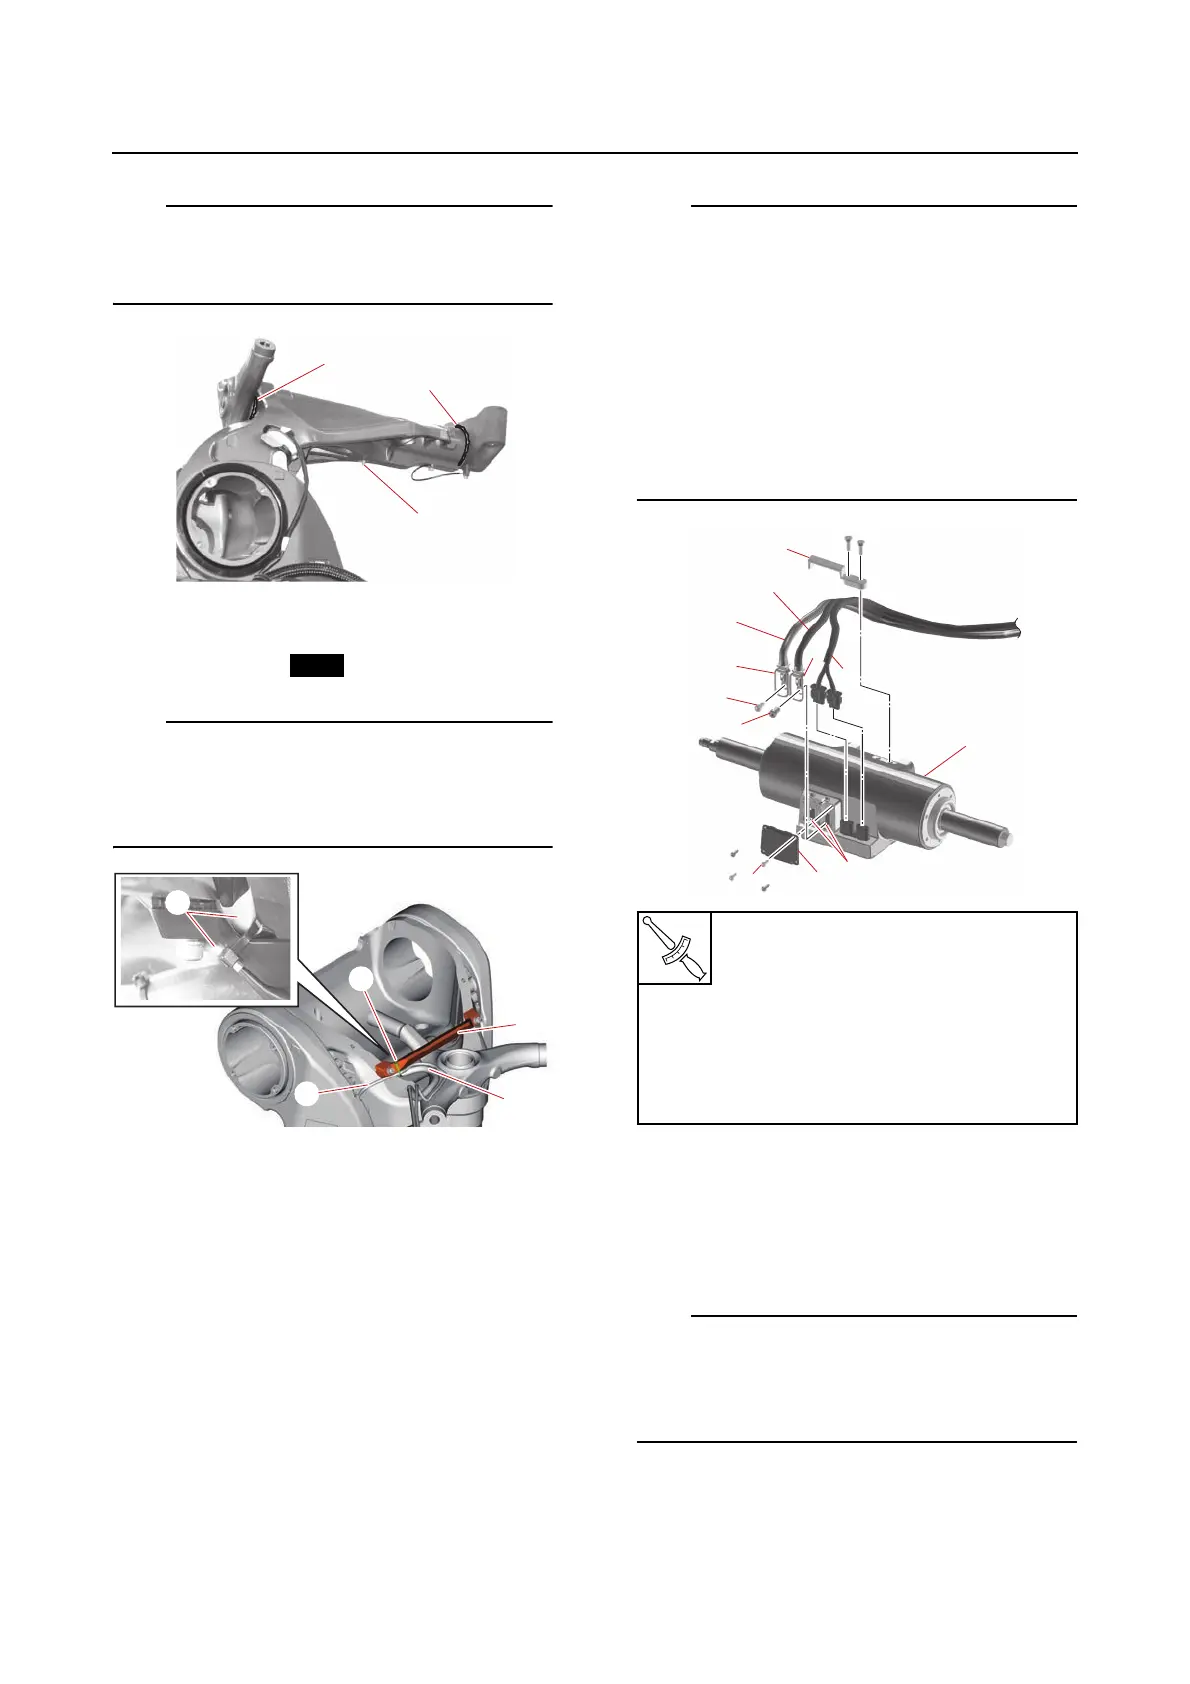
Inject grease into the grease nipple “1” until
grease “a” comes out from both the upper and
lower bushings.
3. Install:
•Guide “1”
• Plastic tie “2”
Route the PTT sensor lead “3” under the guide
“1”, and then fasten the PTT sensor lead “3”
and PTT motor lead “4” at the white tape “a”
using a new plastic tie “2”.
Installing the steering actuator (with
the power unit removed)
If the steering actuator is removed, the calibra-
tion is required after installation. See “Calibra-
tion (6X9 Digital Electronic Control)” (3-66).
1. Install:
• SCU lead
(to the steering actuator)
• SCU positive terminal bolt “1”
• SCU negative terminal bolt “2”
• Terminal cover “3”
•Holder “4”
• Fit the grommets “a” on the SCU positive
lead “b” and SCU negative lead “c” into the
slots “d” in the steering actuator “5”, and
then install the terminal cover “3” to the
steering actuator.
• Position the SCU negative lead “c”, SCU
positive lead “b”, and SCU signal lead “e” in
the order listed from port to starboard so
that the leads do not overlap, and then fas-
ten the leads using the holder “4”.
2. Install:
• Steering actuator
a. Turn the shaft “a” of the steering actu-
ator “1” until the starboard end of the
shaft is the specified length “b”.
To decrease the shaft length “b”, turn the shaft
“a” clockwise.
To increase the shaft length “b”, turn the shaft
“a” counterclockwise.
SCU positive terminal bolt “1”
13 N·m (1.3 kgf·m, 9.6 lb·ft)
Terminal cover bolt “6”
1st: 2.0 N·m (0.20 kgf·m, 1.5
lb·ft)
2nd: 2.0 N·m (0.20 kgf·m, 1.5
lb·ft)