Lower unit
8-6
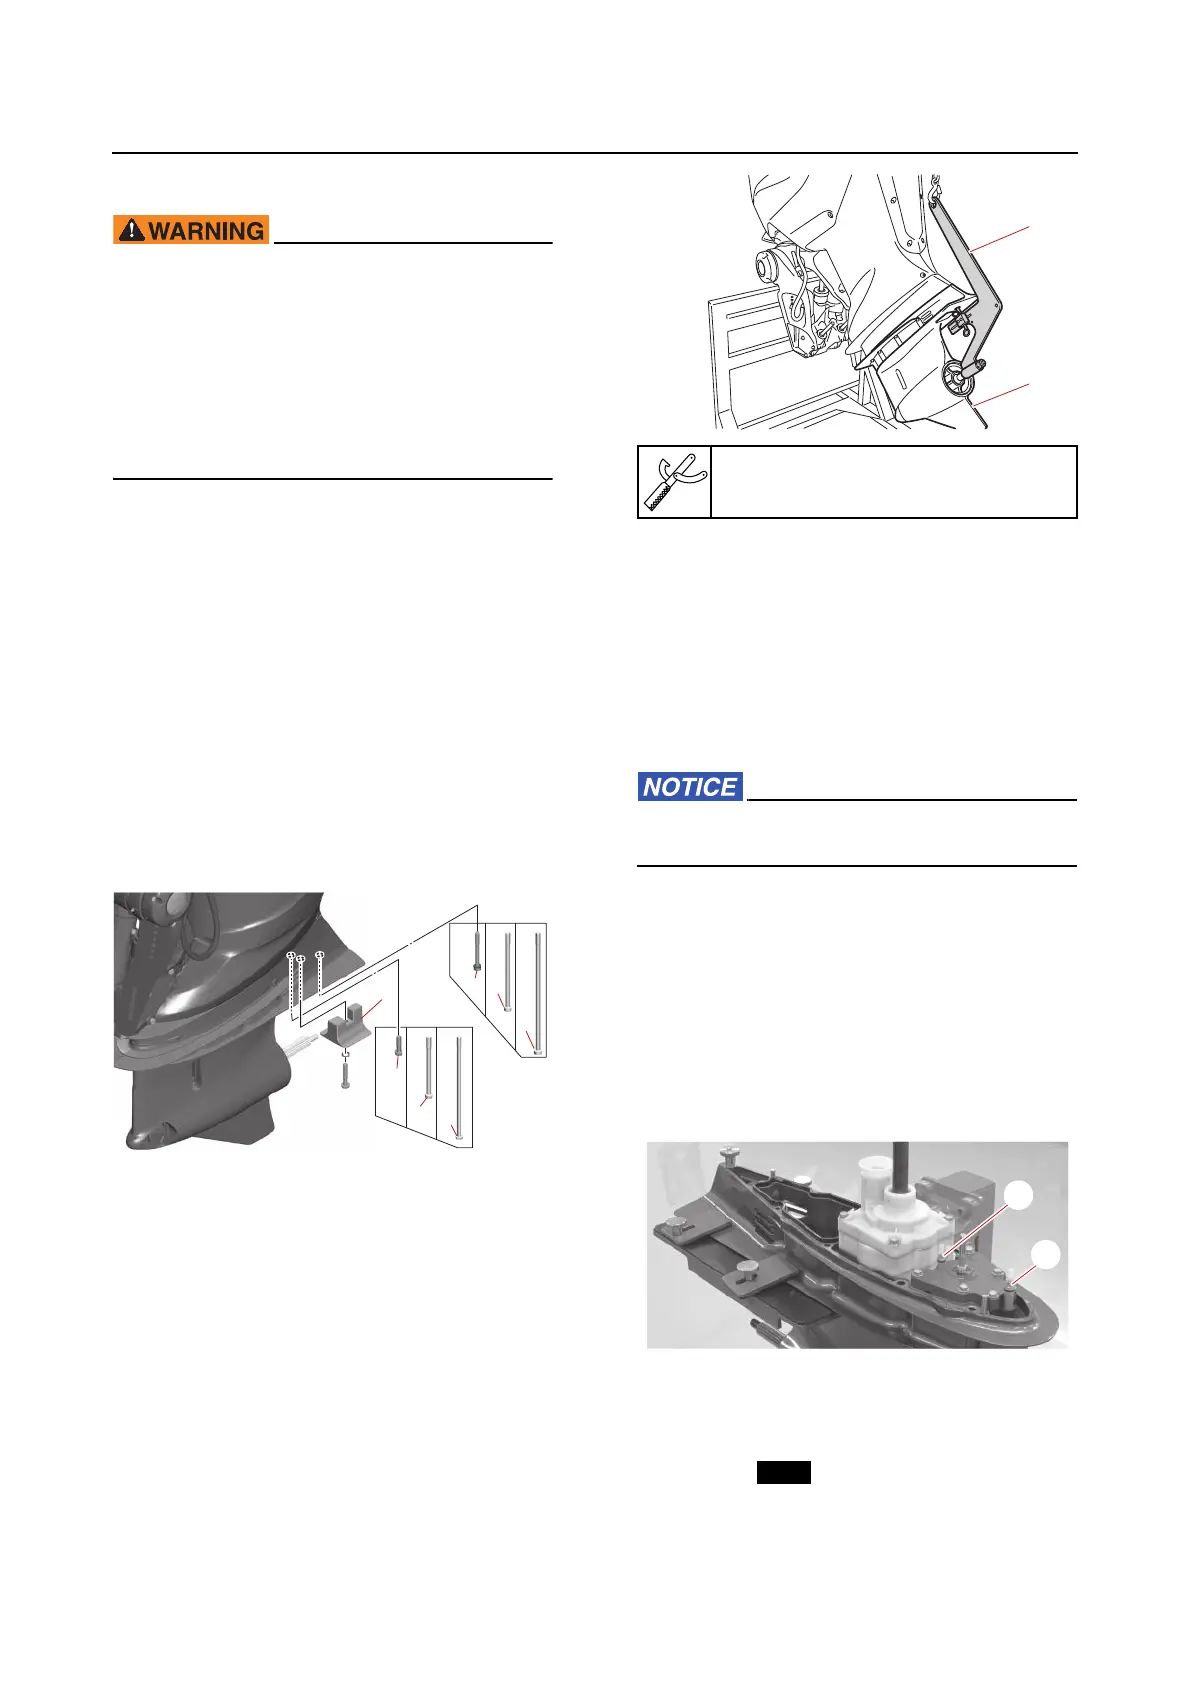
Removing the lower unit
• Make sure to disconnect the battery ca-
bles from the battery, and remove the clip
from the engine shut-off switch.
• When removing or installing the lower
unit with the power unit installed, make
sure to suspend the outboard motor. Oth-
erwise, the outboard motor could fall
suddenly and result in severe injuries.
1. Drain:
•Gear oil
See steps 1 and 2 in “Changing the gear
oil by removing the drain screw” (10-17).
2. Remove:
•Anode
• Lower case mounting bolts
• Lower case mounting nuts (except for X-
transom model)
• Lower unit
a. Place the outboard motor in an upright
position.
b. Remove the anode “1” and lower case
mounting bolts “2” and “3”.
c. Tilt the outboard motor up, and then in-
stall the special service tool “1” to the
lower unit “2”.
d. Hook a lifting harness onto the special
service tool.
e. Remove the lower unit.
Checking the lower unit anode
1. Check:
•Anode
Eroded (1/2 or more worn out) → Replace.
Adhered grease, oil, paint, or scales →
Clean.
Do not apply grease, oil, or paint to the an-
ode.
Checking the gear oil passage check
valve
1. Check:
• Gear oil passage check valves “1”
Cracked/damaged → Replace the check
valve.
See “Water pump and shift rod” (8-11).
Checking the lower unit for leakage
1. Install:
•O-rings
• Drain screw
• Oil filler plug
A. X-transom model
B. U-transom model
C. E-transom model
Lifting hanger “1”
90890-06951