7-44
Timing belt
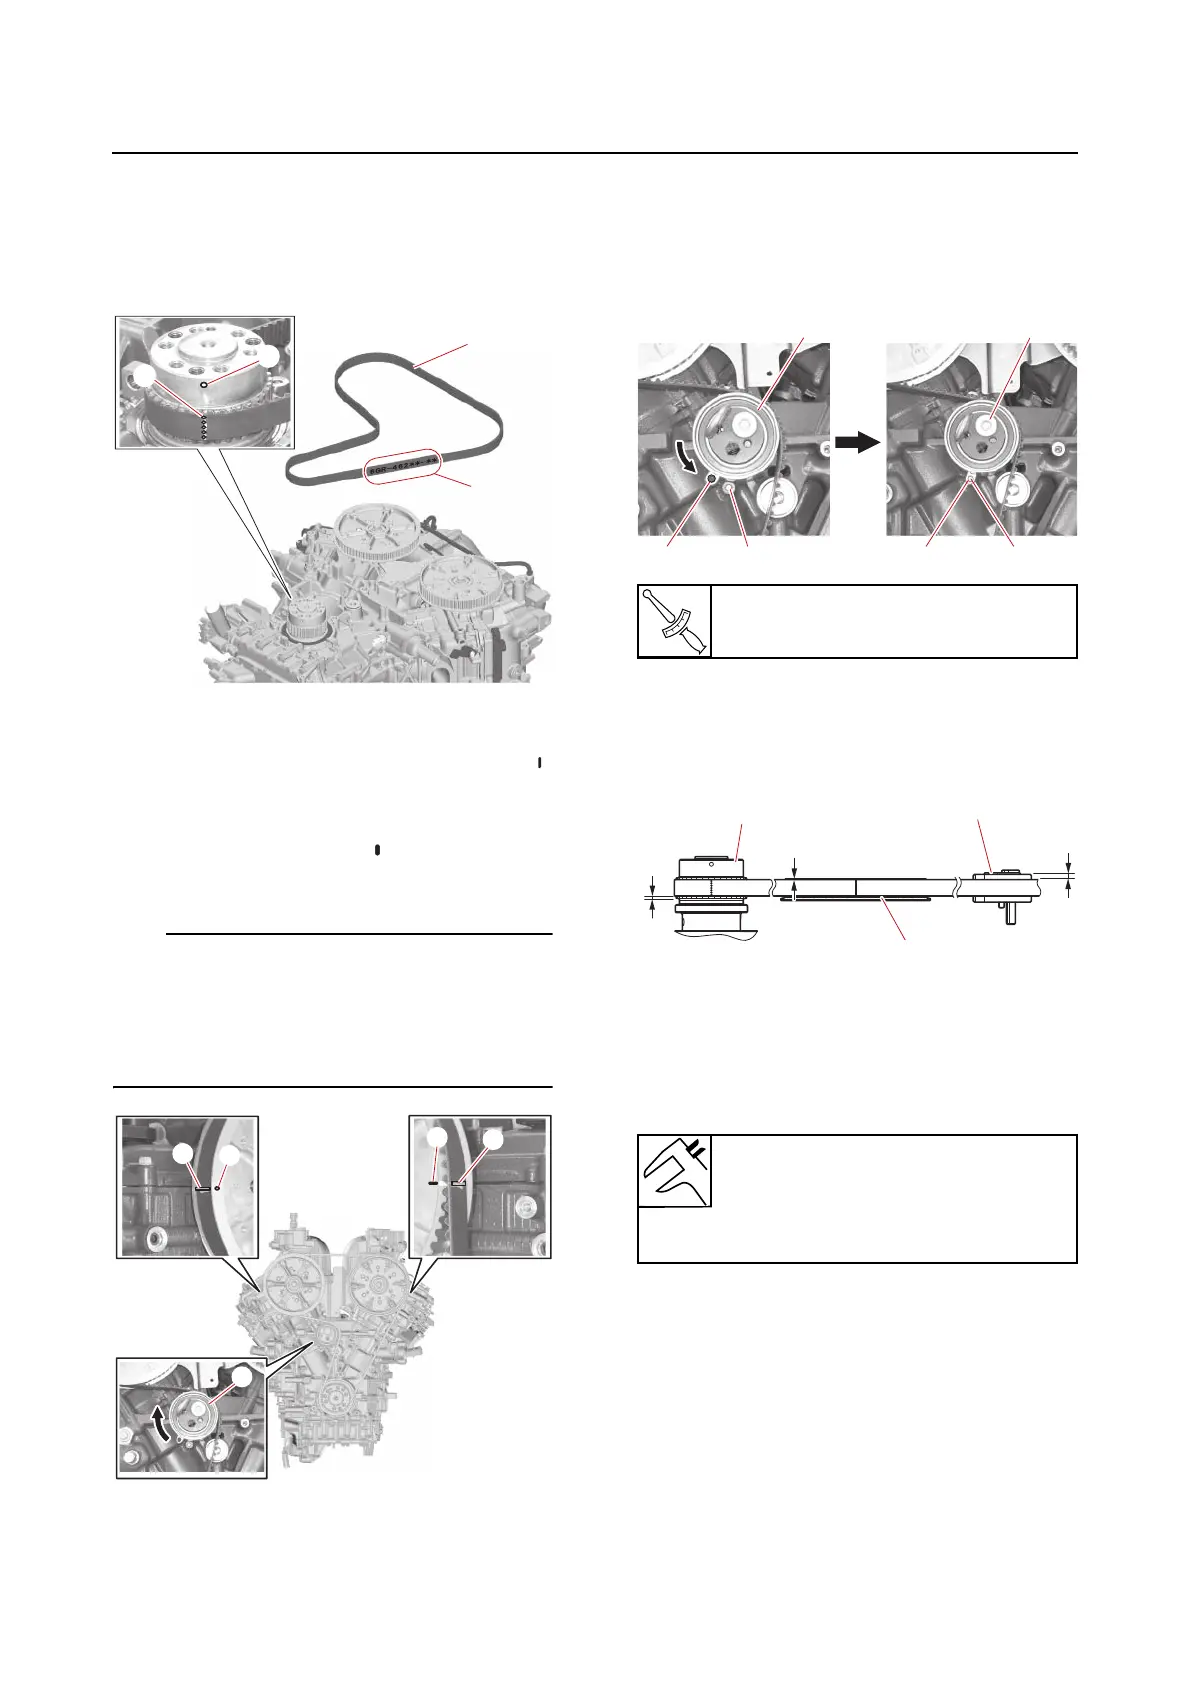
a. Install the timing belt “1” onto the
crankshaft so that the part number “a”
is in the upright position and the belt
position mark “b” is aligned with the
mark “c” on the crankshaft.
b. Working in a counterclockwise man-
ner, install the timing belt by aligning
the belt position mark “a” with the “ ”
mark “b” on the driven sprocket
(PORT) and aligning the belt position
mark “c” with the “ ” mark “d” on the
driven sprocket (STBD).
After installing the timing belt, temporarily in-
stall the timing belt tensioner “1” to remove the
slack in the timing belt. Do not pull out the pin
that was inserted when removing the timing
belt tensioner “1”.
c. Turn the timing belt tensioner “1” so
that the hole “a” in the timing belt ten-
sioner fits onto the protrusion “b” on
the cylinder block, and then tighten the
timing belt tensioner bolt “2”.
d. Adjust the timing belt installation
heights “a”, “b”, and “c” to specifica-
tion.
e. Turn the timing belt tensioner gradually
clockwise using a hexagon wrench,
and then remove the pin “1”. After re-
moving the pin, slowly move the timing
belt tensioner back to its original posi-
tion.
Timing belt tensioner bolt “2”
39 N·m (3.9 kgf·m, 29 lb·ft)
1. Crankshaft
2. Driven sprocket (PORT)
3. Timing belt tensioner
Installation height
“a”: 3.25 mm (0.1280 in)
“b”: 0.75 mm (0.0295 in)
“c”: 6.75 mm (0.2657 in)