Exhaust joint (outside)
7-9
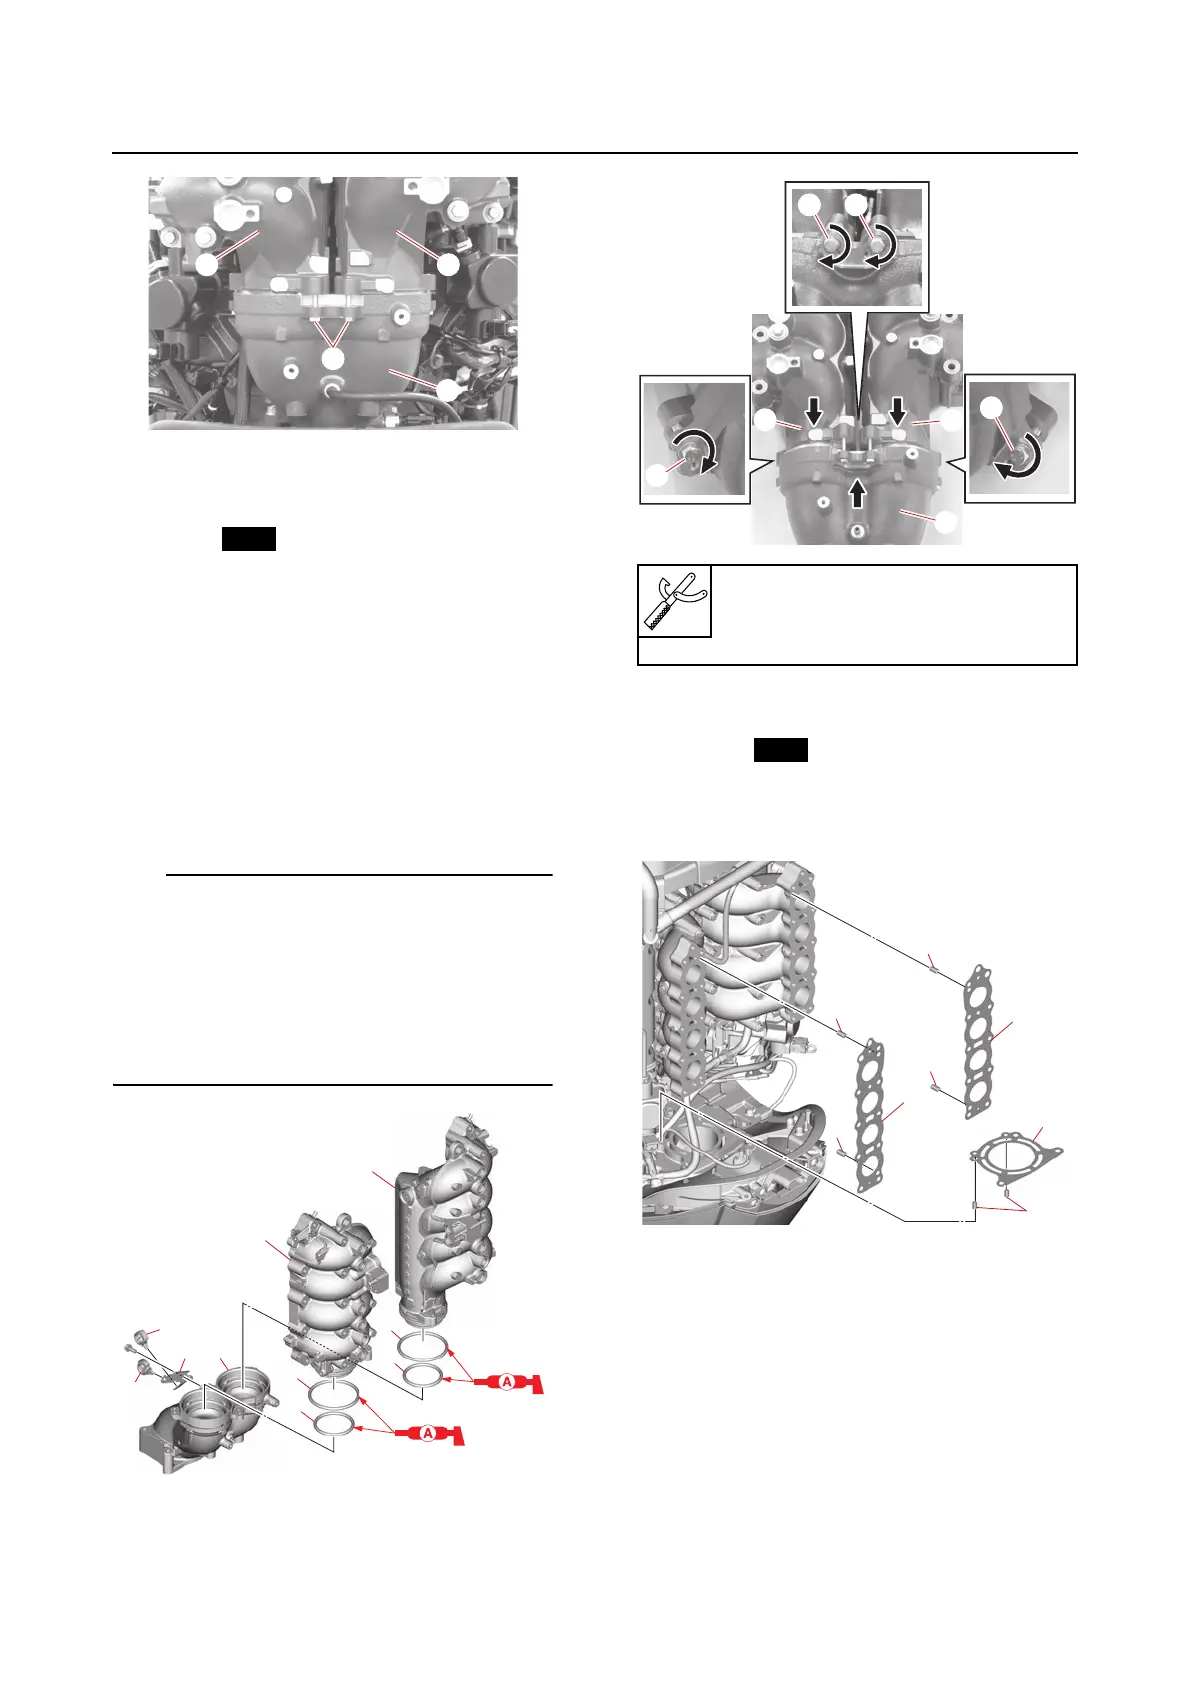
1. Assemble:
•Holder
• Holder bracket
•O-ring
• Exhaust joint
a. Install new O-rings “1” and “2” to the
exhaust joint (PORT) “3” and exhaust
joint (STBD) “4”.
b. Install the holders “5” and holder
bracket “6” to the exhaust joint (lower)
“7”.
c. Install the exhaust joint (PORT) “3” and
exhaust joint (STBD) “4” to the exhaust
joint (lower) “7”.
• Use suitable bolts “8” to install the exhaust
joint (PORT) “3” and exhaust joint (STBD) “4”
to the exhaust joint (lower) “7”. Screw in the
bolts “8” evenly.
• Do not remove the bolts “8” until the exhaust
joint assembly bolts are temporarily tight-
ened.
2. Install:
•Dowel
•Gasket
• Exhaust joint assembly
a. Install the Dowels “1” and “2” and new
gaskets “3” and “4”.
b. Install the exhaust joint assembly “1”,
and then tighten the exhaust joint as-
sembly bolts “2”, “3”, and “4” tempo-
rarily.
Bolt “8”
(commercially available)
M6 × 40 mm (1.57 in)