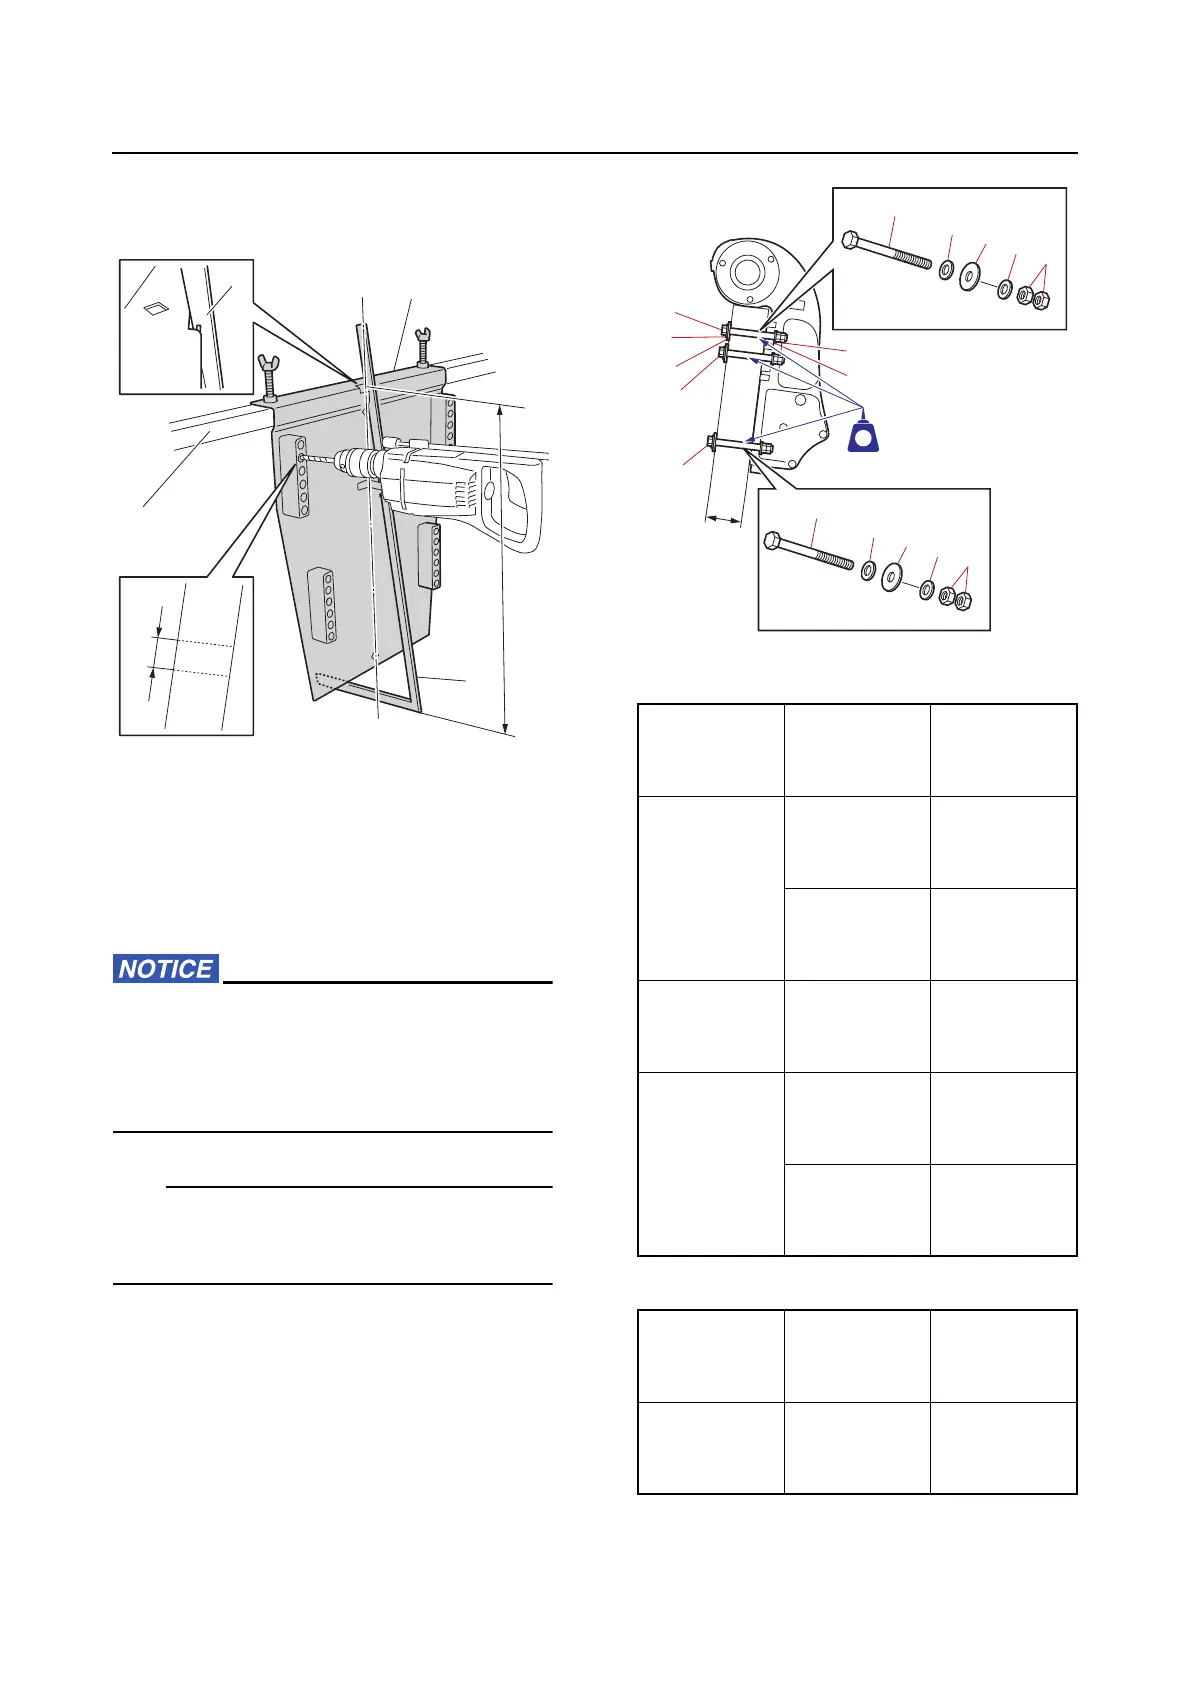
Outboard motor mounting
3-11
holes perpendicular to the surface of the
boat transom using a 13.0 mm (0.5 in) “a”
drill bit.
6. Apply sealant to the mounting holes, and
then secure the outboard motor using the
included mounting bolts “1” and “2”, small
washers “3”, large washers “4”, and nuts
“5”.
Make sure that there is no clearance be-
tween the surfaces of the boat transom and
the clamp brackets. Otherwise, the clamp
brackets or boat transom may be dam-
aged.
The second hole from the top of each clamp
bracket is recommended for the upper mount-
ing bolt.
Upper mounting bolt “1”
Lower mounting bolt “2”
C/L.Centerline of the transom
Boat tran-
som thick-
ness (D)
Mounting
bolt size
Part number
75–95 mm
(3.0–3.7 in)
M12 × 170
mm
(6.69 in)
90101-
12068
M12 × 180
mm
(7.09 in)
90101-
12073
95–115 mm
(3.7–4.5 in)
M12 × 200
mm
(7.87 in)
90101-
12074
115 mm
(4.5 in) or
more
M12 × 210
mm
(8.27 in)
90101-
12069
M12 × 230
mm
(9.06 in)
90101-
12070
Boat tran-
som thick-
ness (D)
Mounting
bolt size
Part number
75–95 mm
(3.0–3.7 in)
M12 × 150
mm
(5.91 in)
90101-
12067