6-21
Direct injection pump and fuel injector
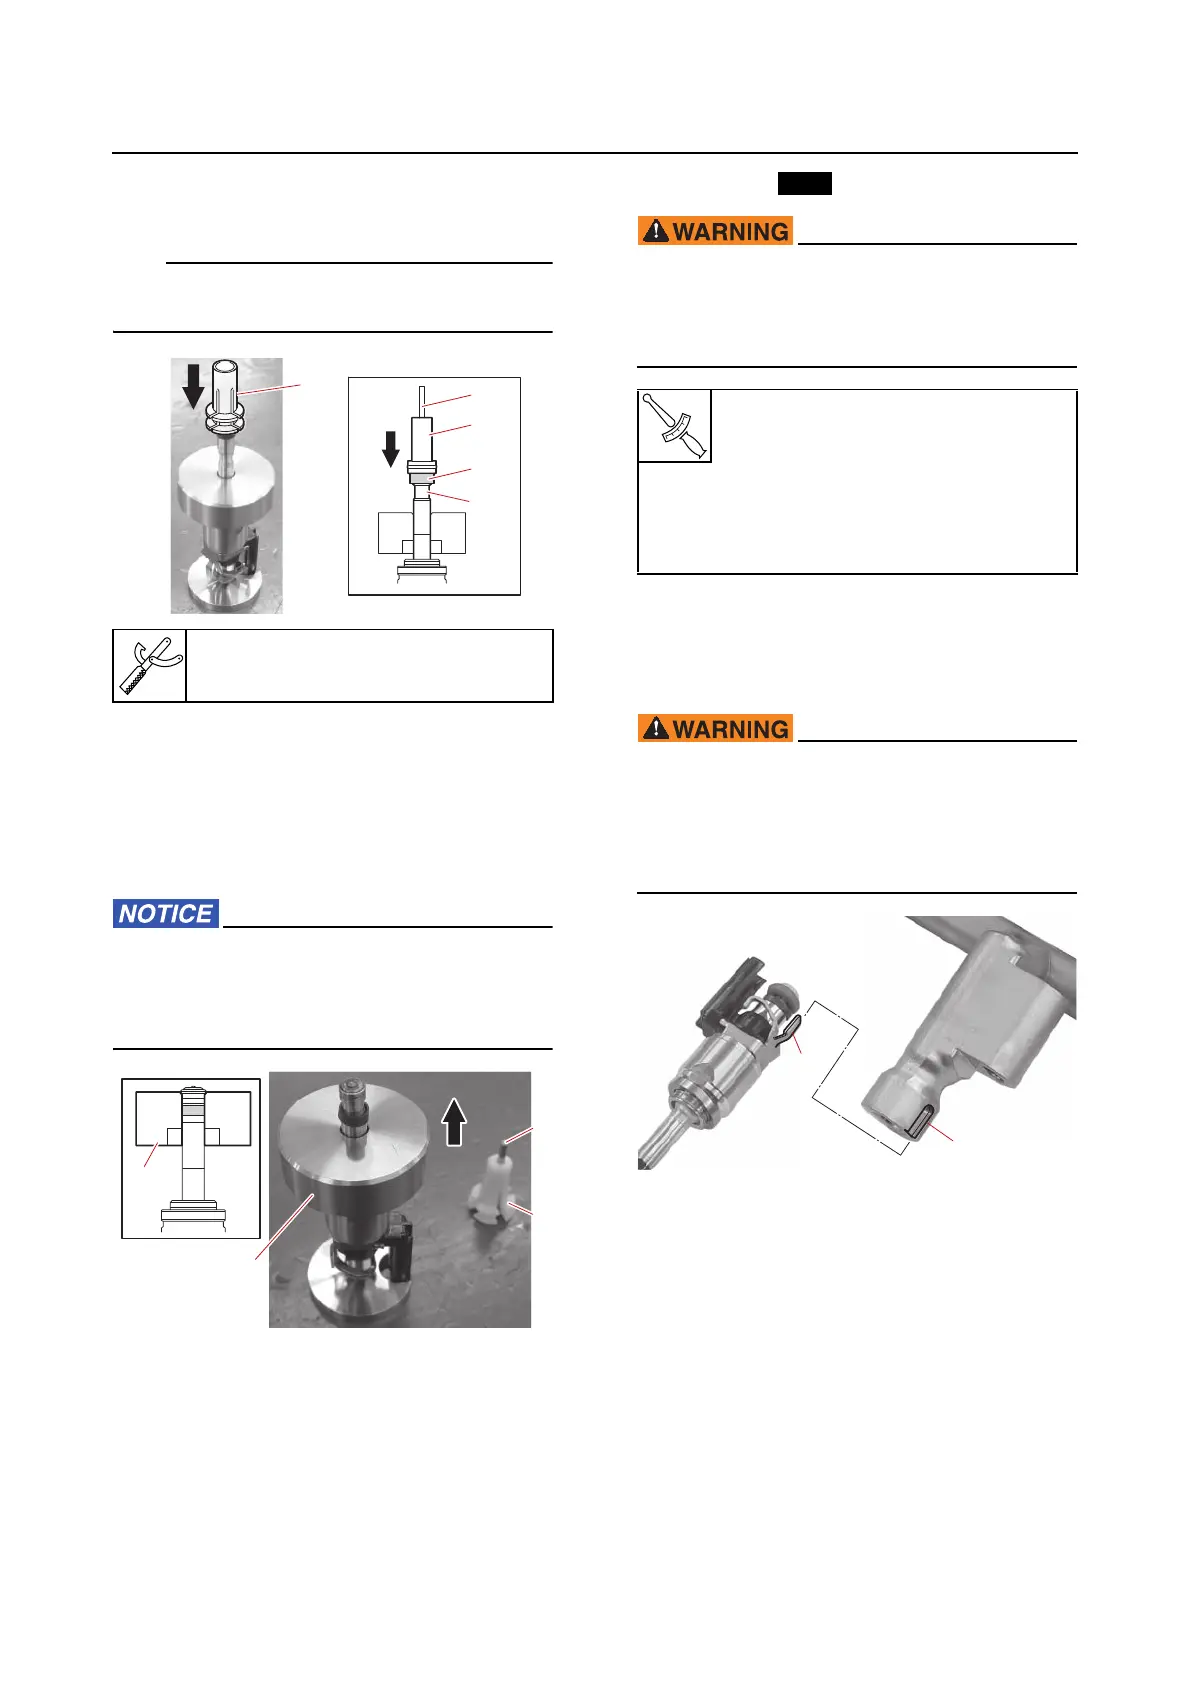
d. Push the nozzle seal into the groove
“a” using your fingers.
At this time, the nozzle seal is larger than its
original size.
e. Remove the special service tools “1”
and “2”, and then pull up the special
service tool “3” gradually.
f. Keep the special service tool “3” for 30
seconds or more.
g. Remove the special service tool “3”.
Make sure that the nozzle seal has returned
to its original size. Otherwise, the seal
could be pinched when the fuel injector is
installed.
4. Install:
• Stud bolt
• Fuel injector
(to the fuel rail)
• Fuel injector sub-wire harness
(to the fuel injector)
• Fuel rail
• Fuel pressure sensor cover
•Plastic tie
• If a fuel injector is dropped, replace it.
• Make sure that there is no foreign materi-
al or damage on the installation area of
the fuel injector.
a. Install the fuel injector to the fuel rail so
that the protrusion “a” on the fuel injec-
tor spring is aligned with the slot “b” in
the fuel rail.
• Install the fuel injector straight into the
fuel rail so that it is not positioned at an
angle.
• Be careful not to damage the O-ring on
the fuel injector.
b. Connect the sub-wire harness to the
fuel injector.
c. Apply engine oil to the fuel injector hole
in the cylinder head.
d. Install the fuel rail onto the stud bolts by
pushing in the fuel rail until the threads
of the bolts for the nuts are visible.
Seal installer “3”
90890-06698
Fuel rail stud bolt
14 N·m (1.4 kgf·m, 10 lb·ft)
Fuel rail bolt
28 N·m (2.8 kgf·m, 21 lb·ft)
Fuel rail nut
28 N·m (2.8 kgf·m, 21 lb·ft)