Direct injection pump and fuel injector
6-22
• Push in the fuel rail gradually and evenly
so that the fuel rail is not positioned at an
angle.
• Be careful not to damage the end of the
fuel injector nozzle or the nozzle seal.
e. Tighten the fuel rail nuts “1” and fuel rail
bolts “2” to the specified torque evenly
in the order [1], [2], and so on.
Make sure that the fuel rail is not positioned
at an angle.
5. Install:
•Lifter
•O-ring
• Direct injection pump
• Fuel pipe
• Direct injection pump cover
•Plastic tie
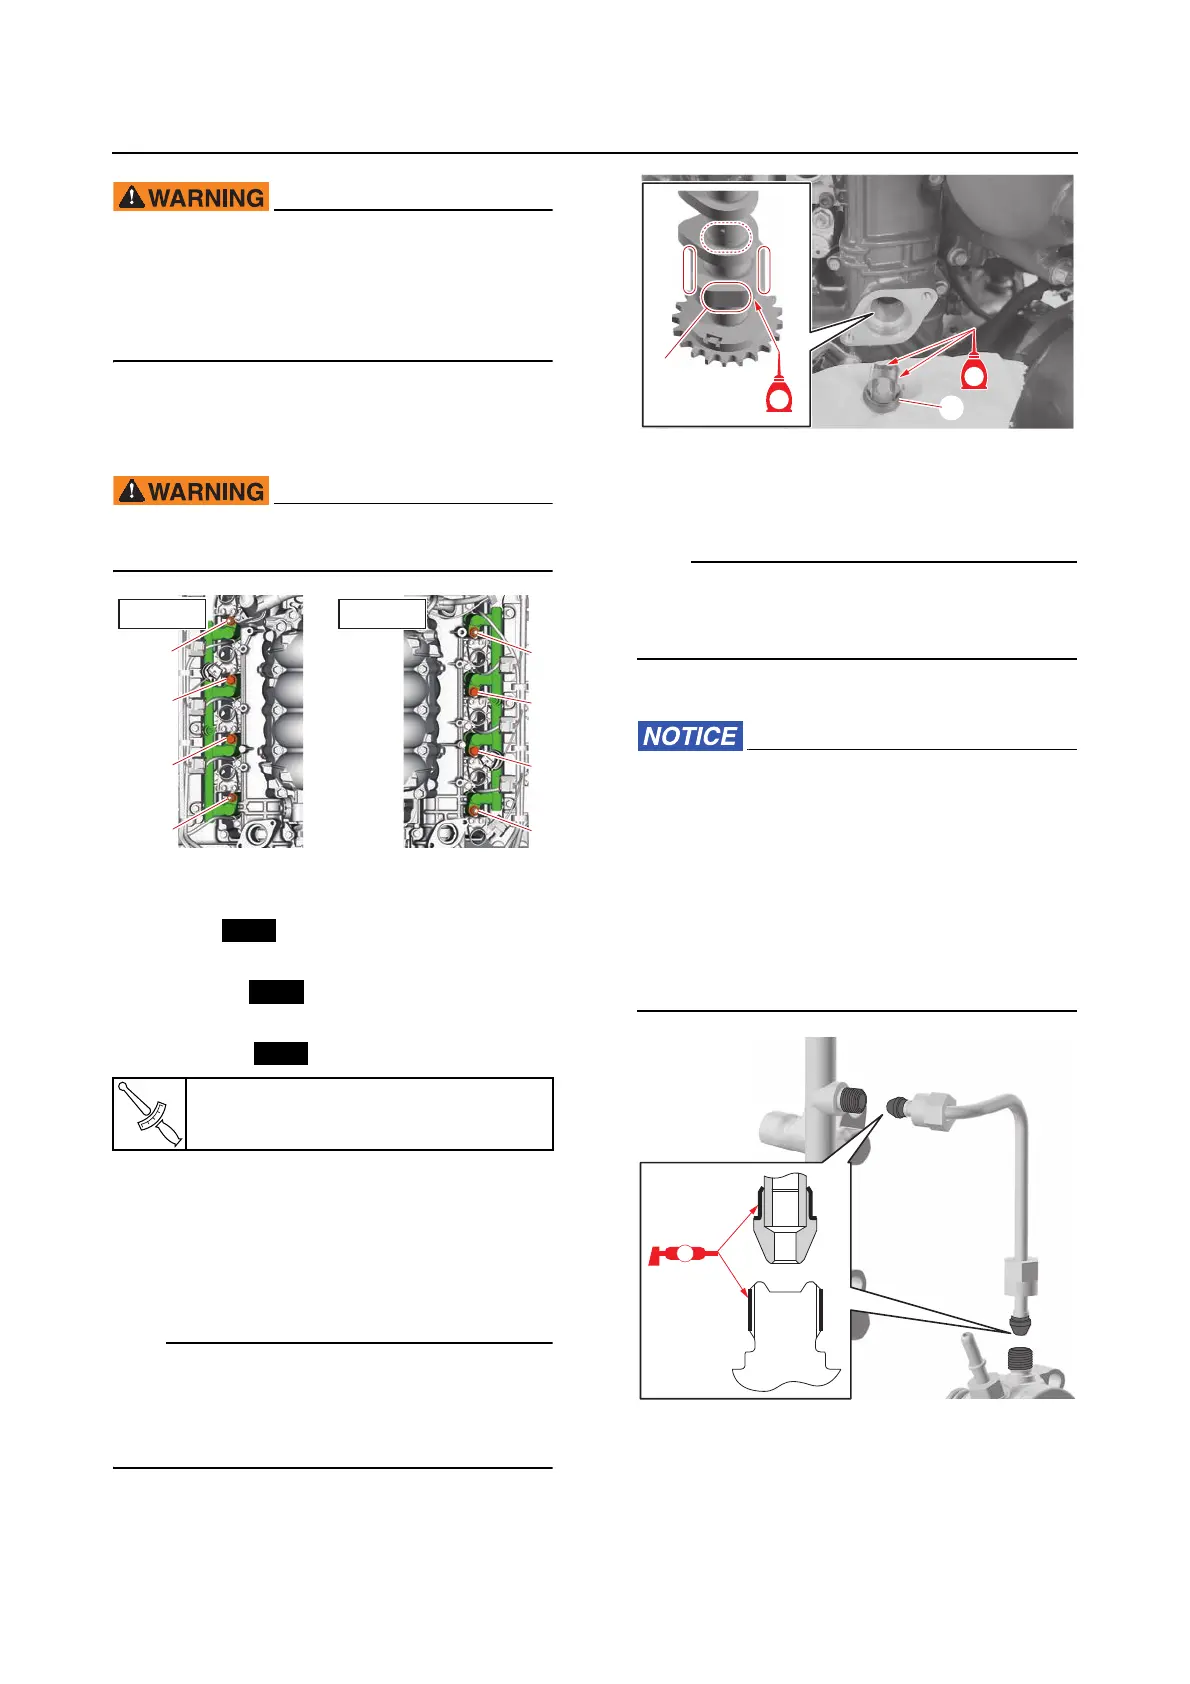
a. Turn the crankshaft so that the flat por-
tion ”a” of the fuel pump cam on the
camshaft is facing toward the direct in-
jection pump hole in the cylinder head
cover.
Because the fuel pump cams for the left and
right cylinder banks have different positions,
rotate the crankshaft to position each cam-
shaft separately.
b. Install the lifter “1”.
c. Install a new O-ring and the direct in-
jection pump, and tighten the bolts
temporarily.
Tighten the bolts temporarily to a level that
does not compress the direct injection pump
spring.
d. Install a new fuel pipe.
• Make sure that there is no foreign materi-
al or damage on the mating surfaces of
the fuel rail, direct injection pump, and
fuel pipe.
• Apply grease to the fuel pipe nipples, and
all around the threaded portions of the di-
rect injection pump and fuel rail. Other-
wise, the parts could seize when
tightened, causing fuel to leak.
e. Tighten the flare nuts “a” on both ends
of the fuel pipe temporarily until the dis-
tances are within specification.
Fuel pipe flare nut
48 N·m (4.8 kgf·m, 35 lb·ft)
1
2
2
1
1
2
2
1
[3][3][3]
[4][4][4]
[1][1][1]
[2][2][2]
[3][3]
[4][4]
[1][1]
[2][2]
[3][3][3]
[4][4][4]
[1][1][1]
[2][2][2]
[3][3]
[4][4]
[1][1]
[2][2]
PORT
STBD