3-6
Uncrating
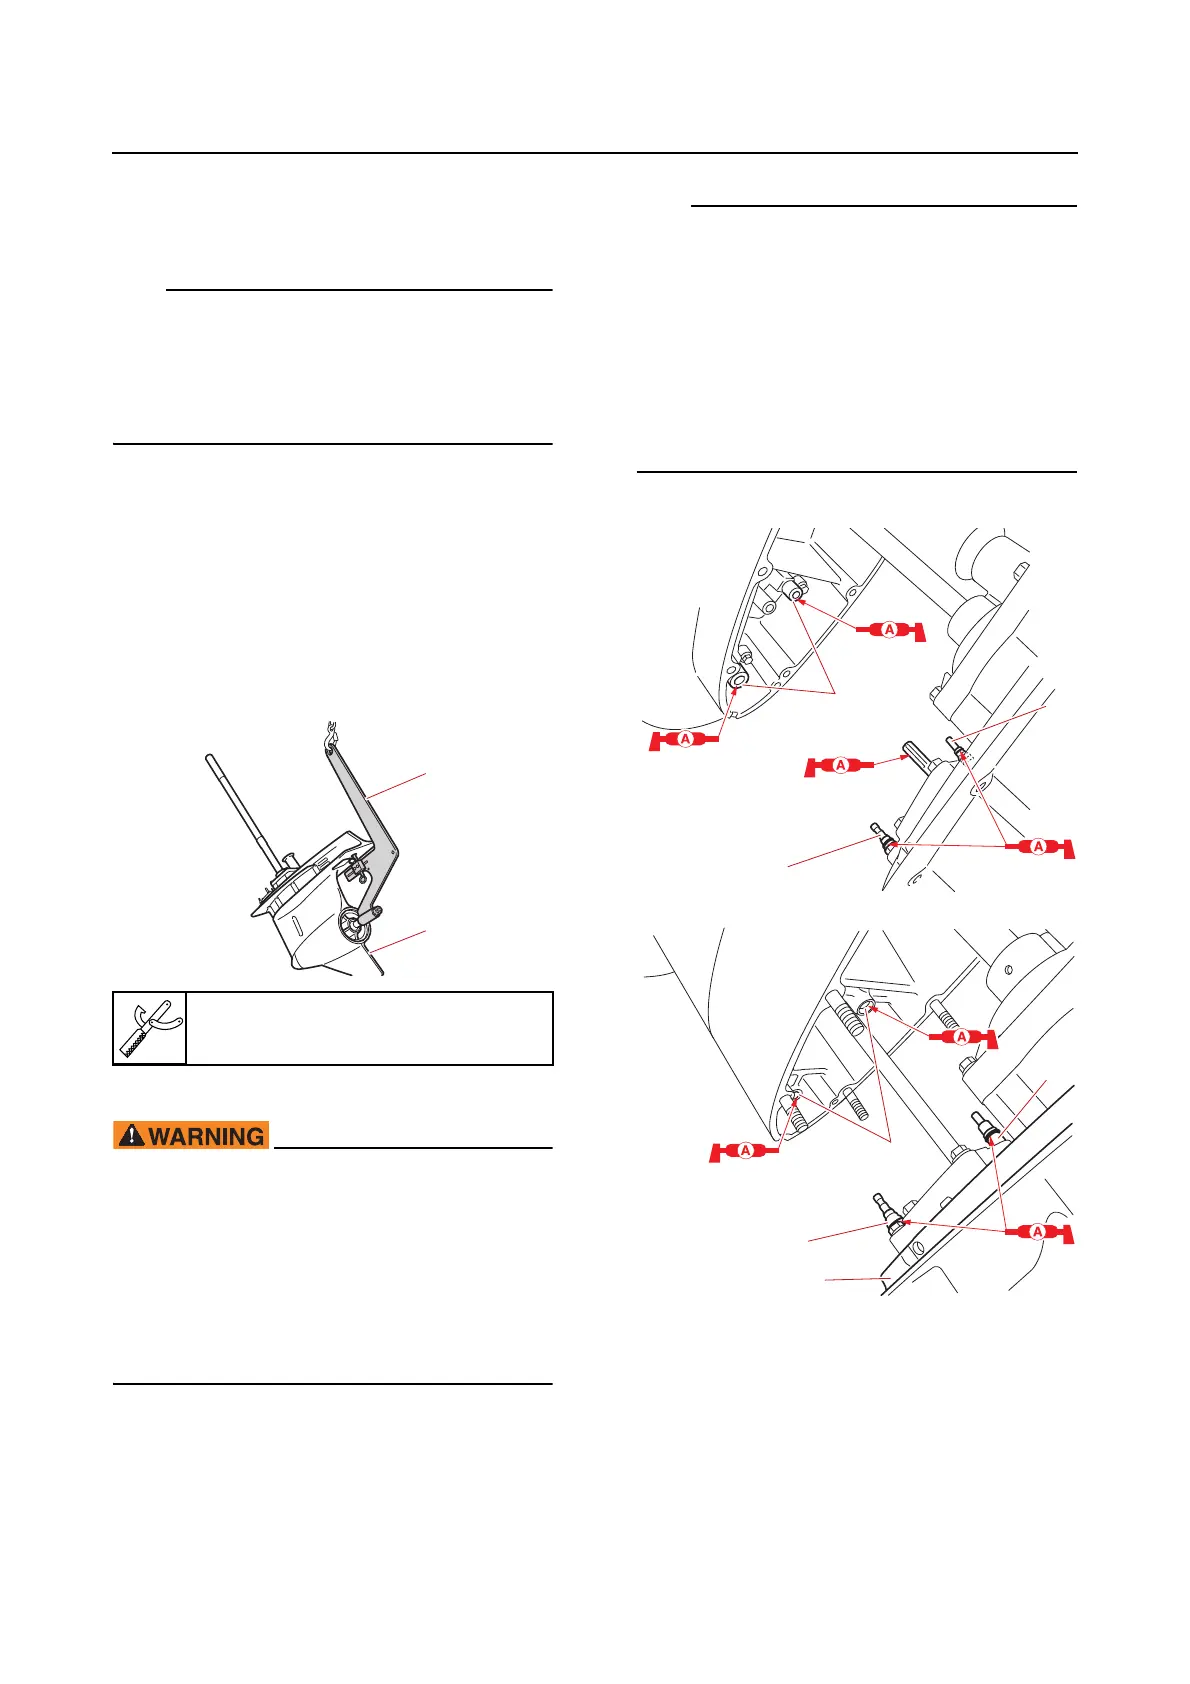
• Lower unit mounting nuts (for U- or E-
transom model)
a. Install the water pipe.
• Check that the rubber seal where the water
pipe is inserted is installed properly, there is
no foreign material on the rubber seal, and
so on.
• Install the water pipe completely.
b. Install the dowels to the lower unit.
c. Install the special service tool “1” onto
the lower unit “2”.
d. Hook a lifting harness onto the special
service tool “1”.
e. Tilt the outboard motor up so that the
mating surface of the outboard motor
is parallel to the mating surface of the
lower unit.
f. Install the lower unit “1”
• Make sure to disconnect the battery ca-
bles from the battery, and remove the clip
from the engine shut-off switch.
• When removing or installing the lower
unit with the power unit installed, make
sure to suspend the outboard motor. Oth-
erwise, the outboard motor could fall
suddenly and result in severe injuries.
• Align the check valves “2” and “3” with the
holes “a” in the joint. (For X-transom model)
• Align the check valves “2” and “3” with the
holes “b” in the extension. (For U- or E-tran-
som model)
• If the lower unit cannot be installed properly
to the outboard motor, check that the pro-
truding portions are aligned properly with
their corresponding openings.
A
B
g. Tighten the bolts “1”. (For X-transom
model)
Tighten the nuts “1”. (For U- or E-tran-
som model)
Lifting hanger “1”
90890-06951
A. For X-transom model
B. For U- or E-transom model