R5905948 /12 Event Master Devices312
C5 – Part3: adjust the projector overlap in Main Screen destinations
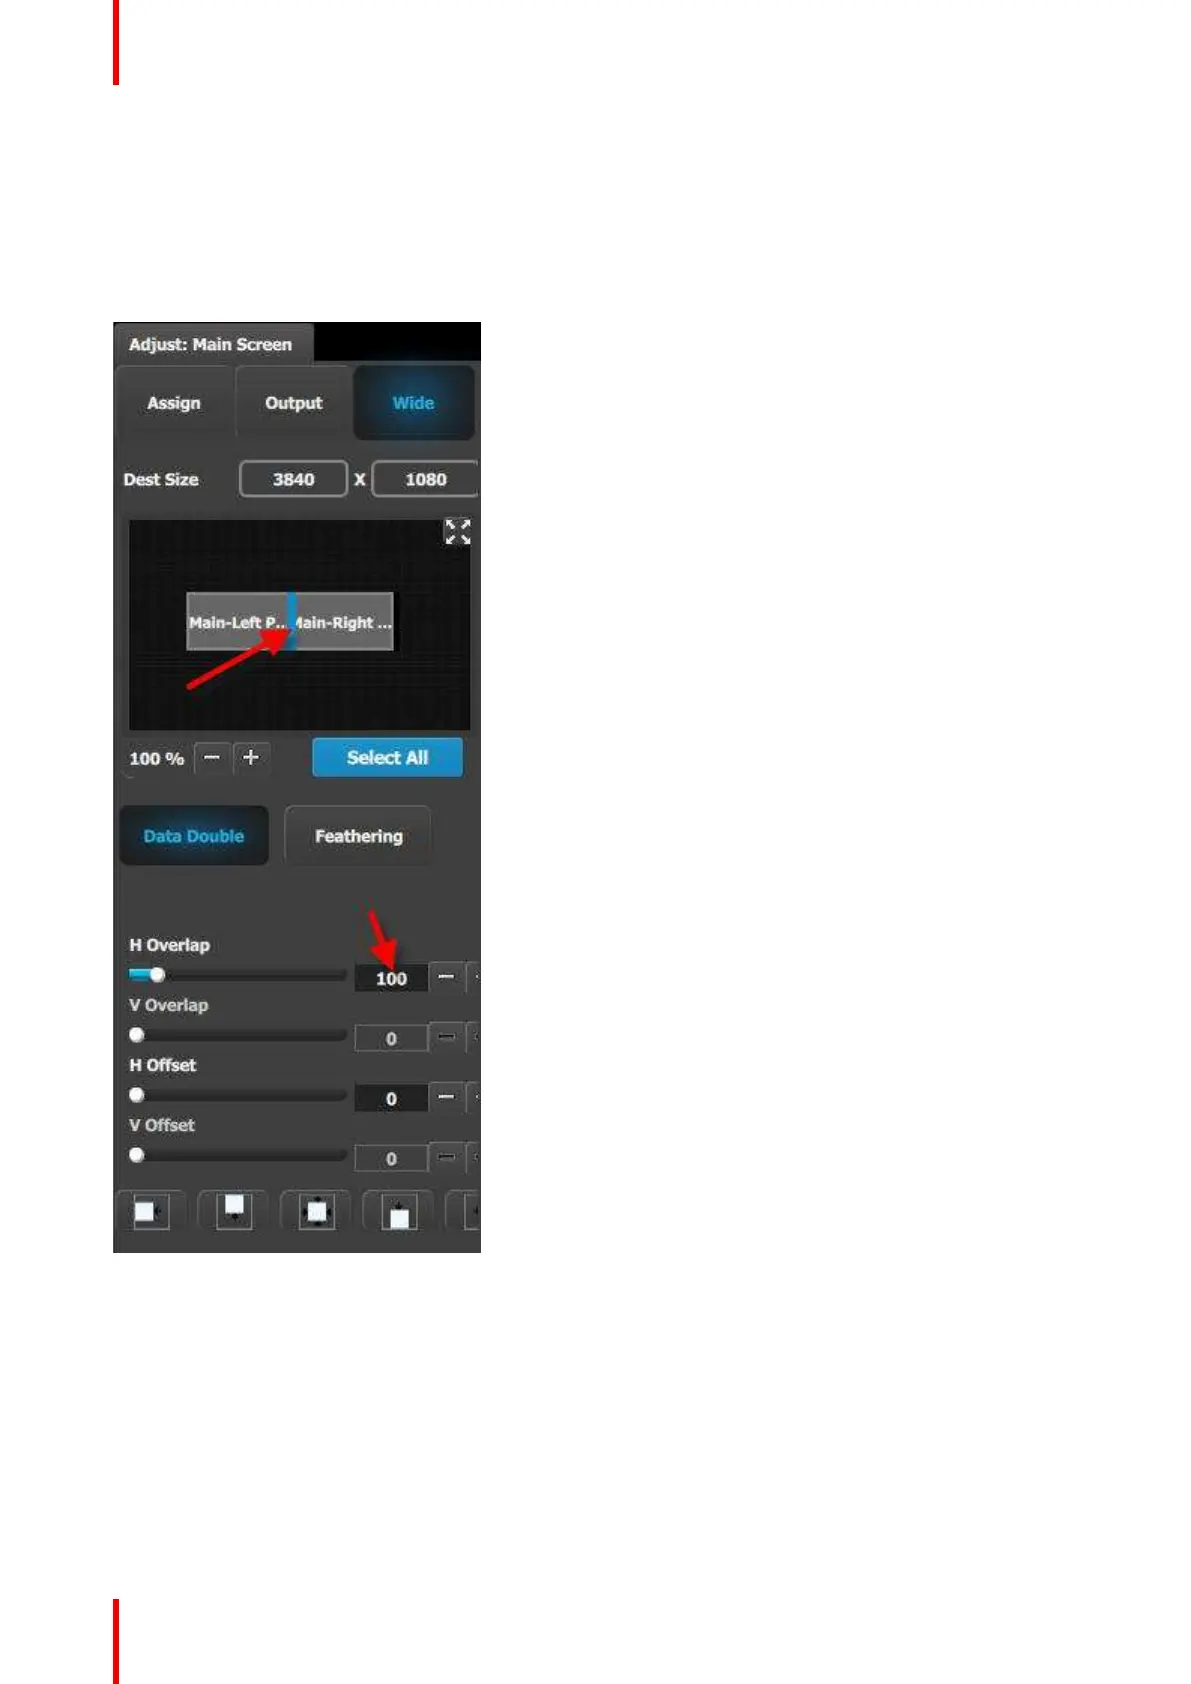
In this section we will adjust the projector overlap area for the Main screen.
1. Under the Wide menu, the small diagram area shows the destination’s outputs layout. Click on the line
between the two rectangles that represent the outputs. The line turns blue.
2. Click on the Data Double button and enter “100” for the H overlap value. Note: We will leave the feathering
disabled (default).
Image 9-9
C6: Add Aux Destinations
1. From the diagram area click on the DSM output. The connector will be highlighted.
2. Click on the +Add Aux Destination blue button to assign the DSM output to an Aux destination.
3. When the Aux destination is created a green rectangle appears next to the E2 diagram.
4. Double click on the AuxDest1 area in the Name list to edit the name.
5. When the area turns blue, click the eraser icon to clear the field.
General operation example