R5905948 /12 Event Master Devices516
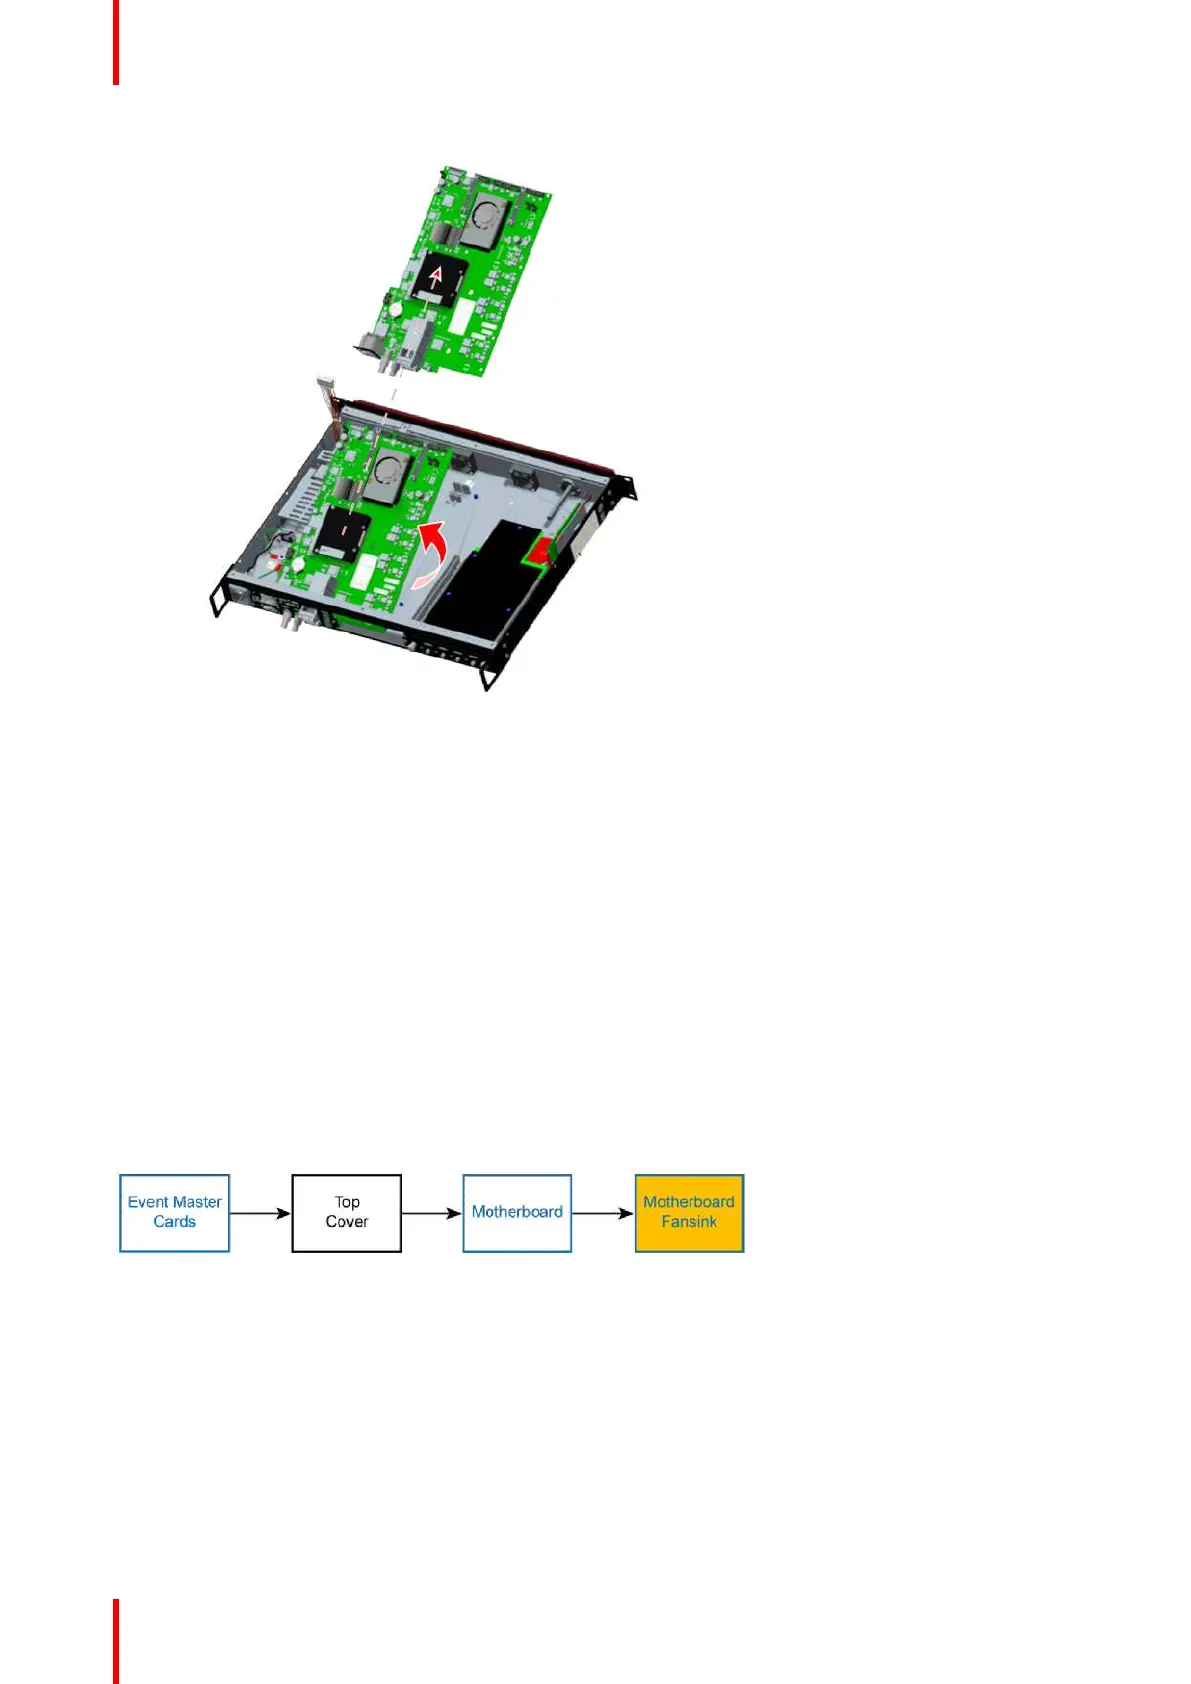
Image 16-21: Motherboard removal – removing the motherboard
3. Remove the motherboard from the chassis.
Note: There is one BNC insulator on the Genlock input connector. Make sure you put this to the side, so
you can re-install it when re-installing the motherboard.
How to install the motherboard
To install the motherboard in the EX chassis, follow the steps of the removal procedure in reverse order.
1. Place the motherboard in the chassis.
2. Install the chassis elements.
3. Install the rear-panel elements.
Note: Do not forget to install the insulating bushing on the Genlock In BNC connector—both internal to the
chassis and external—before installing the toothed washers and hex nuts.
16.11 Motherboard Fansink
Flow chart
Image 16-22: Motherboard fansink
Overview
Because the fansink pins must be removed from the underside of the motherboard, the motherboard must be
removed from the chassis before the fansink can be removed or replaced.
EX Maintenance