26
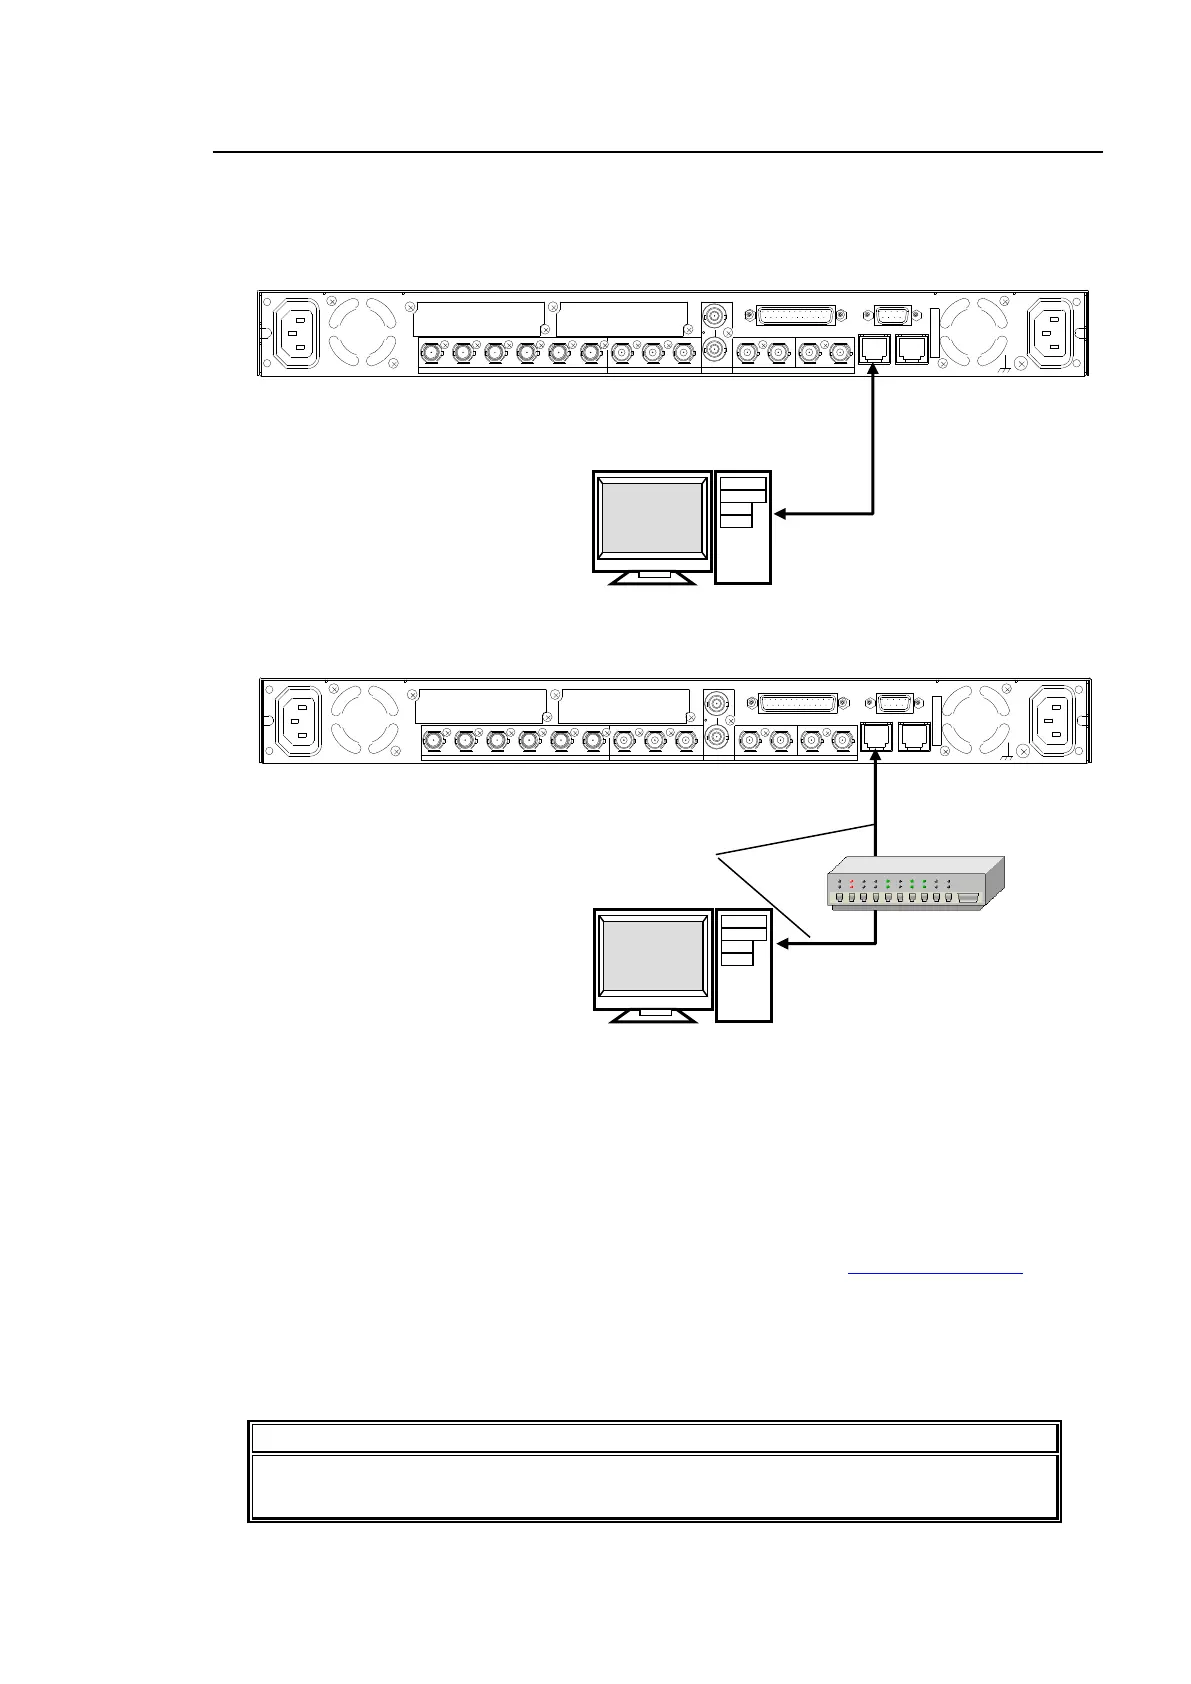
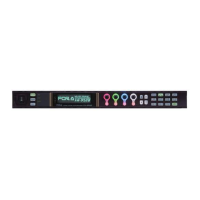
3-5. Connecting a Computer
The FA-9520 can be controlled from a computer through a Web browser.
Connect a computer to the FA-9520 as shown below.
Connection using a crossover LAN cable.
Connection using a hub
The FA-9520 network settings must be adjusted for your network after purchase.
The FA-9520’s LAN1 IP address is set to 192.168.0.10 at the factory.
Set the IPaddress and subnet mask of the computer.
IP address: 192.168.0.1 to 192.168.0.254 (except 192.168.0.10)
Subnet mask: 255.255.255.0
In Windows, open the Local Area Connection Properties dialog box, and open the Internet
Protocol (TCP/IP) Properties window. The settings must be made in the window. See the
user’s manual of your computer for details.
Start a web browser on your computer, and enter the address as http://192.168.0.10.
Enter the default user name (fa9520), and the default password (foranetwork).
The FA-9520 control window appears on the web browser window.
See section 9-8 “Network Settings” for details on changing the FA-9520’s IP address.
See section 9 “Control via WEB Browser” for details on the FA-9520 web browser control
window.
The FA-9520’s IP address can be checked on the front panel display. See section 7-7
“NETWORK INFO” for details.
AC100 - 240V 50/60 Hz I N 1
FAN2
SER. NO.
LAN2LAN1
REMOTE
DIGITAL AUDIO IN / OUT
7 / 85 / 63 / 41 / 2
ANALOG AUDIO
GENLOCK IN
COMPOSITE
OUT2OUT1IN
B
OUT4OUT3IN2OUT2OUT1
SDI
IN1
A
FAN1
AC100 - 240V 50/60 Hz IN2
AC100 - 240V 50/60 Hz I N 1
FAN2
SER. NO.
LAN2LAN1
REMOTE
DIGITAL AUDIO IN / OUT
7 / 85 / 63 / 41 / 2
ANALOG AUDIO
GENLOCK IN
COMPOSITE
OUT2OUT1IN
B
OUT4OUT3IN2OUT2OUT1
SDI
IN1
A
FAN1
AC100 - 240V 50/60 Hz IN2
Straight-through
LAN cable