R5905948 /12 Event Master Devices126
How to Auto add live Inputs
The “Auto add live Inputs” button automatically allocates all live input connectors as individual inputs. Input
connectors that are already assigned to an input will not be affected. If the button is pressed in the beginning,
before any sources have been connected, no inputs will be automatically assigned. The software by default
names inputs as [ConnectorType] “Input 1, 2, 3….”. Input configuration names can be renamed by double-
clicking on the name and turning the box blue.
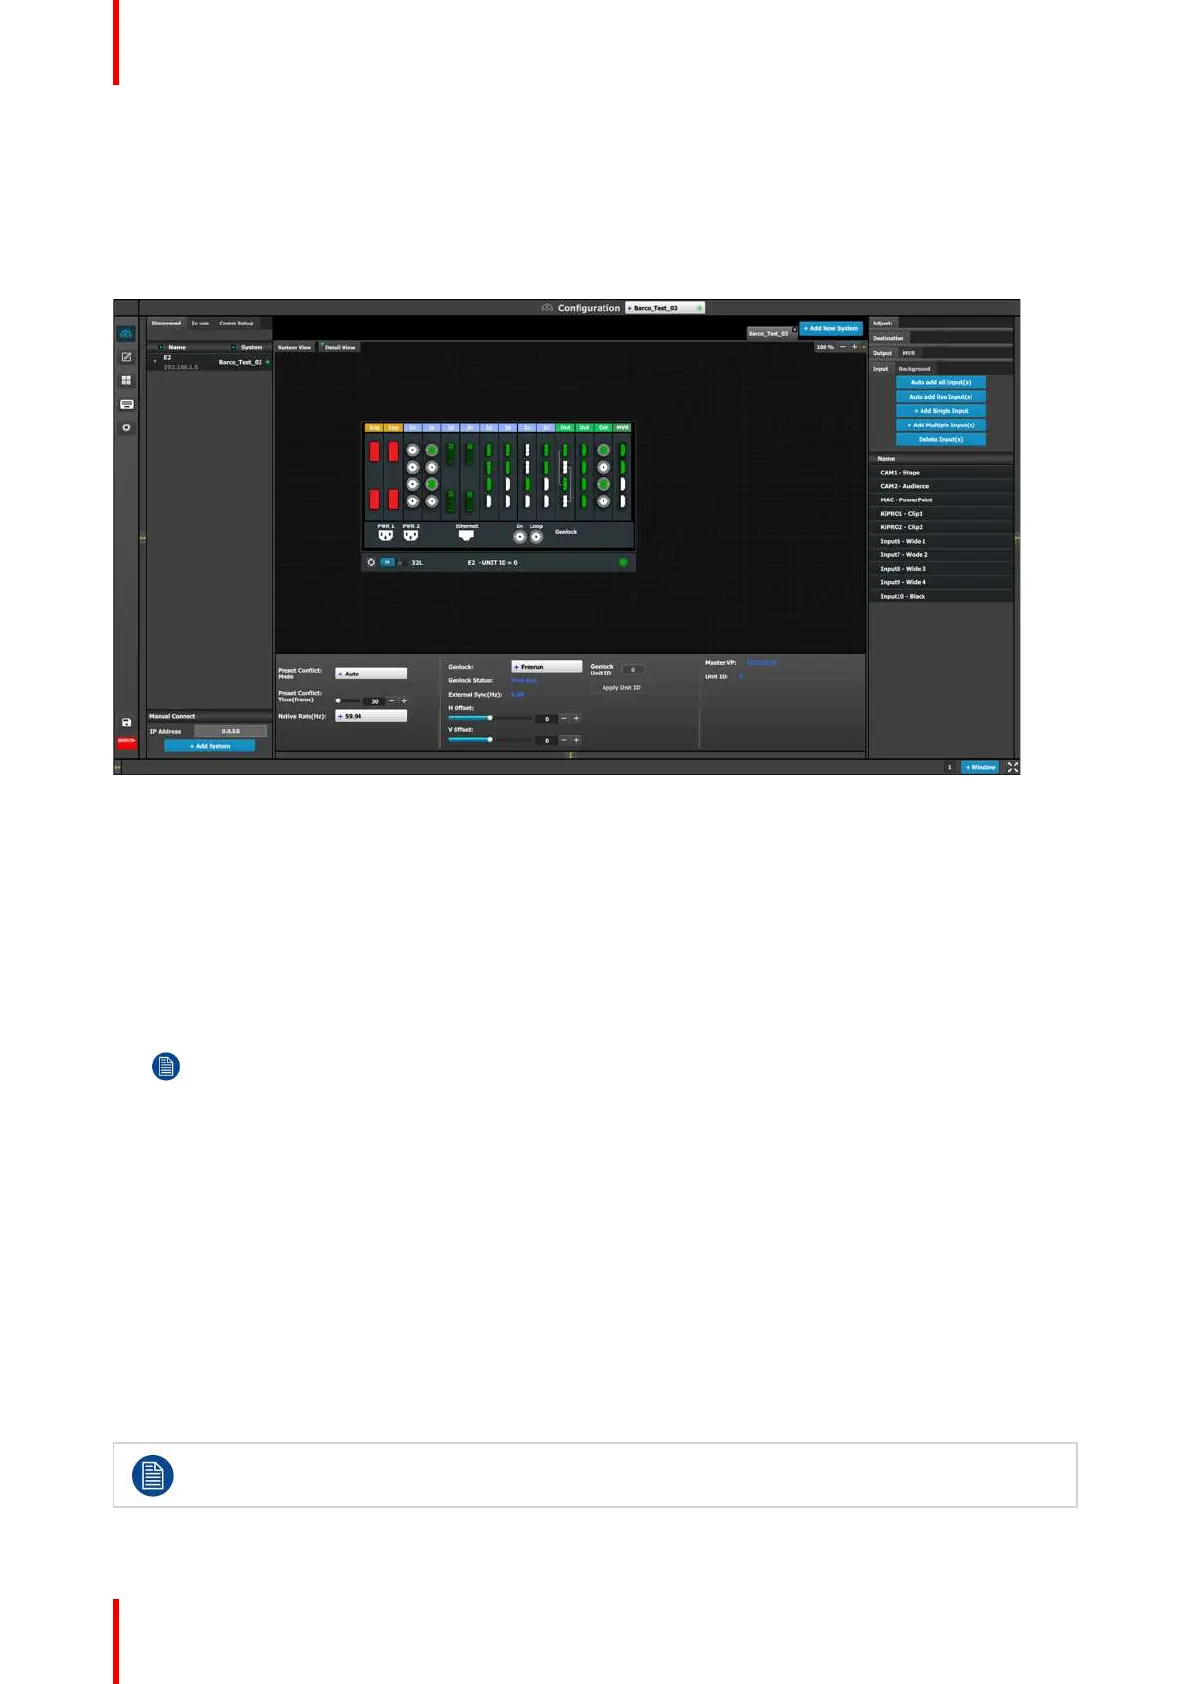
Image 6-17: Configuration menu, Adjustment area, Input
The “Auto Add Live” feature adds only single-connector inputs. Any special input, such as a multi–connector
4K Input, needs to be assigned manually. See How to add Input section below.
How to add an Input
Inputs configurations can be added manually to un-assigned connectors.
1. Select the Detail View tab in the system diagram area.
2. Select an unassigned (white or yellow) input connector from the detail view.
More than one input connector may be selected. The connector(s) will be highlighted blue.
Note: If the input signal is 4K provided by the 4 SDI connectors, 4 SDI connectors need to be selected.
3. Click on the Add Single Input button.
How to delete Input
1. Click on the Delete Input(s) button
The Delete Input(s) button is replaced by the Delete Selected button (highlighted in red).
2. Click on the corresponding connector in the graphical area.
or
click in the “x” on the right hand side in the input configuration list.
Connector(s) is immediately highlighted in blue.
3. The deletion is completed by clicking the Delete Selected button.
Multiple connector configurations can be selected to be deleted together.
EM GUI orientation