Heater Assembly Replacement
Service Manual 11-51
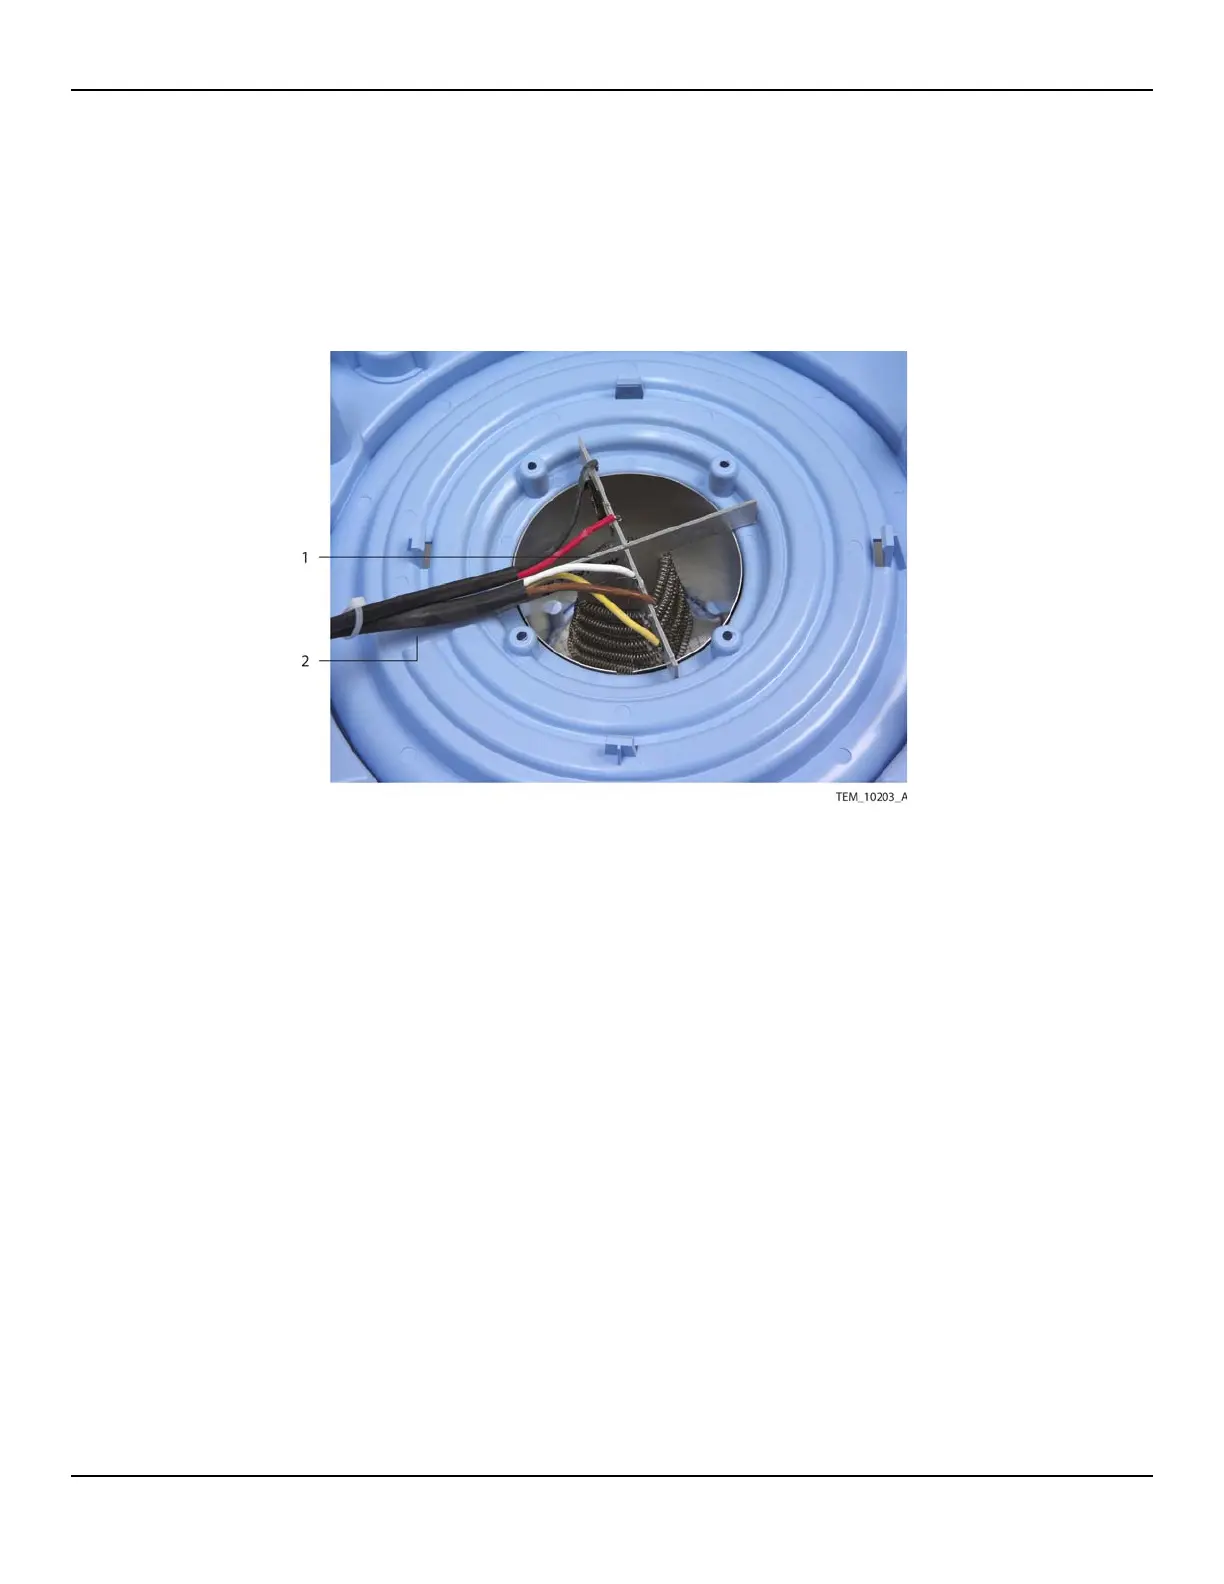
15. Position the new heater assembly in the heater cone, with the wires routed
through the notch in the enclosure. Make sure that the two wrapped sets of wires
lie on opposite sides of the heater’s metal support rib (Figure 11-48).
Figure11-48.Routing of Heater Wires
16. Attach the new circular gasket as follows (Figure 11-47 on page 11-50):
a. Remove the backing from the gasket to expose the adhesive.
b. Center the gasket around the heater assembly, just outside the four screw
bosses in the enclosure.
c. Making sure that the heater wires are lying flat in the notch, press the gasket
down on both sides of the wires.
d. Continue pressing around the rest of the gasket to adhere it to the enclosure.
17. Position the fan assembly back in the unit as shown in Figure 11-45 on
page 11-48.
1 Heater Support Rib 2 Notch for Heater Wires