Enclosure Replacement
12-22 Service Manual
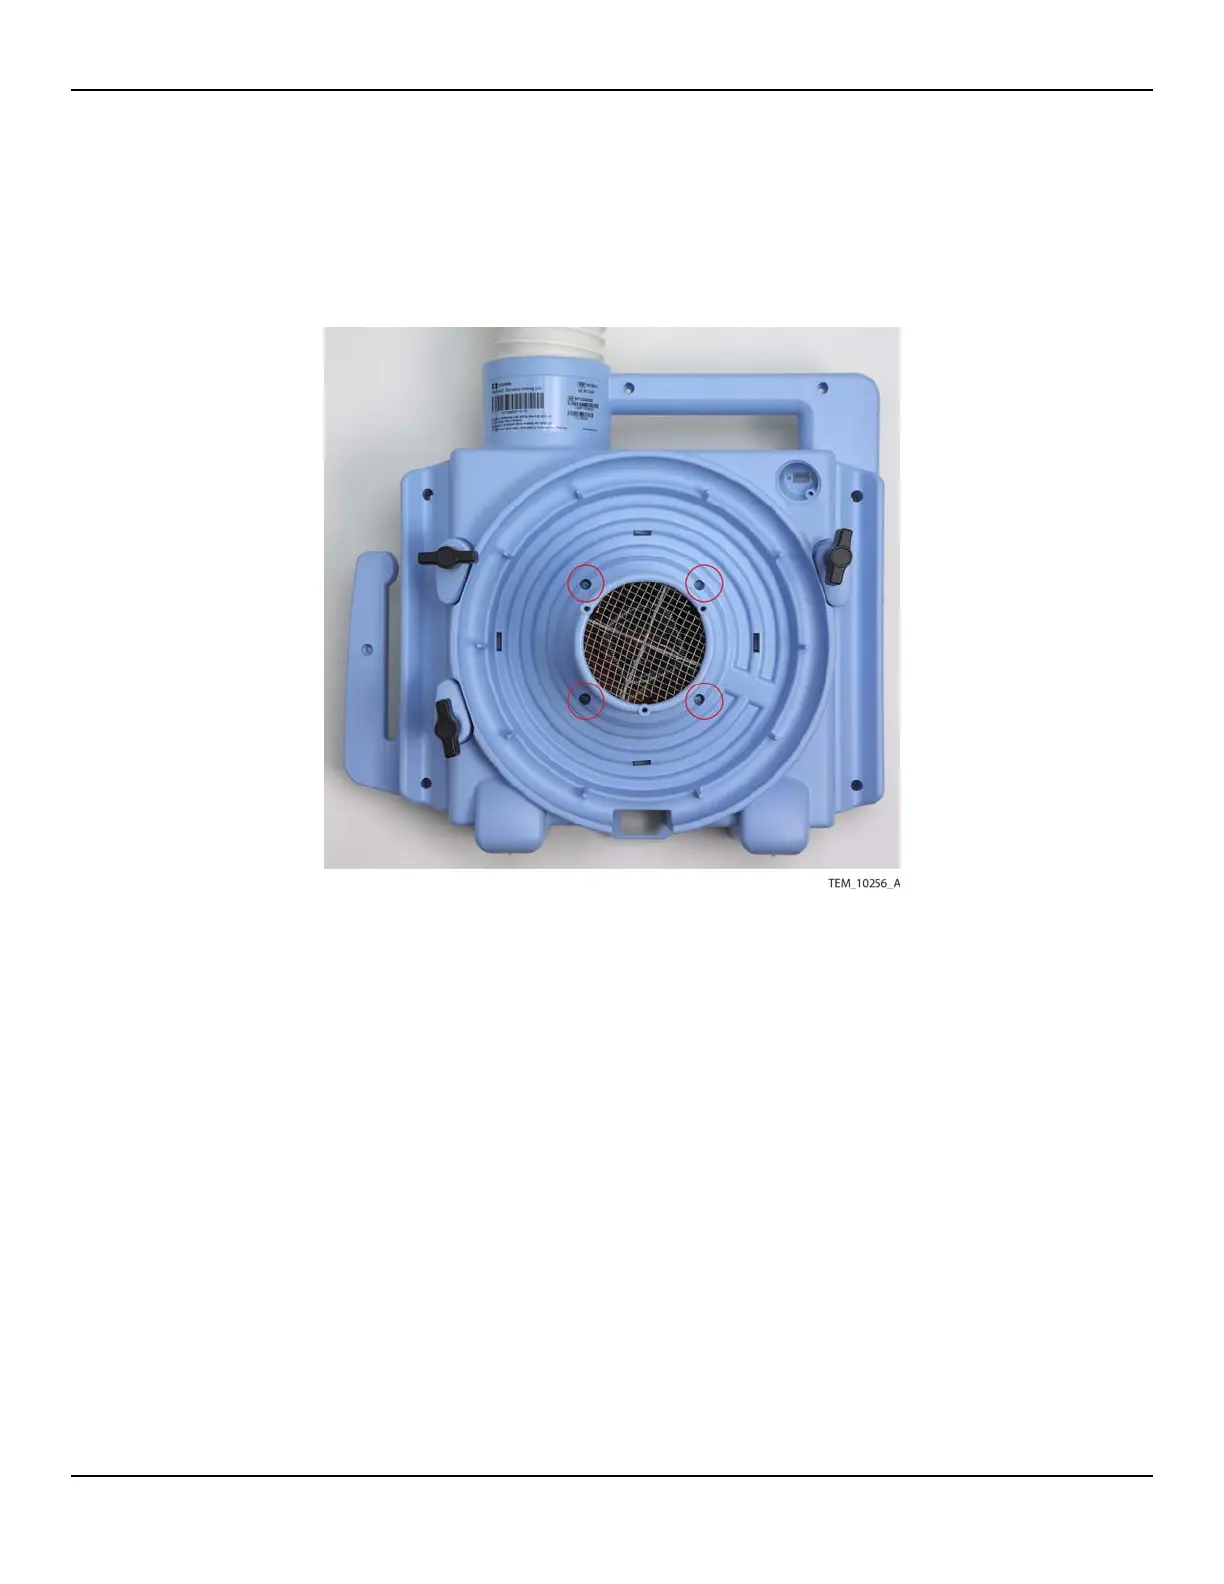
7. Remove the four screws securing the fan assembly to the rear enclosure
(Figure 12-17). Set the screws aside for installation in the new enclosure.
Figure12-17.Fan Assembly Screws
8. Supporting the fan assembly, turn the rear enclosure over.
Caution:
Be careful when moving the hose duct adapter. The connected thermistor
wire can break if too much stress is applied to it.
9. Disengage the hose duct adapter from the fan assembly.
10. Lift the hose and hose duct adapter out of the unit, taking care not to dislodge
the thermistor and thermostat connections. Set the hose, duct adapter, and con-
nected cables aside for installation in the new enclosure.
11. Lift the fan assembly out of the unit and set it aside for installation in the new
enclosure.