8
D-STAR OPERATION <BASIC>
8-19
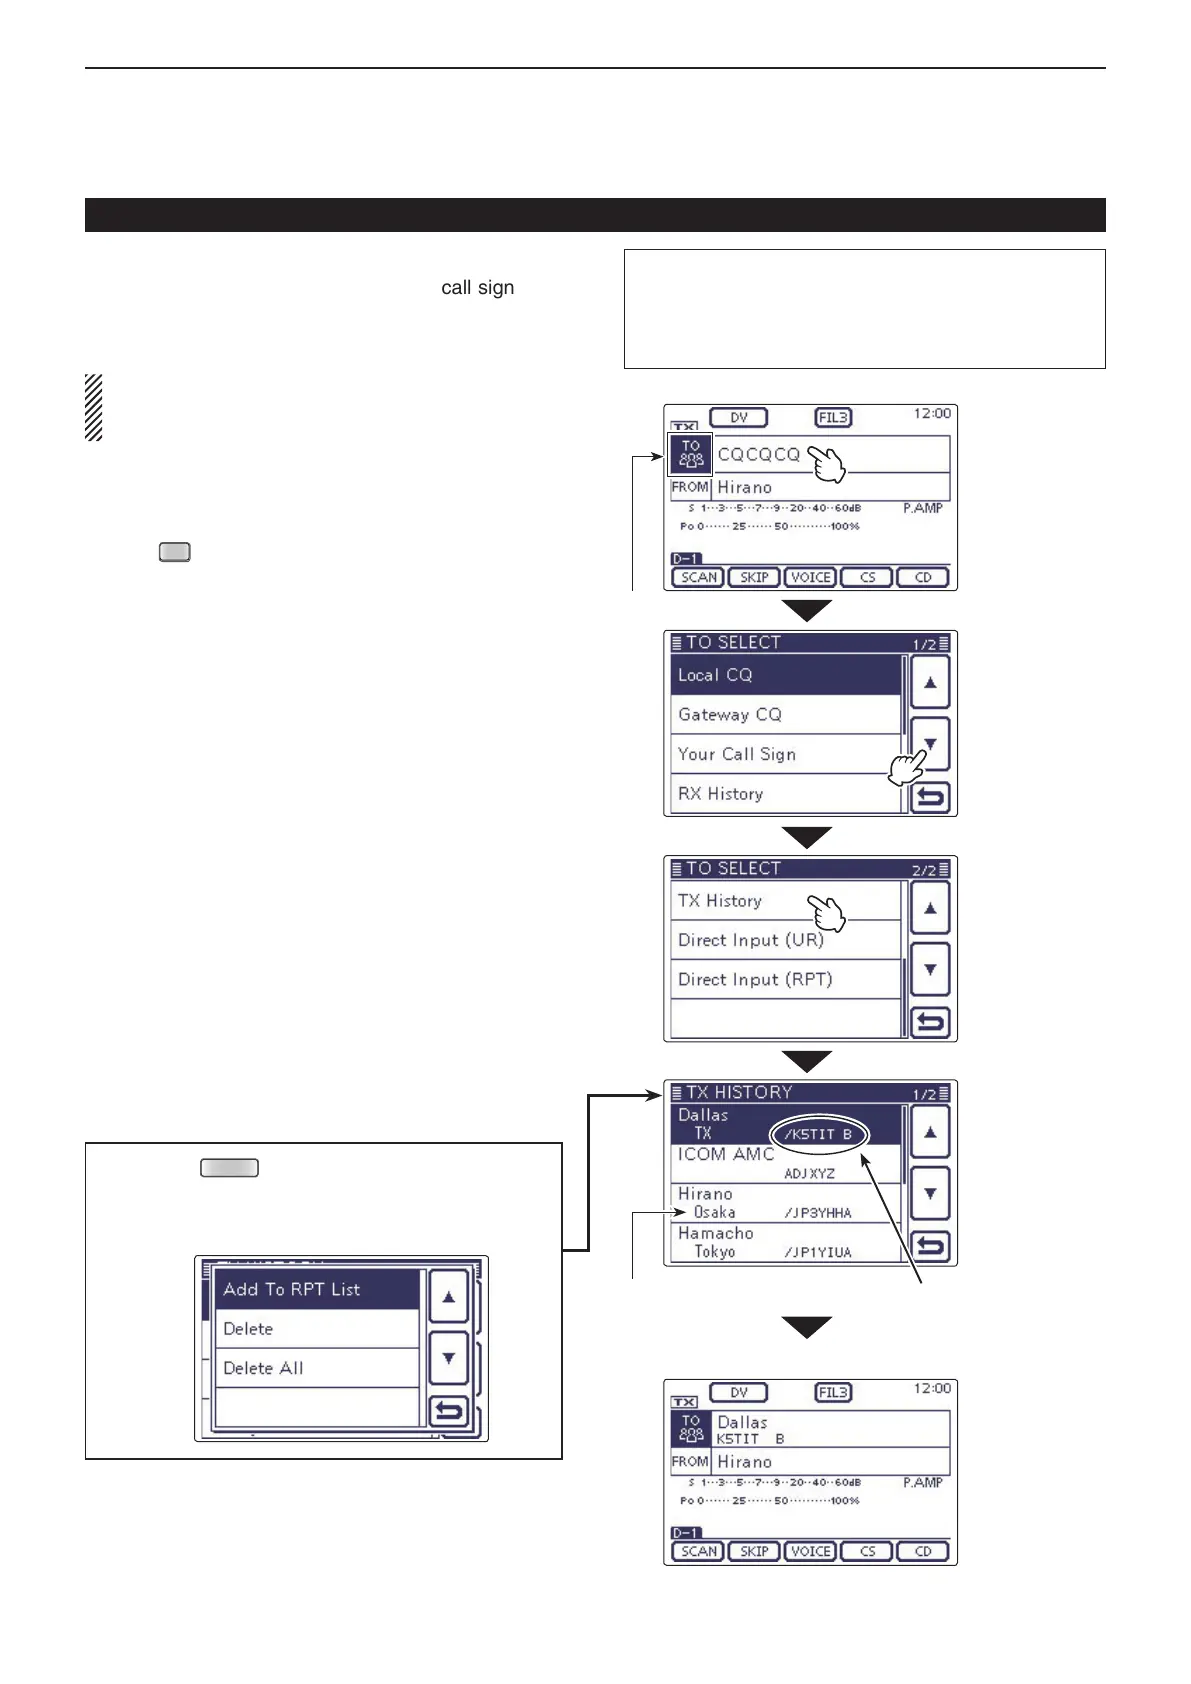
D Using the TX History
The TX History stores the name and/or call sign of up
to 20 “TO” (Destination) settings that were used when
you made the calls.
NOTE: If you never transmit a call in the DV mode,
you cannot select “TO” (destination) from the TX His-
tory.
Example: Select the “Dallas” repeater in the TX His-
tory.
Push q
(C) to select the DR mode.
Check whether or not “TO” is selected. w
• If “TO” is not selected, touch the “TO” eld.
Touch the “TO” field. e
• The “TO SELECT” screen appears.
Touch [ r Z] to display the next page.
Touch “TX History.” t
• The “TX HISTORY” screen appears.
Touch the destination name or call sign. y
• Example: “Dallas”
• The transceiver returns to the DR mode screen, and “Dal-
las” is displayed in “TO.”
“Dallas” repeater’s
call sign is displayed.
If you push
(C) on the TX HISTORY screen,
you can add the selected TX HISTORY data to mem-
ory, or delete it from there.
“TO” (Destination) setting (Continued)
“Dallas” is set in “TO.”
“TO” is selected.
Touch
“TO.”
Touch
“TX History.”
Touch
[Z].
The Sub name is
displayed when
a repeater is se-
lected.
The L, R, C or D in the instructions indicate the
part of the controller.
L: Left side, R: Right side, C: Center bottom
D: Display (Touch screen)

 Loading...