Preliminary Check-Out
Gem-5 User’s Manual 13
4. Confirm that the LVDS cable from the LCD panel is plugged into the LVDS
receptacle on the computer box.
5. Ensure that optional external equipment such as automatic doors or barriers are
connected to the power terminals on the utility panel.
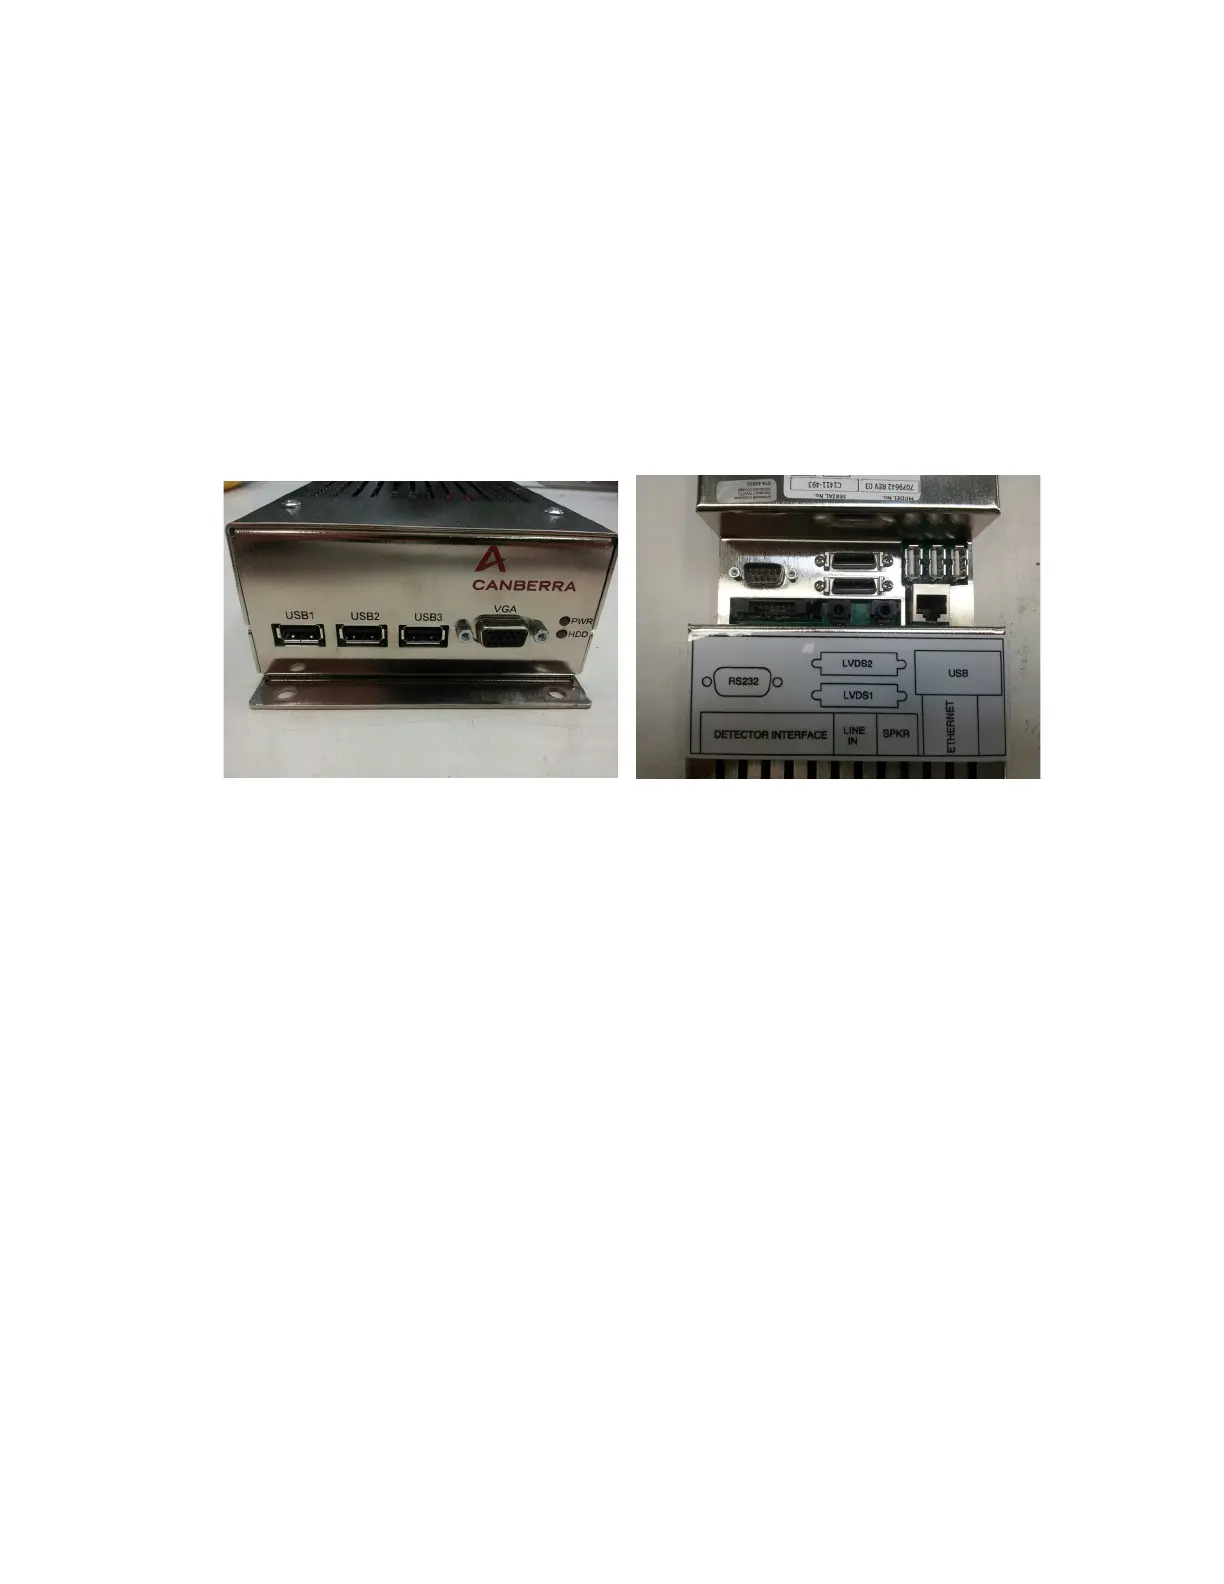
6. Connect a keyboard (one included per order) to one of the USB ports that is
accessible through the locked access panel (see Figure 7).
7. Check the computer power switch is in the ON position. (Standard power
switch designations are "0" = OFF, "1" = ON).
Figure 7 Computer Box Connectors
When all checks are satisfactory, apply power to the monitor by turning the POWER
keylock Switch to the ON position. When power is applied, the following sequence is
initiated:
• The computer performs a boot-up of the Microsoft Windows 7 Embedded
operating system and then begins an automatic launch of the operational
software.
• At the same time, the low-voltage power supply provides +12 VDC to the
Carrier Board, which in turn supplies +12 VDC power to the Detector and
Sensor Boards and +3.3 VDC power to the LCD panel.
•
A stationary Mirion Technologies (Canberra CA) Ltd. logo appears while
the software initializes. When the initializing sequence is complete, the
audio circuits should sound a
"fanfare" indicatin
g that the sound system and software have been properly
initialized.
• While HV is ramping up the screen shows “Please Wait / Initializing”.