Repair of Detectors
Gem-5 User’s Manual 363
Replacing a Damaged Photomultiplier Tube
Once the detector has been removed from the monitor (see previous section), a
damaged photomultiplier tube is easily replaced. Place the detector on a clean
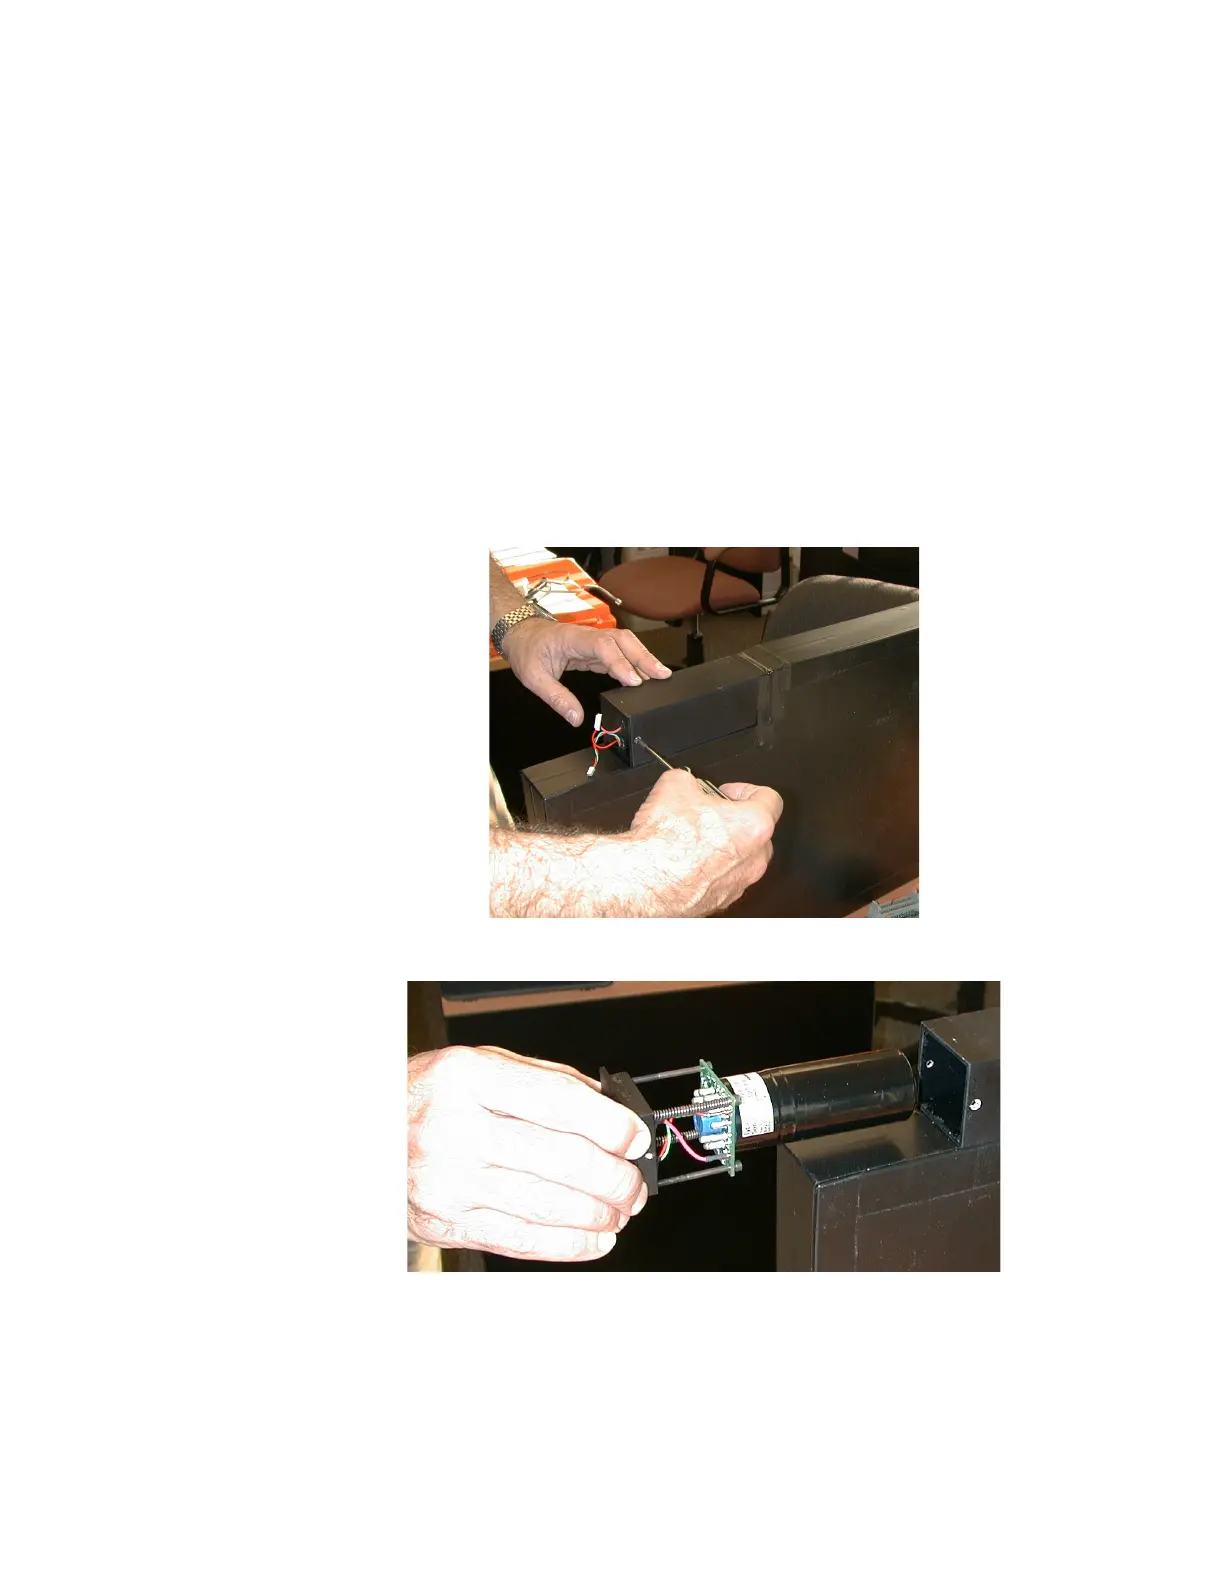
worktable with the photomultiplier housing on top, as shown in Figure 155.
Note: Take note of the taping technique used to provide the light shield around all
the openings and edges of the assembly, as it will be necessary to replace any
tape removed during this procedure.
Remove the two retaining screws on the photomultiplier tube housing as shown in
Figure 155 below (top). Hold the base of the photomultiplier tube assembly as it will
tend to spring out when the screws are removed. Slide the assembly out of its
housing, as shown in Figure 155 below (bottom). Remove the photomultiplier tube
from its socket and replace it with the new tube.
Figure 155 The photomultiplier tube housing (top) and removal (bottom).
 Loading...