DMTA-10040-01EN, Rev. E, February 2018
Using the Instrument 191
To set the initial NORTEC 600 configuration
1. Connect the probe and the cable into the PROBE connector on the NORTEC 600.
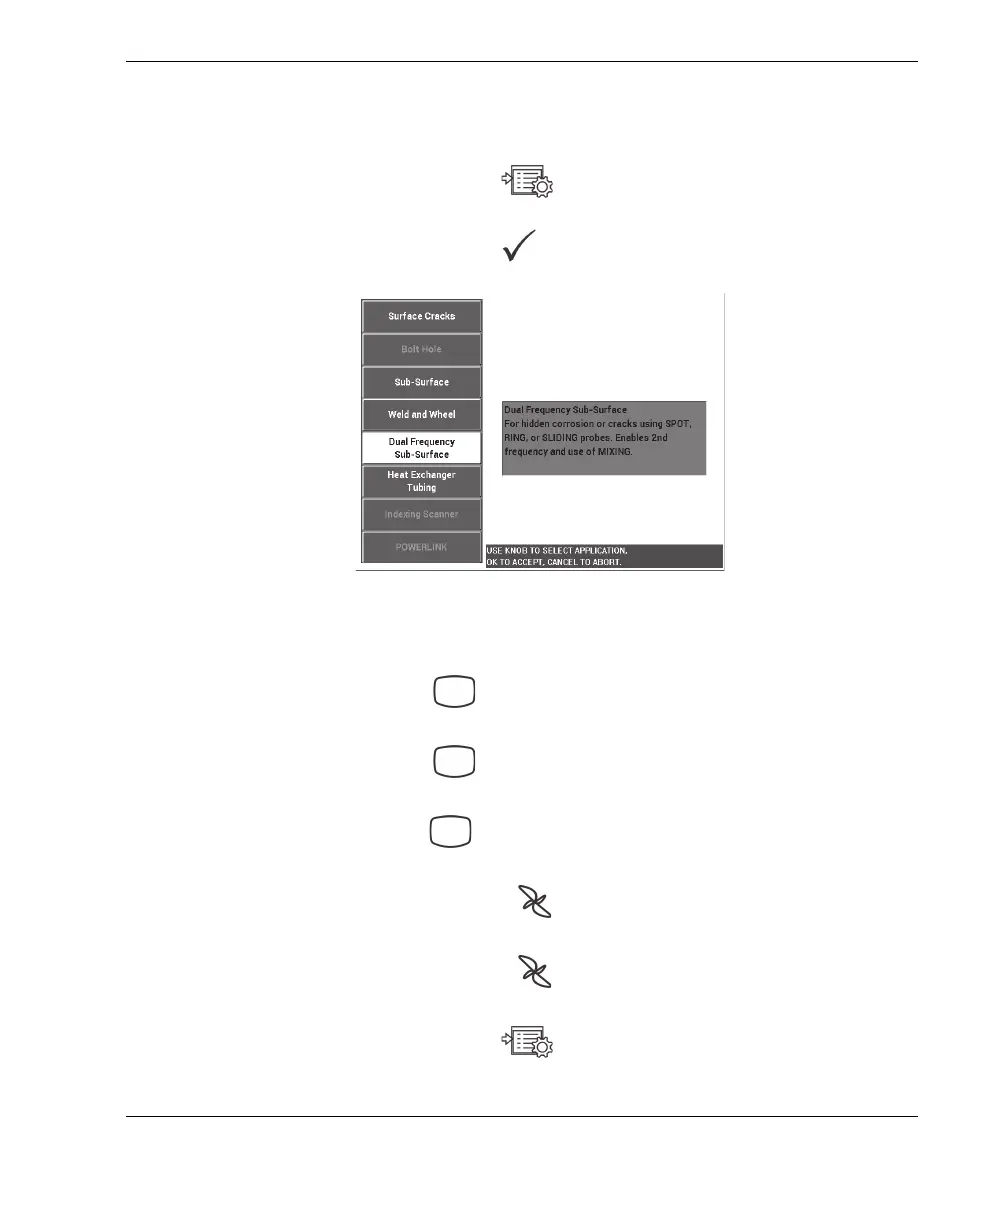
2. Press the ADV SETUP menu key ( ) once, and then select APPL SELECT
(A key) to open the application selection menu. Select Dual Frequency Sub‑
Surface with the knob, then press to accept (see Figure 5-98 on page 191).
Figure 5‑98 The Dual Frequency Sub‑Surface application
3. Press the DISP menu key ( ) twice, and then set the POSITION (C key) to
TOP LEFT using the knob.
4. Press the DISP menu key ( ) again, and then set the POS 2 (C key) to TOP
LEFT using the knob.
5. Press the DISP menu key ( ) again, and then set the MIX DISP (A key) to OFF
using the knob.
6. Press the MAIN FILTER menu key ( ) four times, and then set the LO PASS
(B key) to 50 Hz.
7. Press the MAIN FILTER menu key ( ) again, and then set the PRB DRV
(A key) to HIGH.
8. Press the ADV SETUP menu key ( ), select ALL SETTINGS (B key), press
the E key, and then press the C key. Set the RDG1 CHN to MIX, then press the