Chapter 2 Installation - First Use of System
36 Gem-5 User’s Manual
Table 6 Access Configuration Typical Defaults (by Sensor Board)
Section
Setting
254 ID 2 (Sensor Board) 253 ID 3 (Auxiliary Sensor Board)
Security Key – Input
“None” “None”
Access Key – Input
“None” “None”
Access Scanner – Input
“None” “None”
Open Barrier
“Normal” “Normal”
Service Open
“NO” “NO”
Alarm Test Open
“NO” “NO”
Security Supervisor Open
“YES” “YES”
Hot Side Security Key Open
“YES” “YES”
Cold Side Security Key
Open
“YES” “YES”
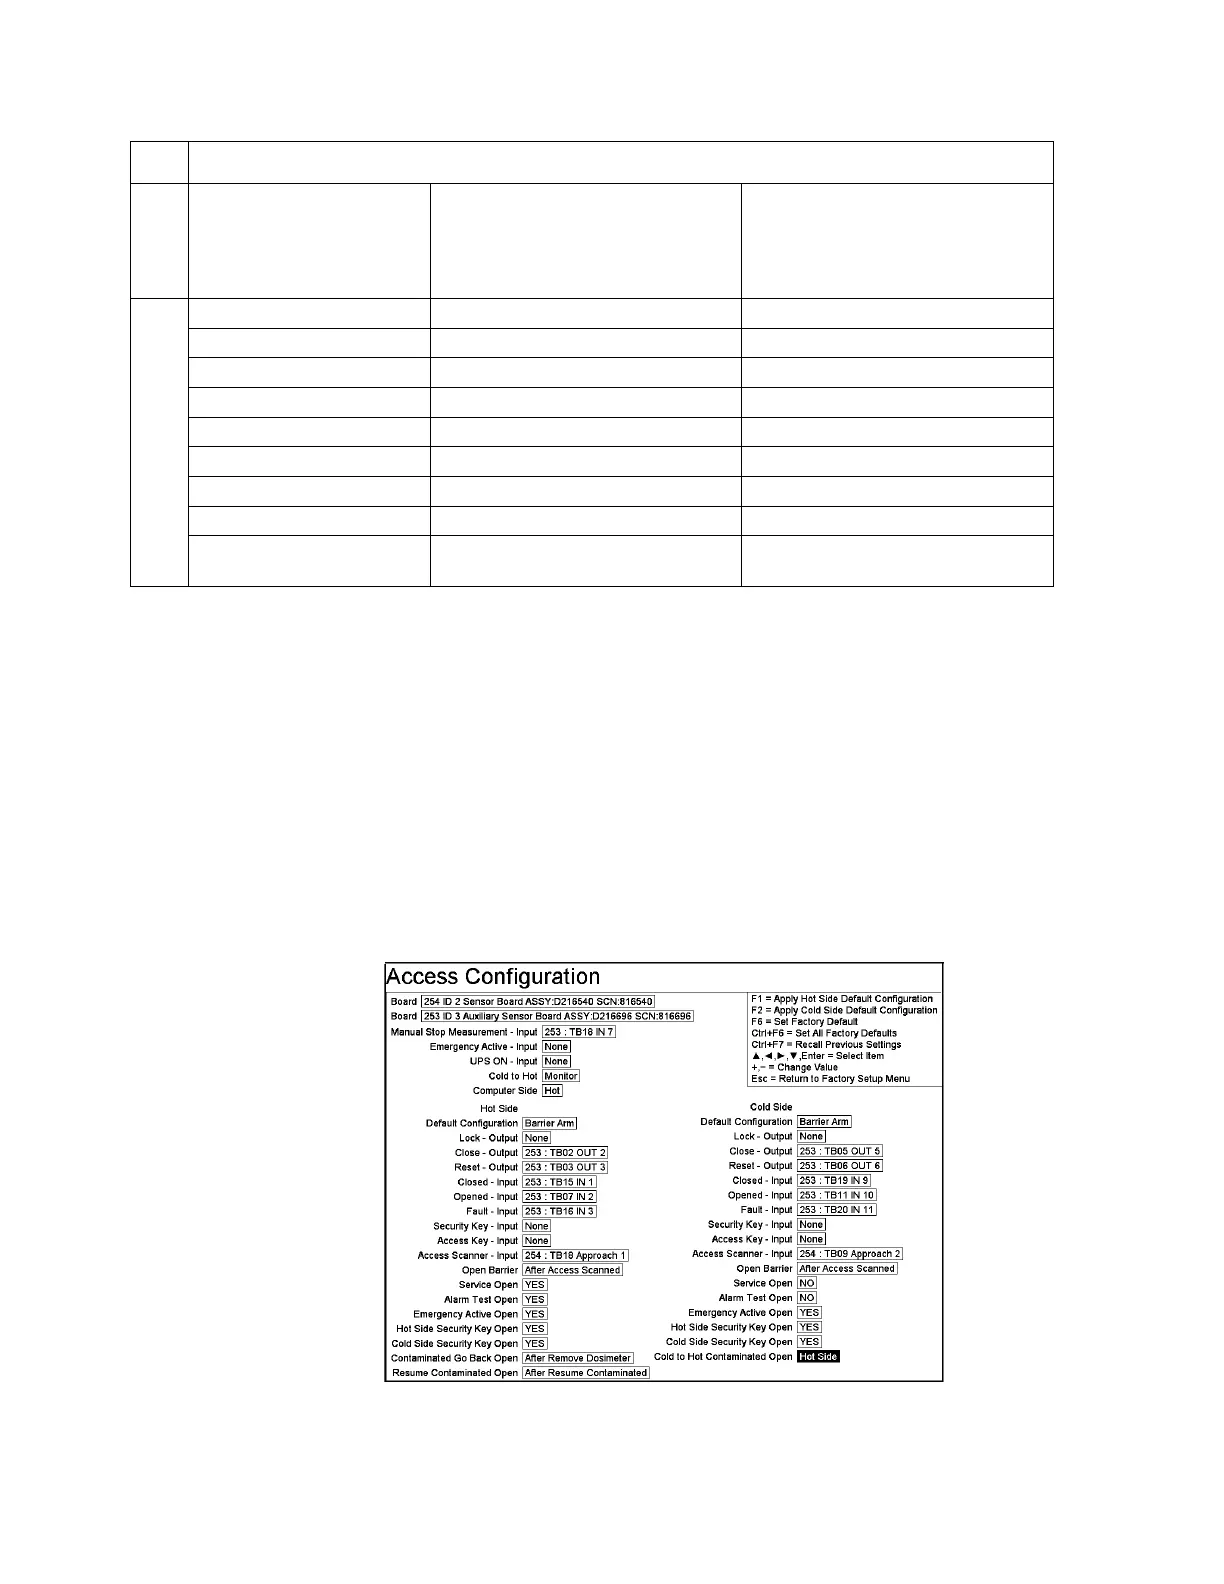
Specific Information for Barrier Arms
A GEM-5 with Barrier Arms installed on both Hot and Cold sides can use the
approach sensors to open the barrier arms. See Figure 13 or example settings (noting
in particular the Cold to Hot, Access Scanner - Input and Open Barrier settings for
both Hot and Cold Sides). In this case, both Barrier arms are normally closed until an
approach sensor activates. That side’s barrier arm will open and measurement
proceeds as normal. A Clean result will open opposite barrier arm. A Contaminated
or Aborted result will open the Barrier Arm that allowed measurement to start. Also,
in this example, it is suggested that the Cold Alarm Activity value in F3 – Setup, F3
– Detection Zone, F2 – Zone Settings screen should checked such that it is the same
as the Alarm Activity value (however, the customer’s Health Physics/Radiation
Safety officer is responsible for verifying the impact of the settings).
Figure 13 Example Access Configuration Screen with Dual Barrier Arms