Invert the fuel tank, be careful to avoid tank
scratches and bumps.
Remove fuel pump assembly installing bolt.
Remove fuel pump assembly from the fuel tank
carefully.
Be careful to not damage fuel pump filter screen.
Installation of Fuel Pump Assembly:
Replace the sealing washer of fuel pump assembly.
(Used washer may lead to fuel leakage)
Gently hold the fuel pump filter screen and put
fuel pump assembly into the fuel tank. Avoid
damaging fuel pump filter screen.
Installation direction of fuel pump assembly:
the installing screw holes of fuel pump
assembly are not arranged asymmetrically,
and they can be installed in the specified
direction. The pressure regulator should face
the rear of fuel tank, and
installing surface of fuel tank is clean and flat
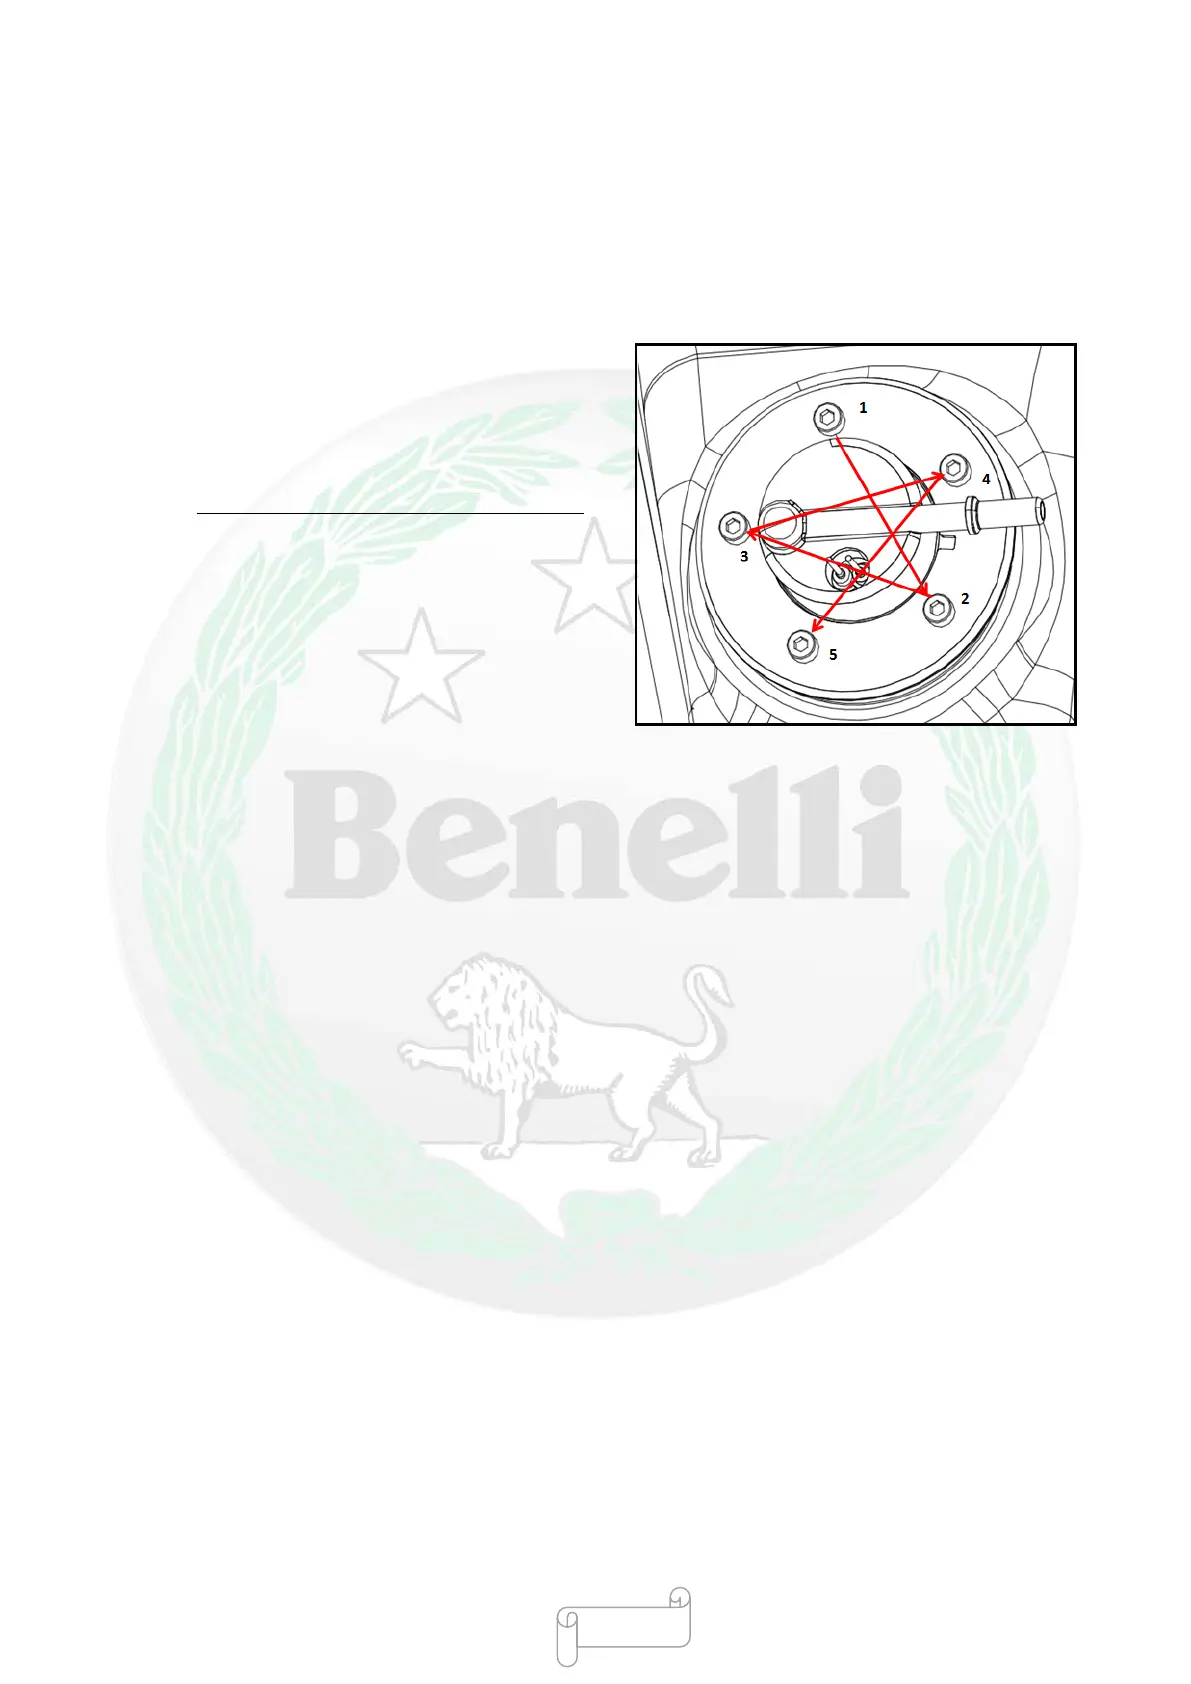
N•m. Install mounting bolts on the fuel pump
assembly cover and tighten them evenly in the
order indicated in the following figure.
Installing torque of screw: 3- 4 Nm
The fuel pump assembl
y should be secured
with special bolts. It should be tightened
according to specified tightening order and
torque during the installation. Over torque an
incorrect tightening order may cause washer
deformation and thus result in leakage.
Install the fuel tank on the motorcycle.
Connect fuel pipe and fix it with a suitable clamp.
Connect the fuel pump harness connector.
Check for leaks according to “Fuel Leakage Check
Process”.
Fuel Pressure Release Process:
Note: Do not operate when the engine is in warning-up
state.
After confirming that the engine is in cooling state,
conduct the following fuel pressure release operation:
The motorcycle is in “neutral” state.
Disconnect the connector between fuel pump
assembly harness and motorcycle harness.
Turn on motor to start engine until the engine
is automatically extinguished. Then
continuously turn on and off the ignition key
for 2-3 times, with an internal
- 151 -
 Loading...