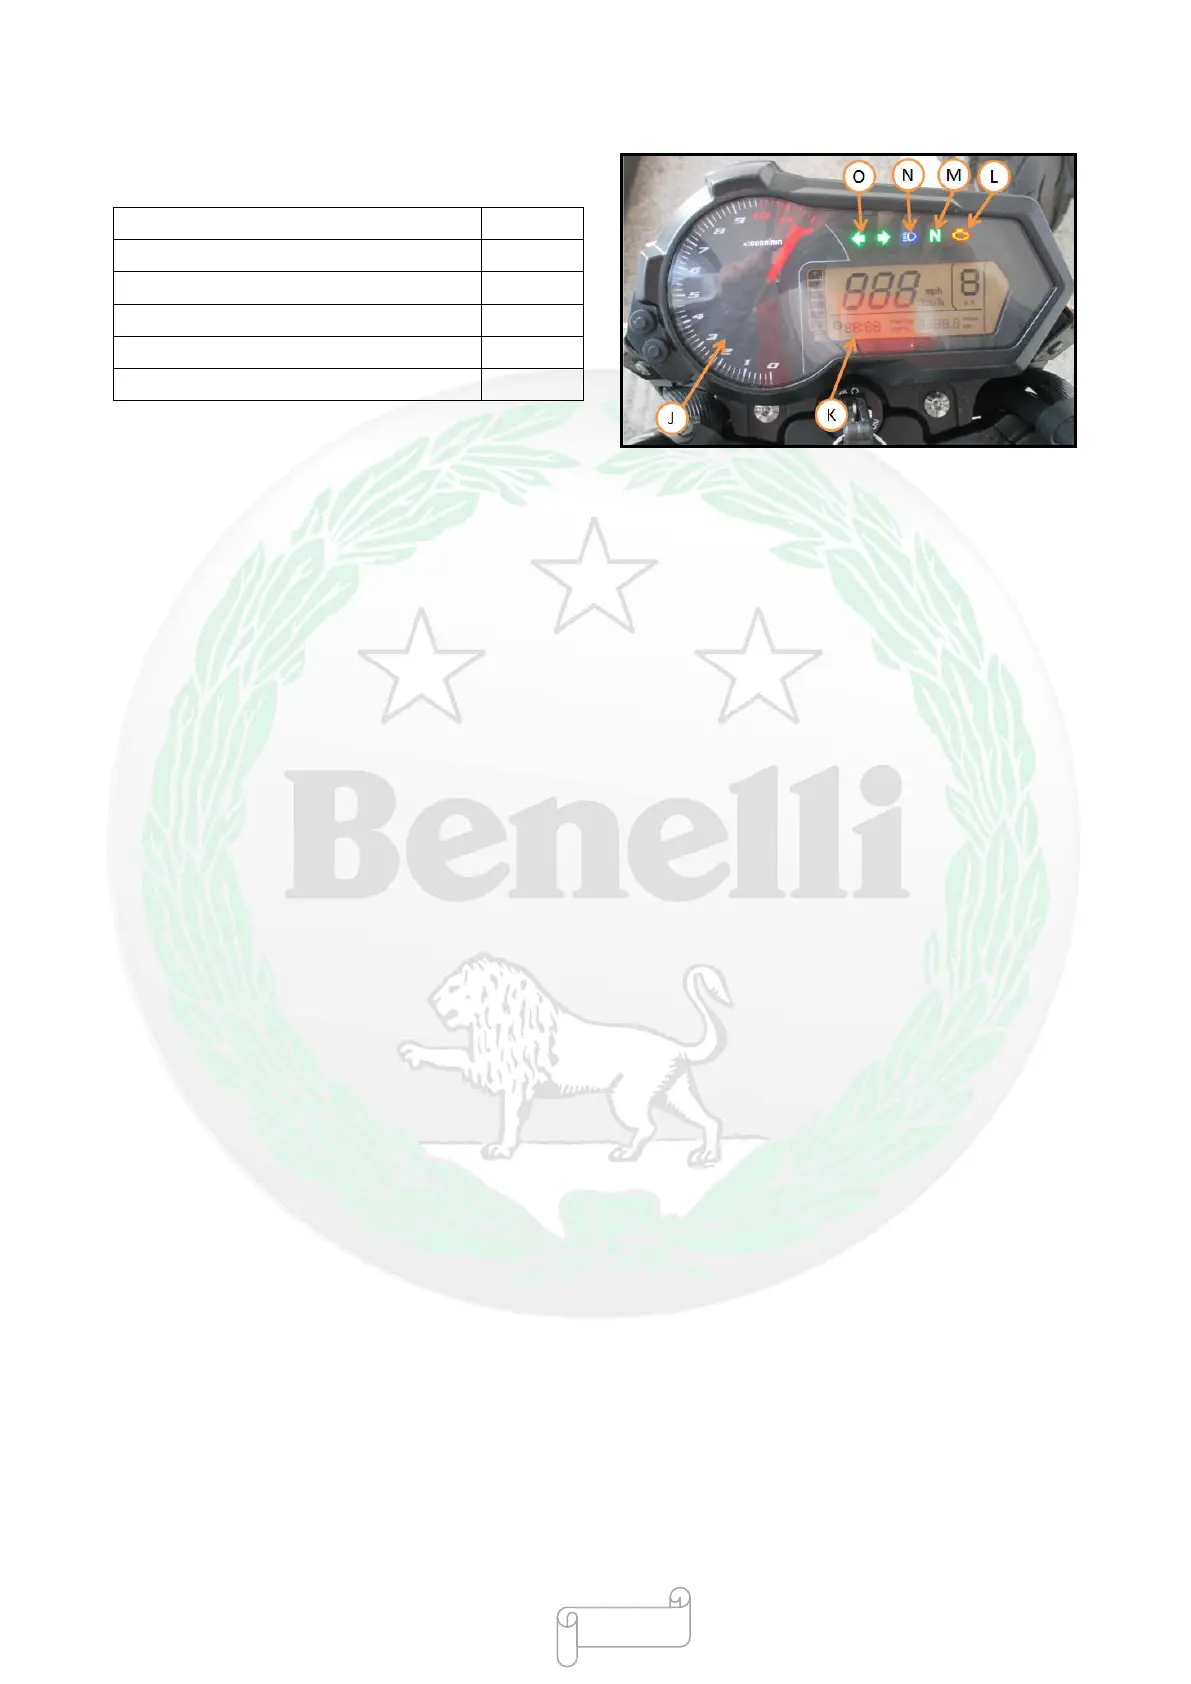
●Th
e indicator of meter will be on in the order shown
in the table below.
Tachometer light (LED) [J] On
Meter panel (LED) [K] On
Fault warning indicator (LED) [L]
Indicator at neutral position (LED) [M]
High beam light indicator (LED) [N] On
Turn signal light indicator (LED) [O] On
★
If the lights are not on, check or replace the
following parts:
Battery (see “Checking Charging Situation” in the
“Electrical System” chapter);
20A main fuse and 10 A taillight fuse (see “Checking
Fuse” in the “Electrical System” chapter);
Applicable bulb
(see “Wiring Diagram” in the
“Electrical System” chapter);
Header parts of dashboard LCD (see “Checking Header
Parts” in the “Electrical System” chapter);
Header parts of neutral indicator (LED) (see “Checking
Header Parts” in the “Electrical System” chapter);
Header parts of alarm indicator (LED) (see “Checking
Header Parts” in the “Electrical System” chapter);
Header parts of fault alarm indicator (LED) (see
“Checking Header Parts” in the “Electrical System”
chapter);
Header parts of light (LED) (see “Ch
Parts” in the “Electrical System” chapter);
ECU (see “Checking ECU Power” in the “Fuel
Injection System (EFI)” chapter);
Electric door lock (see “Checking Switch” in the
“Electrical System” chapter);
Gear position switch (see “Checking Gear Position
Switch” in the “Electrical System” chapter);
Wire harness (see “Checking Circuit” in the “Electrical
System” chapter).
ABS indicator (LED) (models with ABS) [see
“Checking ABS Indicator (LED)” in the “Brake”
chapter”)
●Close the electric door lock.
●
At this time, all lights shall be off
.
★
If any light is not off, replace the electric door lock.
- 83 -
 Loading...