Installing and Removing QFX3008-I Interconnect Device Hardware Components
The field-replaceable units (FRUs) in a QFX3008-I Interconnect device are:
•
Control Boards
•
Fan trays
•
Air filters
•
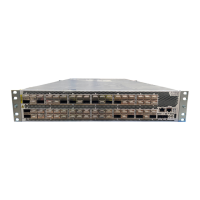
16-port QSFP+ front cards
•
Rear cards
•
QSFP+ and SFP+ transceivers
•
Power supplies
•
Wiring trays
The FRUs in a QFX3008-I Interconnect device are hot-insertable and hot-removable:
you can remove and replace these components while the device is functioning without
turning off power to the device or disrupting the device function. However, we recommend
that you take the 16-port QSFP+ front cards and the rear cards offline before you remove
them. You must take Control Boards offline before you remove them. See
“Field-Replaceable Units in a QFX3008-I Interconnect Device” on page 38 for details.
To install a Control Board in a QFX3008-I Interconnect device, follow the instructions in
“Installing a Control Board in a QFX3008-I Interconnect Device” on page 349. To remove
a Control Board from a QFX3008-I Interconnect device, follow the instructions in
“Removing a Control Board from a QFX3008-I Interconnect Device” on page 347.
To install a fan tray in a QFX3008-I Interconnect device, follow the instructions in
“Installing a Bottom Fan Tray and Front Panel Display in a QFX3008-I Interconnect
Device” on page 331, “Installing a Side Fan Tray in a QFX3008-I Interconnect Device” on
page 334, and “Installing a Top Fan Tray in a QFX3008-I Interconnect Device” on page 337.
To remove a fan tray from a QFX3008-I Interconnect device, follow the instructions in
“Removing a Bottom Fan Tray and Front Panel Display from a QFX3008-I Interconnect
Device” on page 329, “Removing a Side Fan Tray from a QFX3008-I Interconnect Device”
on page 332, and “Removing a Top Fan Tray from a QFX3008-I Interconnect Device” on
page 336.
To install an air filter in a QFX3008-I Interconnect device, follow the instructions in
“Installing a Bottom Air Filter in a QFX3008-I Interconnect Device” on page 340 and
“Installing a Side Air Filter in a QFX3008-I Interconnect Device” on page 343. To remove
an air filter from a QFX3008-I Interconnect device, follow the instructions in “Removing
a Bottom Air Filter from a QFX3008-I Interconnect Device” on page 338 and “Removing
a Side Air Filter from a QFX3008-I Interconnect Device” on page 341.
To install a 16-port QSFP+ front card in a QFX3008-I Interconnect device, follow the
instructions in “Installing a 16-Port QSFP+ Front Card in a QFX3008-I Interconnect Device”
on page 353. Toremove a 16-port QSFP+ front card from a QFX3008-I Interconnect device,
Copyright © 2012, Juniper Networks, Inc.322
QFX3000 Hardware Documentation