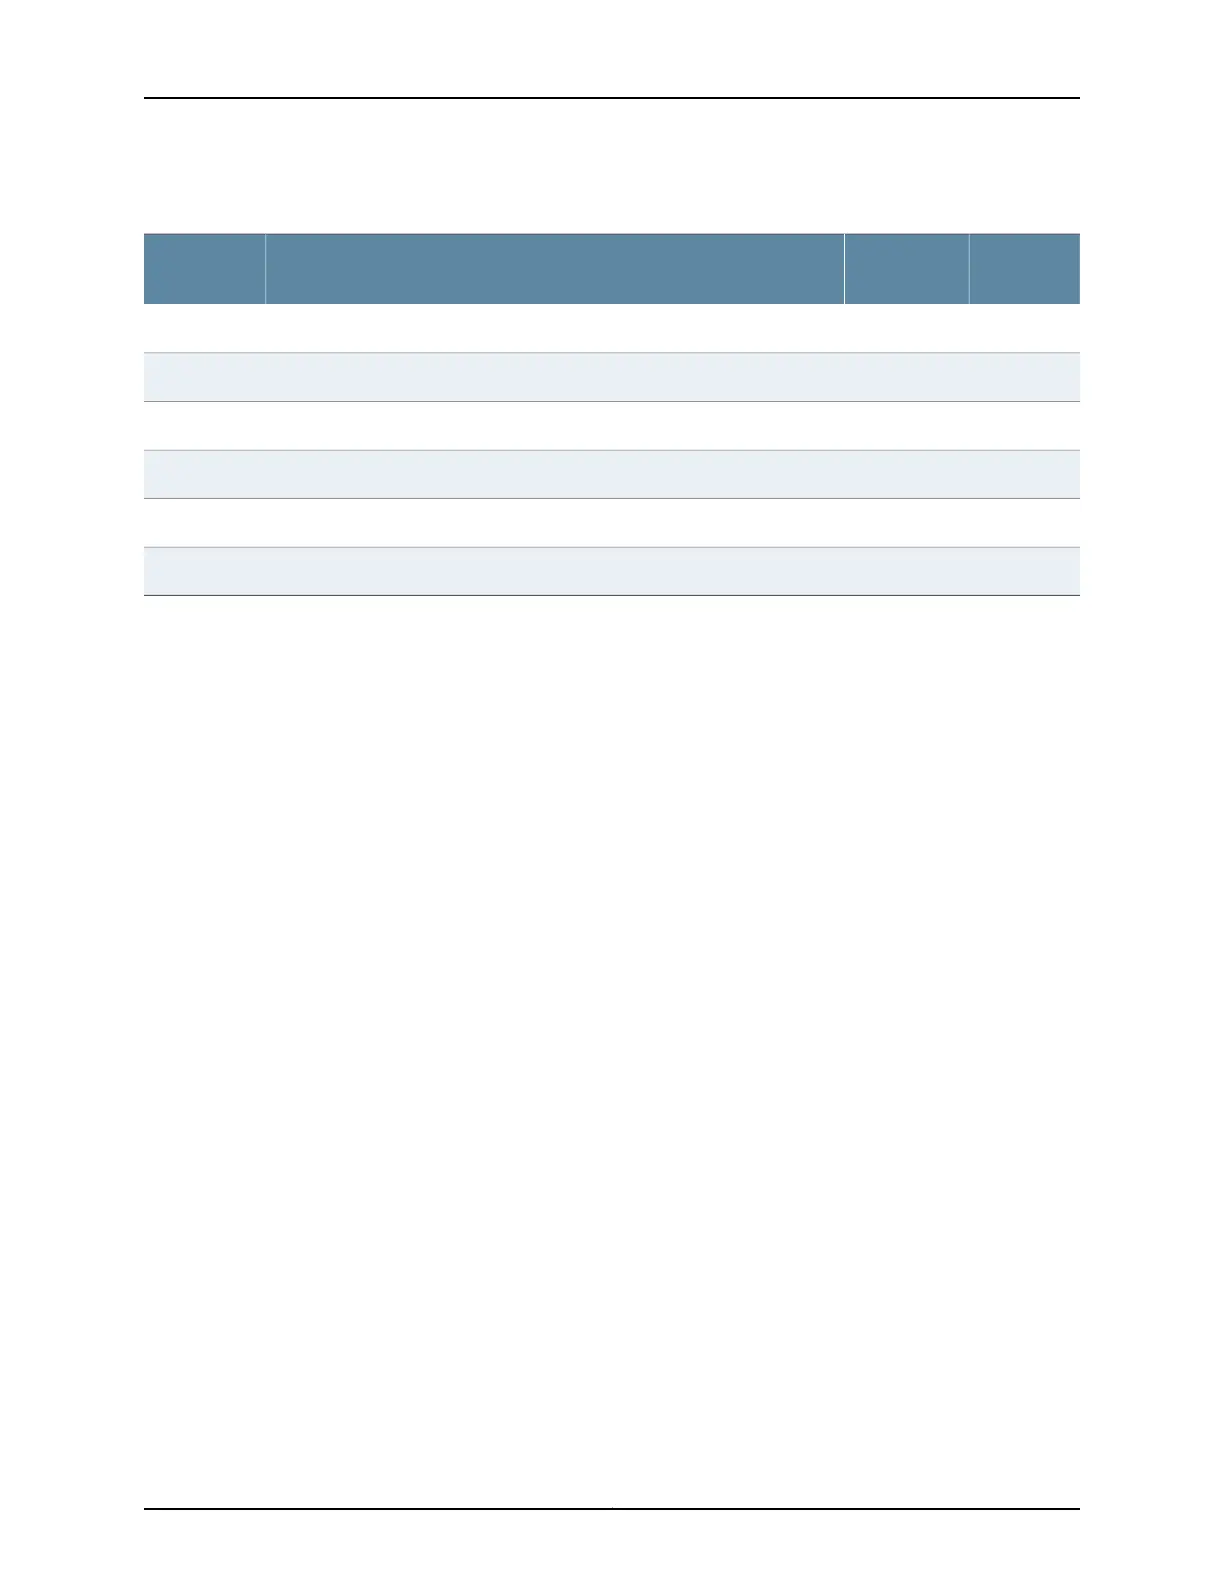
Table 61: Two-Post Rack Mounting Hole Locations (continued)
Small
ShelfLarge ShelfDistance Above “U” DivisionHole
X3.86 U6.76 in. (17.1 cm)12
X2.86 U5.01 in. (12.7 cm)9
X1.86 U3.26 in. (8.3 cm)6
XX0.86 U1.51 in. (3.8 cm)3
XX0.50 U0.88 in. (2.2 cm)2
X0.14 U0.25 in. (0.6 cm)1
This topic describes these tasks:
1.
Installing Cage Nuts for QFX3008-I Interconnect Device Two-Post Rack
Mounting on page 233
2.
Installing the Small Mounting Shelf for QFX3008-I Interconnect Device Two-Post
Rack Mounting on page 233
3.
Installing the Large Mounting Shelf for QFX3008-I Interconnect Device Two-Post
Rack Mounting on page 234
Installing Cage Nuts for QFX3008-I Interconnect Device Two-Post Rack Mounting
For racks without threaded holes, you must install cage nuts on the rack rails in the
locations specified in Table 61 on page 232 (an X indicates a mounting hole location). The
hole distances are relative to one of the standard “U” divisions on the rack rails. The
bottom of all mounting shelves is at 0.04 in. (0.02 U) above a U division.
Before you begin, ensure that you have 28 cage nuts appropriate for your rack.
To install the cage nuts in the proper locations:
1. On the front rack rail, install cage nuts in the holes specified in Table 61 on page 232
for the small shelf.
2. On the front rack rail, install cage nuts for the center-mounting brackets. The
center-mounting brackets have holes for rack-mounting screws, spaced at
3.5 in. (8.89 cm).
3. On the rear rack rail, install cage nuts in the holes specified in Table 61 on page 232 for
the large shelf.
Installing the Small Mounting Shelf for QFX3008-I Interconnect Device Two-Post Rack Mounting
To mount the chassis on a two-post rack, you must first install the mounting shelves on
the rack.
233Copyright © 2012, Juniper Networks, Inc.
Chapter 19: Installing a QFX3008-I Interconnect Device