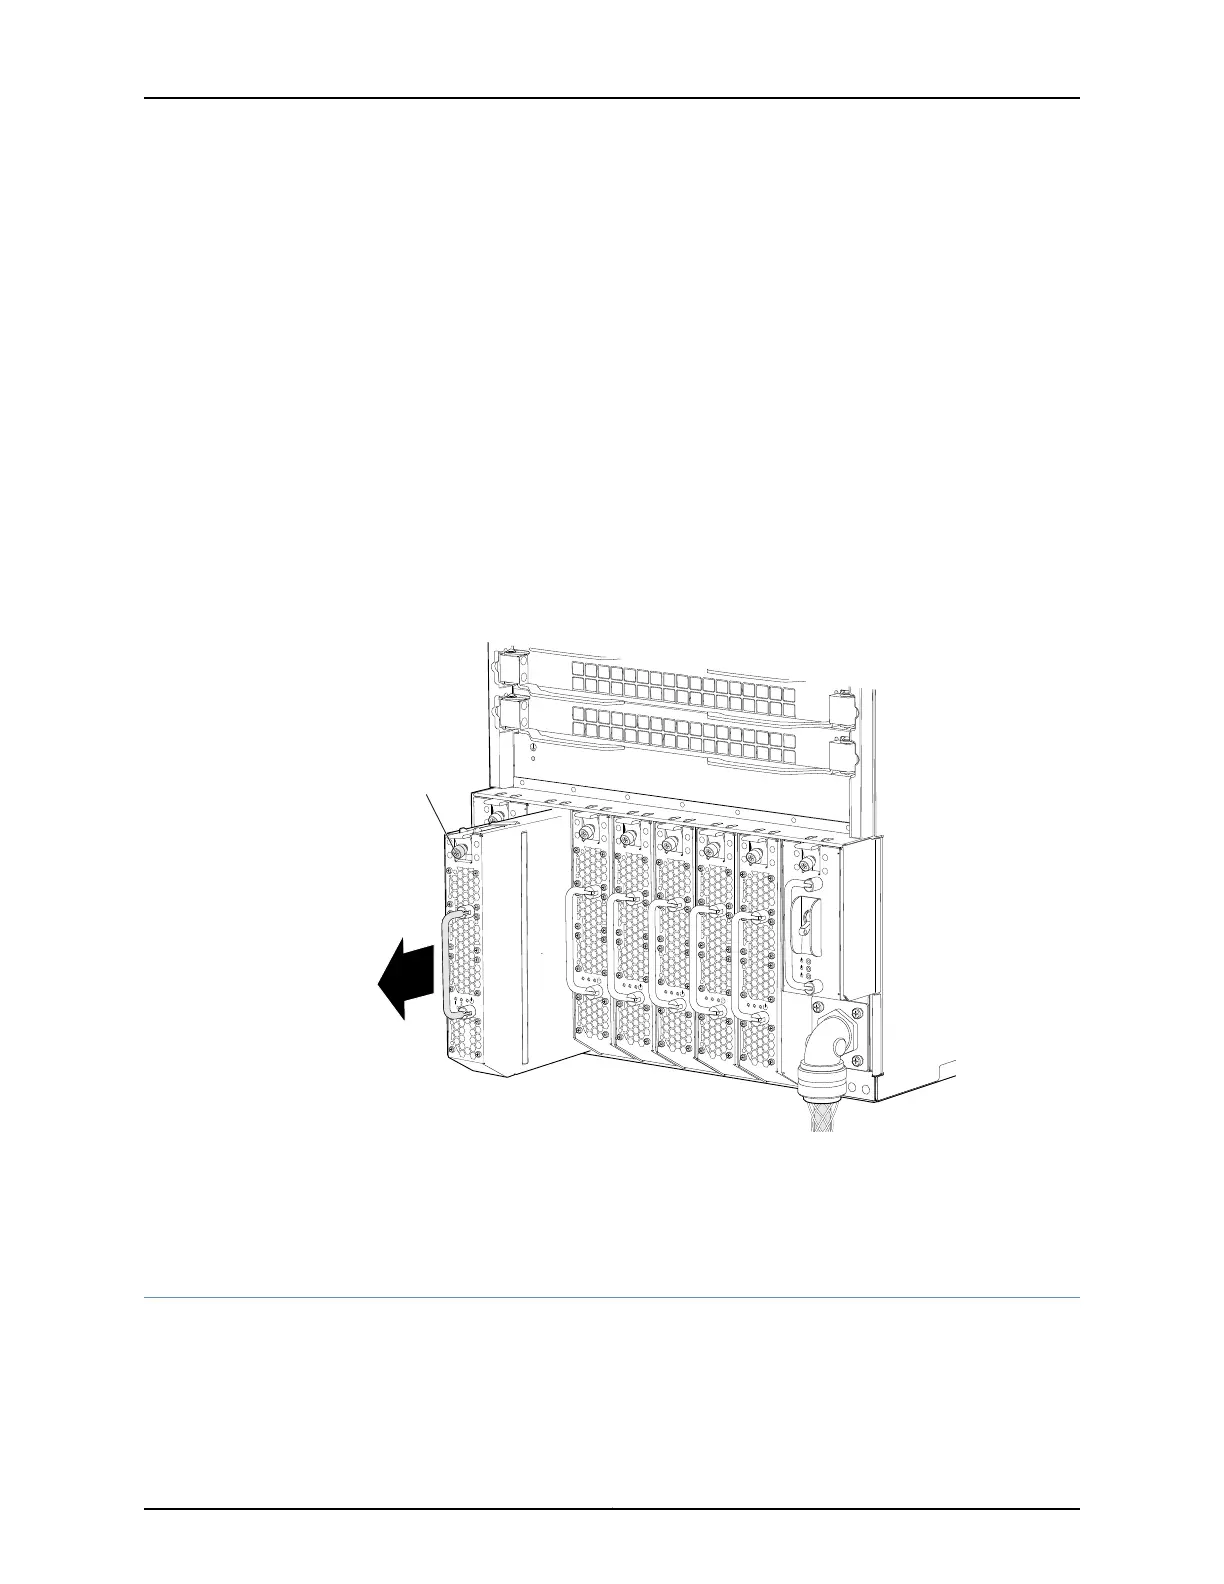
1. Attach the ESD grounding strap to your bare wrist, and connect the strap to the ESD
point on the chassis.
2. Unscrew the captive screw, located at the top of each power supply, counter-clockwise
using your fingers. If you cannot easily unscrew the captive screw with your fingers,
use the screwdriver.
3. Pull the captive screw away from the faceplate of the power supply to release the
latch.
4. Pull the handle away from the faceplate of the power supply until it is perpendicular
to the faceplate.
5. Taking care not to touch power supply components,pins, leads, or solder connections,
place one hand under the power supply to support it. Grasp the power supply handle
with your other hand and pull the power supply completely out of the chassis.
Figure96: Removing an AC Power Supply from a QFX3008-IInterconnect
Device
Related
Documentation
AC Power Supply in a QFX3008-I Interconnect Device on page 52•
• Installing an AC Power Supply in a QFX3008-I Interconnect Device on page 324
Installing an AC Power Supply in a QFX3008-I Interconnect Device
The AC power supply in a QFX3008-I Interconnect device is a hot-insertable and
hot-removable field-replaceable unit (FRU). Six AC power supplies are installed in the
chassis. All power supplies install in the rear of the chassis in the slots provided at the
bottom. See “Slot Numbering for a QFX3008-I Interconnect Device” on page 40.
Copyright © 2012, Juniper Networks, Inc.324
QFX3000 Hardware Documentation