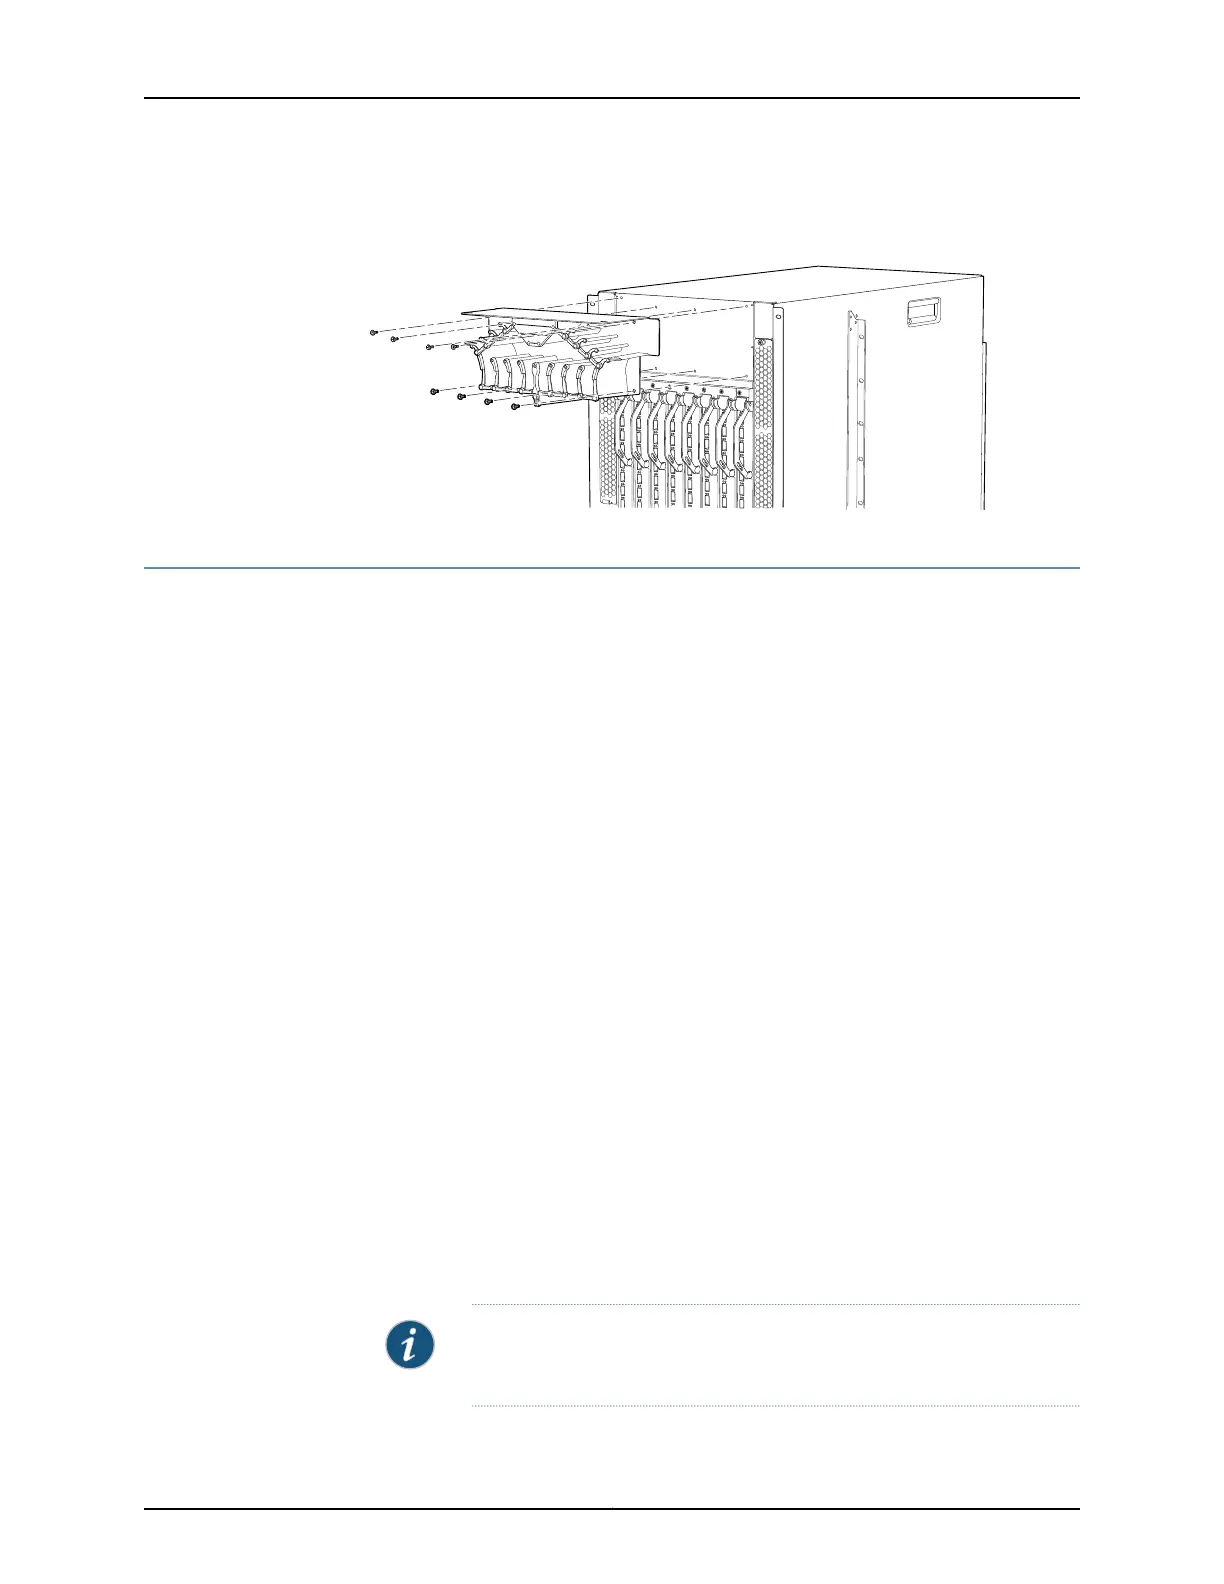
Figure 72: Installing the Cable Management System on a QFX3008-I
Interconnect Device
Installing the Lockable Front Doors on a QFX3008-I Interconnect Device
The lockable front doors cover the front card cage. A captive thumbscrew at the base
where the doors meet secures the doors in a closed position. You can also lock these
doors in the closed position to prevent cables, transceivers, or front cards from being
removed. You must provide the lock. The lockable front doors are an optional
field-replaceable unit (FRU).
Before you begin, ensure that you have the following parts and tools available to install
the lockable front doors on a QFX3008-I Interconnect device:
•
Electrostatic discharge (ESD) grounding strap
•
Phillips (+) screwdriver, number 1
•
Eight mounting screws—These screws are already installed on the chassis, in each
corner of the top and bottom front card cage ejector lever receptacle bars.
To install the lockable front doors on a QFX3008-I Interconnect device (see Figure 73
on page 257):
1. Attach the ESD grounding strap to your bare wrist, and connect the strap to the ESD
point on the chassis.
2. Remove the two screws at each corner of the top and bottom front card cage ejector
lever receptacle bars. The screws are located in the inset portion of the bar.
3. Place one of the doors on the chassis, aligning the holes on its faceplate with the
mounting holes on the chassis.
4. Install the four mounting screws, tightening them by turning them clockwise using the
Phillips (+) screwdriver, number 1.
5. Repeat Step 2 through Step 4 for the other door.
NOTE: The doors must be in the open position to remove or install the
bottom fan tray and front panel display.
Copyright © 2012, Juniper Networks, Inc.256
QFX3000 Hardware Documentation