5. Ensure that the network module is properly aligned with the network module slot.
Thenetwork module faceplate shouldbe aligned so the ports are numbered 0 through
3 from left to right.
6. Insert the network module into the network module slot, and gently push the module
all the way into the slot until the module is seated flush in the network module slot.
CAUTION: Do not use too much force to seat the network module flush
into the network module slot. If backpressure is preventing the network
modulefrom seating flush in the networkmodule slot, remove the network
module from the slot and retry the procedure, taking care to ensure that
the network module is properly aligned with the network module slot.
7. Tighten both screws on the network module, using your fingers.
8. Power on the QFX3100 Director device. See “Powering On a QFX3100 Director Device”
on page 220.
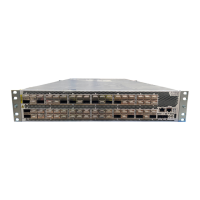
Figure 93: Installing a Network Module in a QFX3100 Director Device
Slot
0
1
1
2
g050054
Tighten captive screws.
Related
Documentation
Network Modules in a QFX3100 Director Device on page 28•
• Rear Panel of a QFX3100 Director Device on page 26
Removing an HDD Module from a QFX3100 Director Device
QFX3100 Director devices have two 2-terabyte (TB) hard disk drive (HDD) module slots
on the front panel. HDD modules are field-replaceable units (FRUs). At least one HDD
module should always be installed in a QFX3100 Director device.
Before you begin removing an HDD module from a QFX3100 Director device:
•
Ensure that you understand how to prevent electrostatic discharge (ESD) damage.
See “Prevention of Electrostatic Discharge Damage” on page 192.
Ensure that you have the following parts and tools available:
317Copyright © 2012, Juniper Networks, Inc.
Chapter 25: Replacing QFX3100 Components