•
ESD grounding strap
•
Phillips (+) screwdriver, number 2
•
Antistatic bag or antistatic mat
•
Replacement HDD module for the HDD module slot
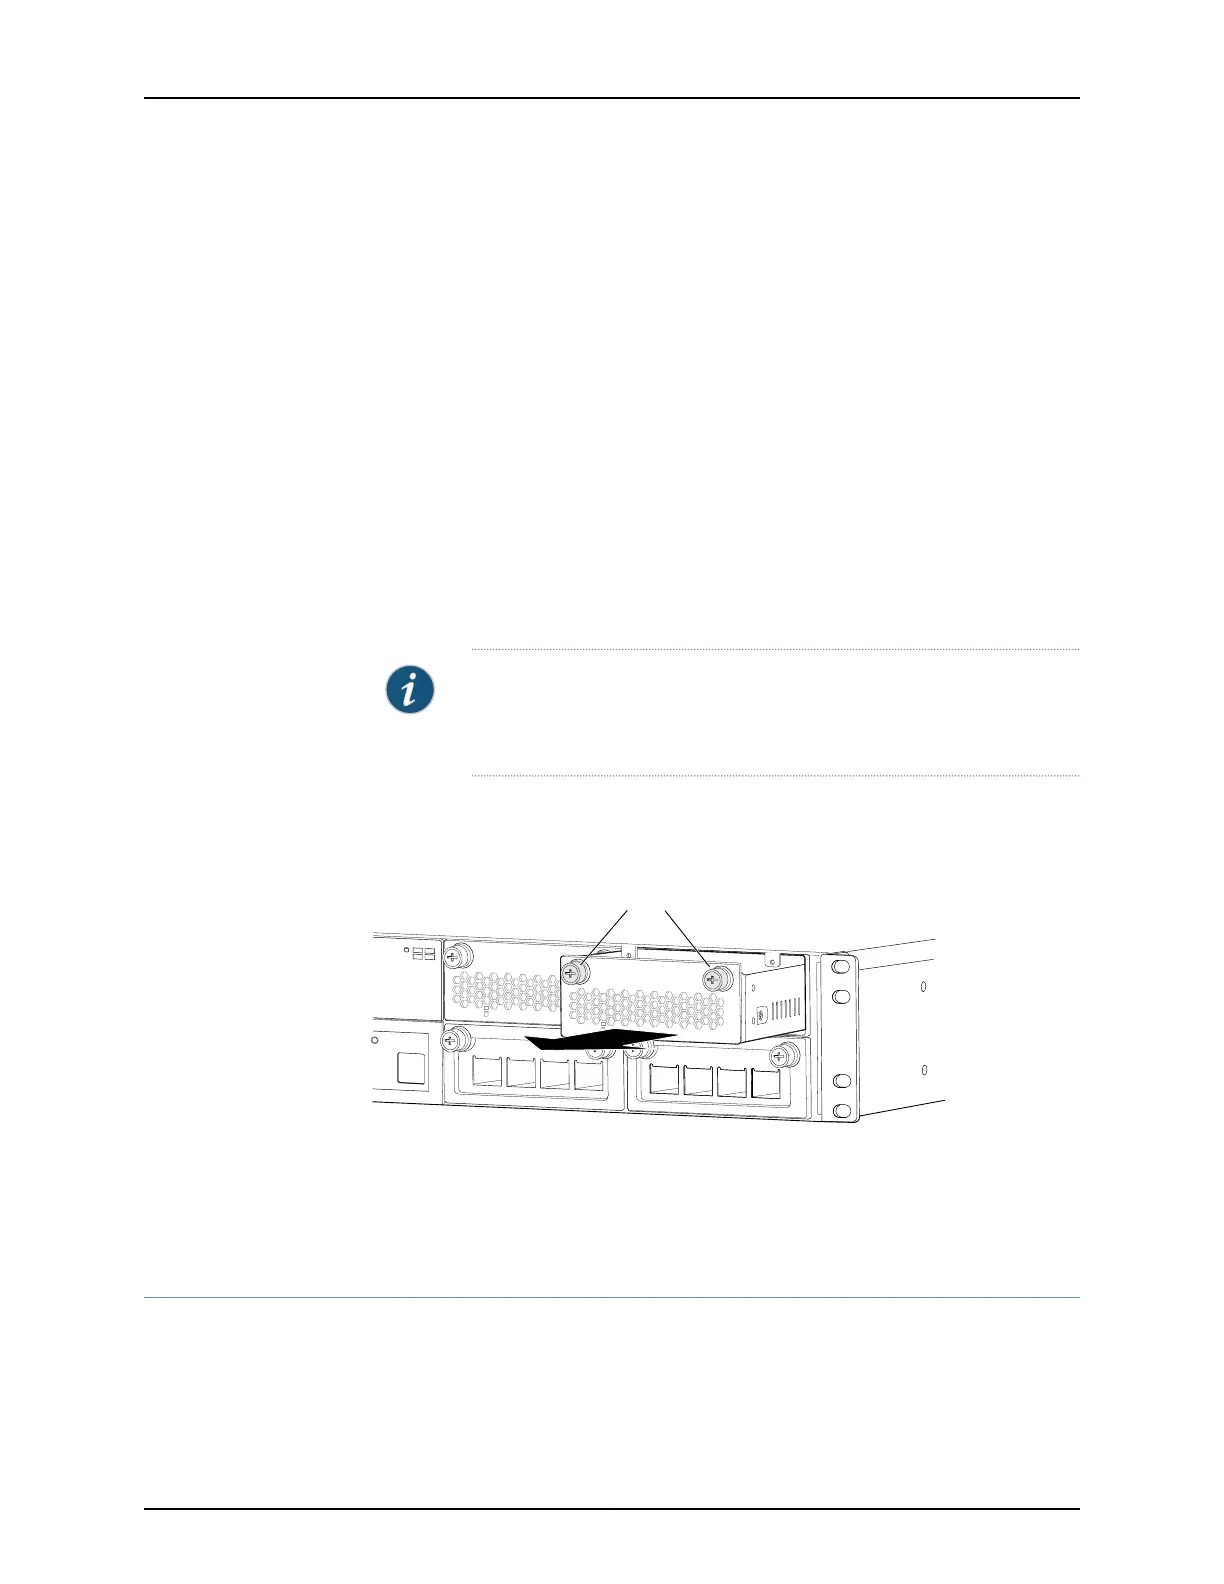
To remove an HDD module from a QFX3100 Director device (see Figure 94 on page 318):
1. Attach the ESD grounding strap to your bare wrist, and connect the strap to a site ESD
point.
2. Place the antistatic bag or the antistatic mat on a flat, stable surface.
3. Unscrew both captive screws counterclockwise using your fingers. If you are unable
to unscrew the captive screws using your fingers, use the screwdriver.
4. Gently pull the HDD module toward you and out of the HDD module slot, being careful
to keep one hand underneath the module to support it when it is removed from the
chassis.
NOTE: If the Director device is powered on, at least one HDD module must
be installed at all times. This step should only be performed when an HDD
module in the other HDD slot is installed and operational.
5. Place the HDD module in the antistatic bag or on the antistatic mat.
Figure 94: Removing an HDD Module from a QFX3100 Director Device
Slot
0
1
1
2
g050065
Loosen captive screws.
Related
Documentation
Installing an HDD Module in a QFX3100 Director Device on page 318•
• HDD Modules in a QFX3100 Director Device on page 29
Installing an HDD Module in a QFX3100 Director Device
QFX3100 Director devices have two 2-terabyte (TB) hard disk drive (HDD) module slots
on the front panel. HDD modules are field-replaceable units (FRUs).
Copyright © 2012, Juniper Networks, Inc.318
QFX3000 Hardware Documentation