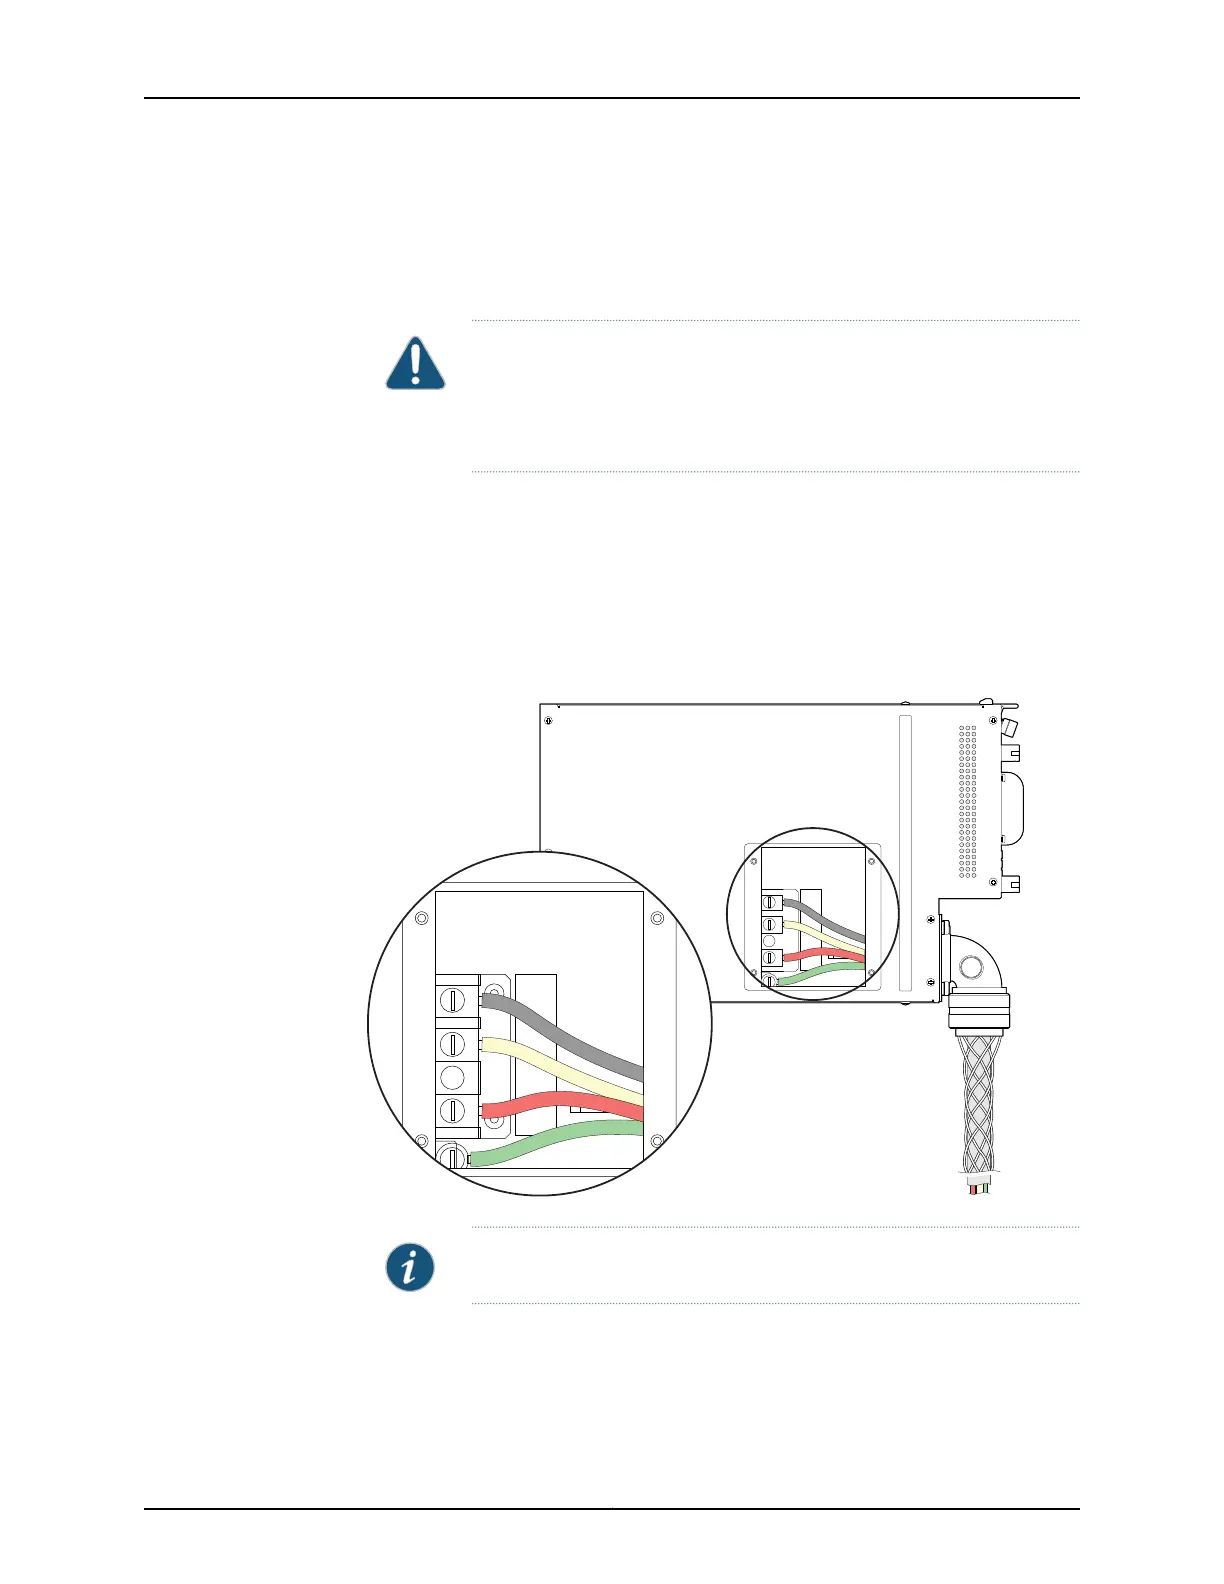
7. Connect the wires to the AC terminal block on the three-phase delta wiring tray (Figure
70 on page 249). Use a 1/4-in. slotted screwdriver to loosen the input terminal or
grounding point screw, insert each wire into the grounding point or input terminal, and
tighten the screw to between 23 in-lb (2.6 Nm) and 25 in-lb (2.8 Nm).
CAUTION: You must use an appropriate torque-controlled tool to tighten
the screws on the terminal block. Applying excessive torque damages the
terminal block and the wiring tray. The absolute maximum torque that
may be applied to this screw is 50 in-lb (5.6 Nm).
a. Insert the wire labeled GND into the grounding point labeled GND.
b. Insert the wire labeled L1 into the L1 input terminal.
c. Insert the wire labeled L2 into the L2 input terminal.
d. Insert the wire labeled L3 into the L3 input terminal.
Figure 70: Connecting Power to a Three-Phase Delta AC Power Supply
NOTE: The color of each AC power wire might vary.
8. Verify that the power cable connections are correct.
249Copyright © 2012, Juniper Networks, Inc.
Chapter 19: Installing a QFX3008-I Interconnect Device