Ensure that you have the following parts and tools available to remove a rear card from
a QFX3008-I Interconnect device:
•
Electrostatic discharge (ESD) grounding strap
•
Antistatic bag or antistatic mat
•
Replacement rear card
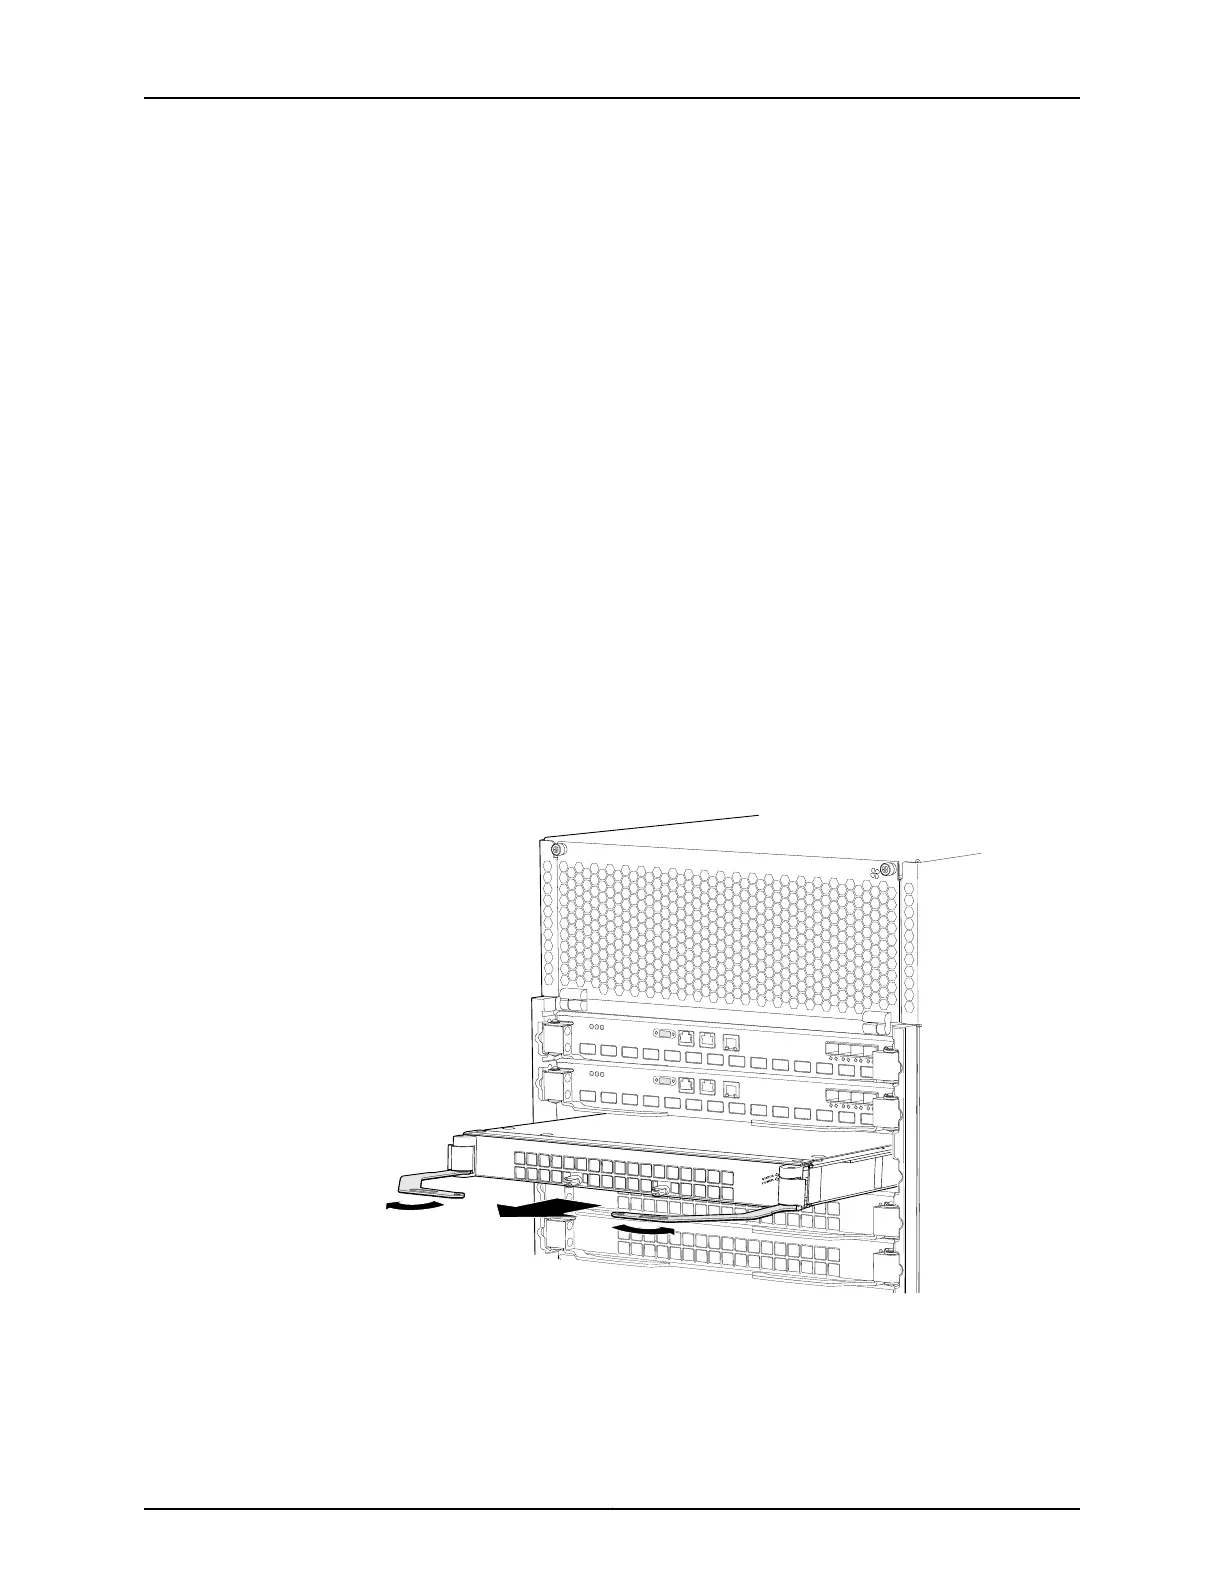
To remove a rear card (see Figure 116 on page 357):
1. Attach the ESD grounding strap to your bare wrist, and connect the strap to the ESD
point on the chassis.
2. Place the antistatic bag or antistatic mat on a flat, stable surface.
3. Pull both the ejector levers outward simultaneously, away from the faceplate of the
rear card, until they go no further. This action causes the rear card to slide out of the
chassis slightly.
4. Grasping the ejector levers, pull the rear card about halfway out.
5. Taking care not to touch the leads, pins, or solder connections, place one hand
underneath the rear card to support it, and slide it out of the chassis completely.
6. Place the rear card in the antistatic bag or on the antistatic mat.
Figure 116: Removing a Rear Card from a QFX3008-I Interconnect Device
Related
Documentation
Rear Cards in a QFX3008-I Interconnect Device on page 51•
• Rear Card LEDs on a QFX3008-I Interconnect Device on page 393
• Installing a Rear Card in a QFX3008-I Interconnect Device on page 358
357Copyright © 2012, Juniper Networks, Inc.
Chapter 26: Replacing QFX3008-I Components
 Loading...


