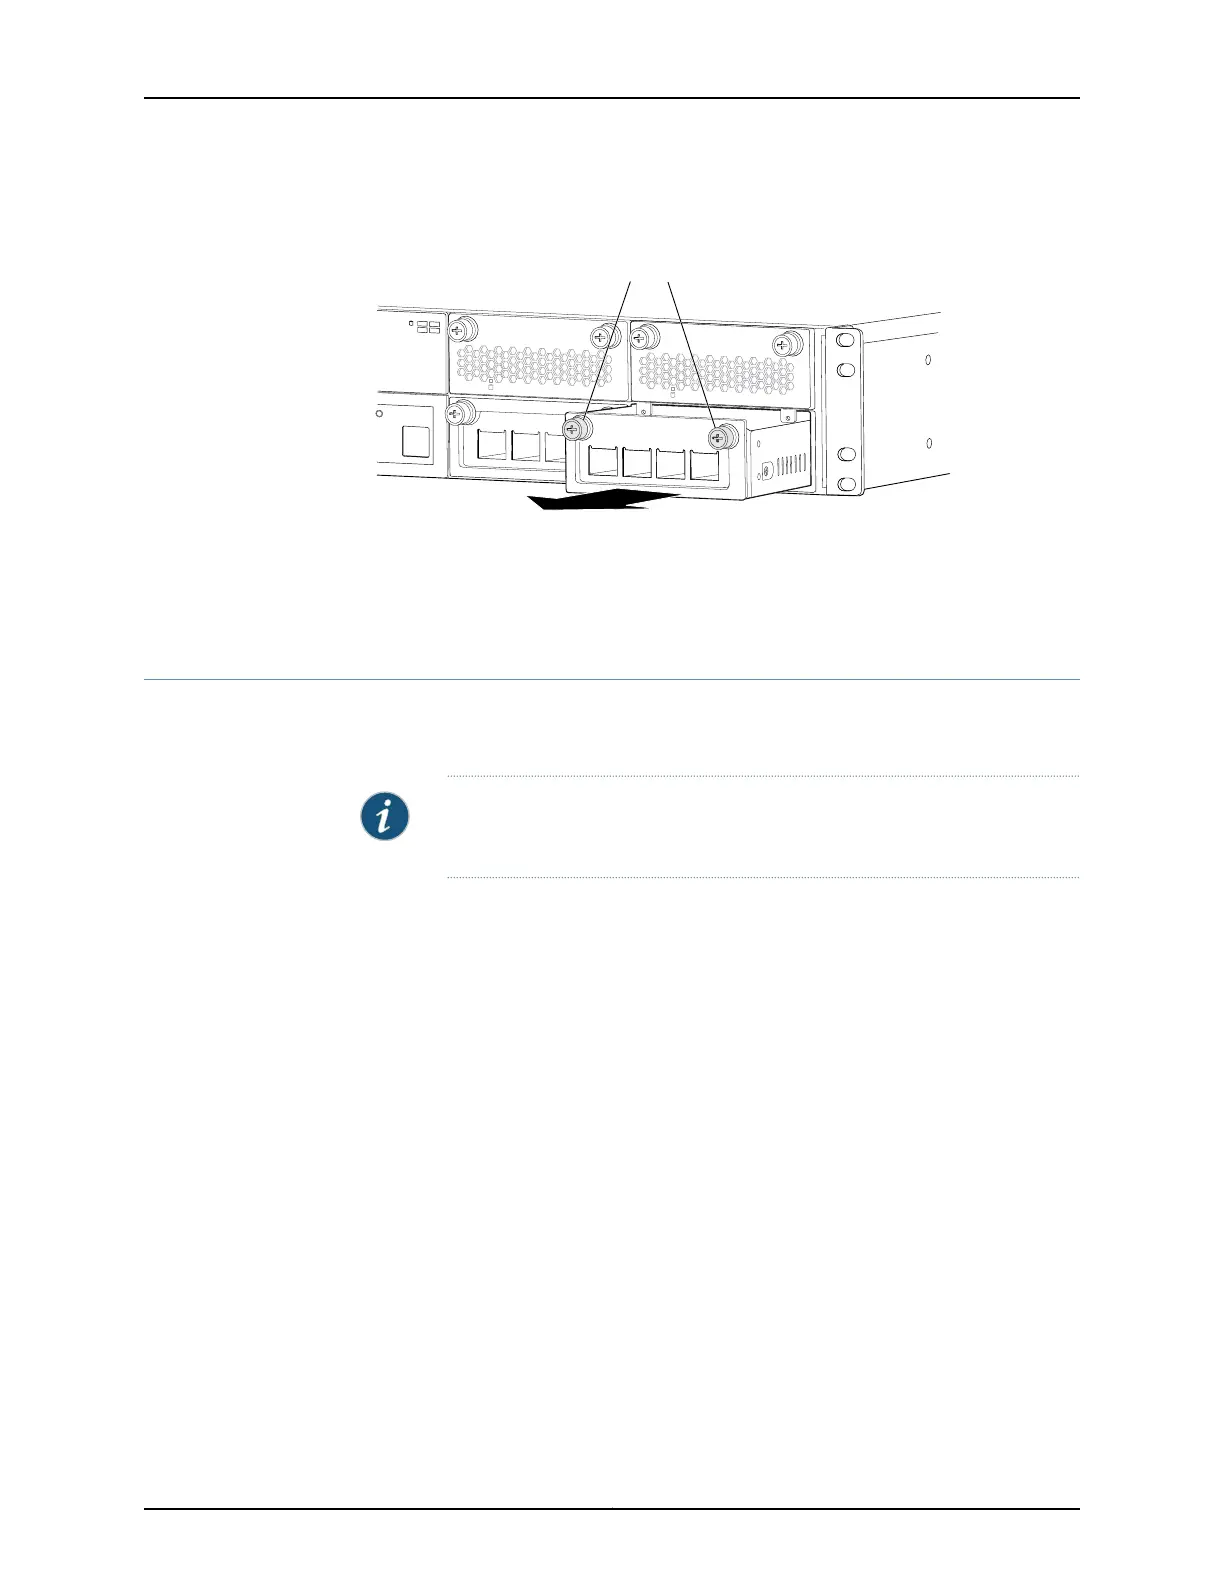
Figure 92: Removing a Network Module from a QFX3100 Director Device
Slot
0
1
1
2
g050056
Loosen captive screws.
Related
Documentation
Installing a Network Module in a QFX3100 Director Device on page 316•
• Network Modules in a QFX3100 Director Device on page 28
Installing a Network Module in a QFX3100 Director Device
QFX3100 Director devices have two network module slots on the front panel. Network
modules are field-replacable units (FRUs).
NOTE: The Director device requires powering off beforeinstallation or removal
of the network module.
Before you begin installing a network module in a QFX3100 Director device:
•
Ensure that you understand how to prevent electrostatic discharge (ESD) damage.
See “Prevention of Electrostatic Discharge Damage” on page 192.
Ensure that you have the following parts and tools available:
•
ESD grounding strap
To install a network module in a QFX3100 Director device (see Figure 93 on page 317):
1. Attach the ESD grounding strap to your bare wrist, and connect the strap to a site ESD
point.
2. Power off the QFX3100Director device. See “Powering Off a QFX3100 Director Device”
on page 295.
3. If the network module slot has an installed network module, remove the network
module. See “Removing a Network Module from a QFX3100 Director Device” on
page 315.
4. Taking care not to touch network module components, pins, leads, or solder
connections, remove the network module from its bag.
Copyright © 2012, Juniper Networks, Inc.316
QFX3000 Hardware Documentation