Chapter 5 Parameters Definition
176
As an alternative to the central computer for data collection, data files can be
transferred instead to a mapped network drive at a preset time every day (when “Send
Data Log, Method, Mapped Drive – Daily is chosen) or at the next opportunity (when
“Send Data Log, Method Mapped Drive – next Opportunity” is chosen).
The Mapped Network Drive data transfer method requires that a drive letter be
assigned during the boot-up sequence to specify the network drive destination.
If the remote computer is not available during Windows 7 computer start up, then it is
marked as a disconnected drive. The monitor must be rebooted or manually have this
connection restored for the monitor program to send data file to the remote directory.
A password change on the remote computer must also be manually updated on each
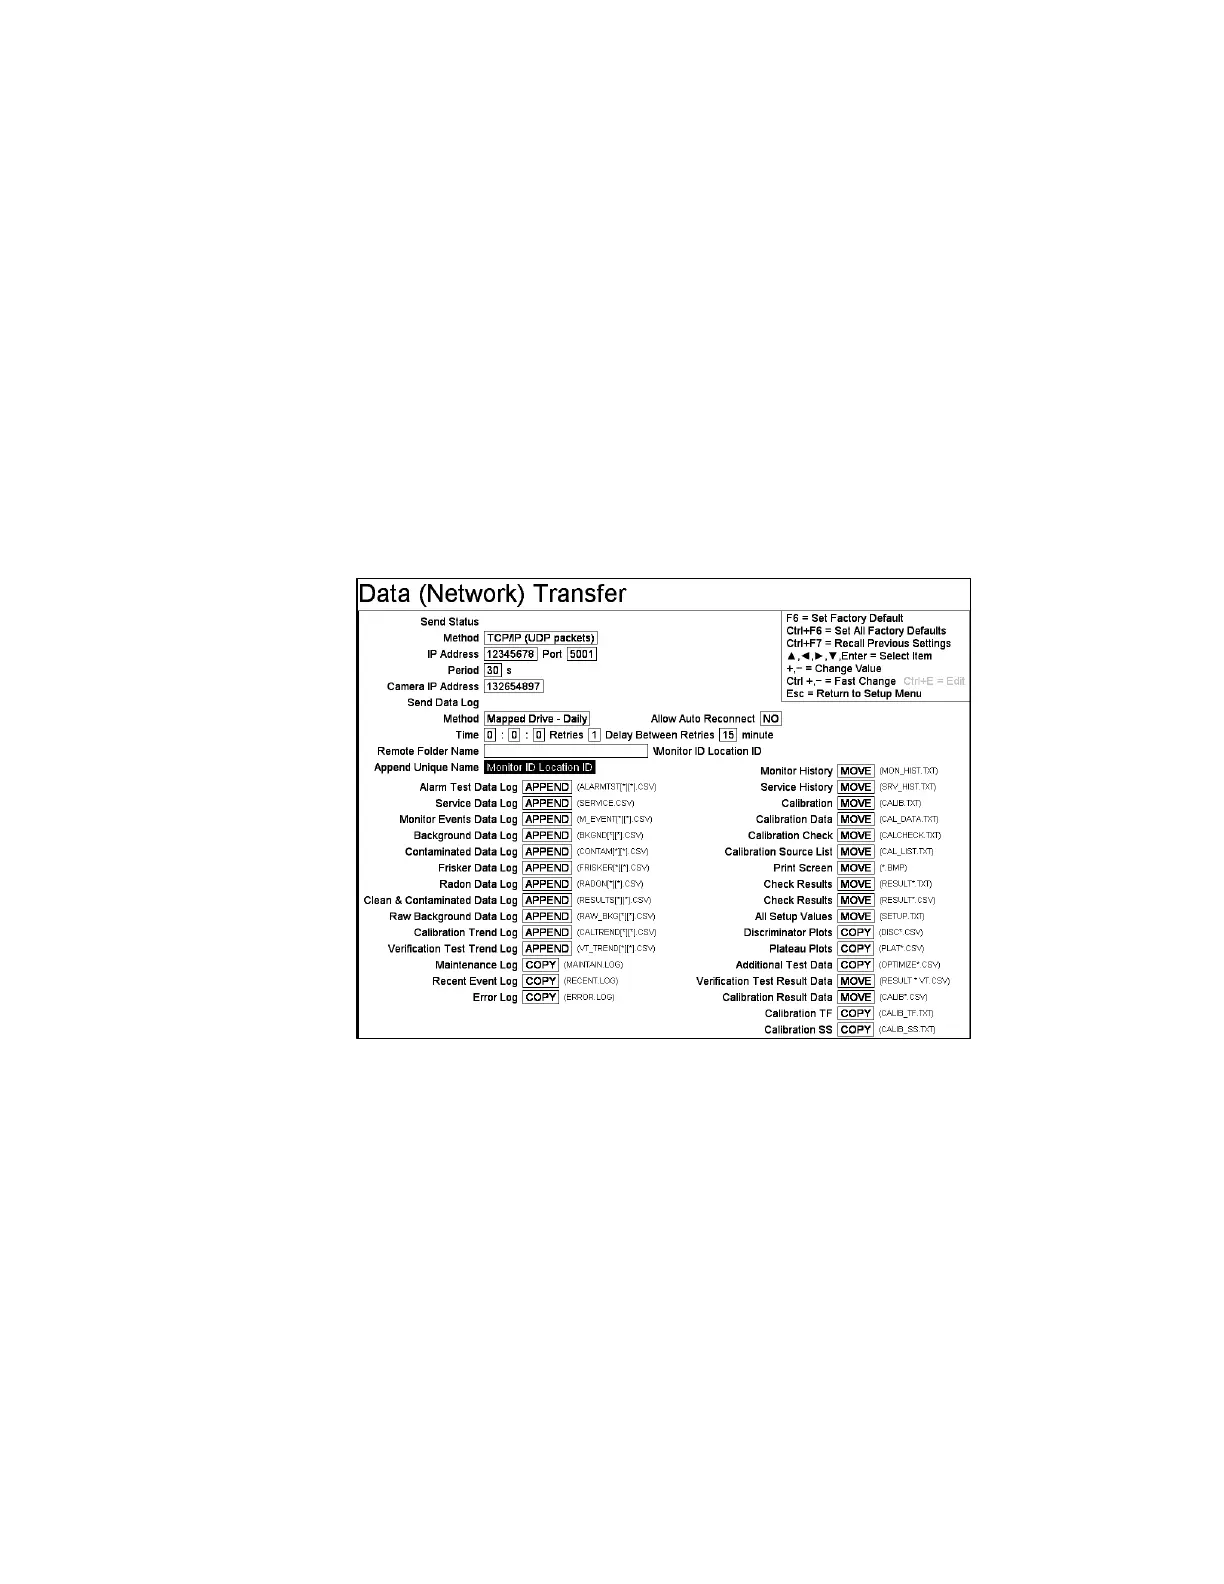
monitor sending files to it. The setup screen for Mapped Drive data transfer is shown
in Figure 76 below. A Directory Name text box appears beside Remote Folder
Name containing the (mapped) drive letter and unique item chosen in the Append
Unique Name item (e.g. Z:\UNIQUEID).
Figure 76 Data (Network) Transfer setup for a Mapped Drive
If neither central monitoring nor the mapped drive method is used then files may be
transferred manually to a USB compatible memory device (assume F: drive). The
following procedure can be used:
1. Insert the memory device interface into the USB port. Use Windows Explorer
to copy all *.CSV, *.LOG, *.TXT, and *.BMP files from the
D:\MonitorProgram\DATALOG directory to Z:\UNIQUEID.
2. Once the CSV and TXT files have been “APPEND”-ed or “COPY”-ed (as
applicable) they should be deleted from the hard disk to prevent the files from
becoming too large. The *.LOG files are normally not deleted.