6 - 6 BeneVision N22/N19 Patient Monitor Operator’s Manual
6.6.2.1 About Alarm Watch Tile
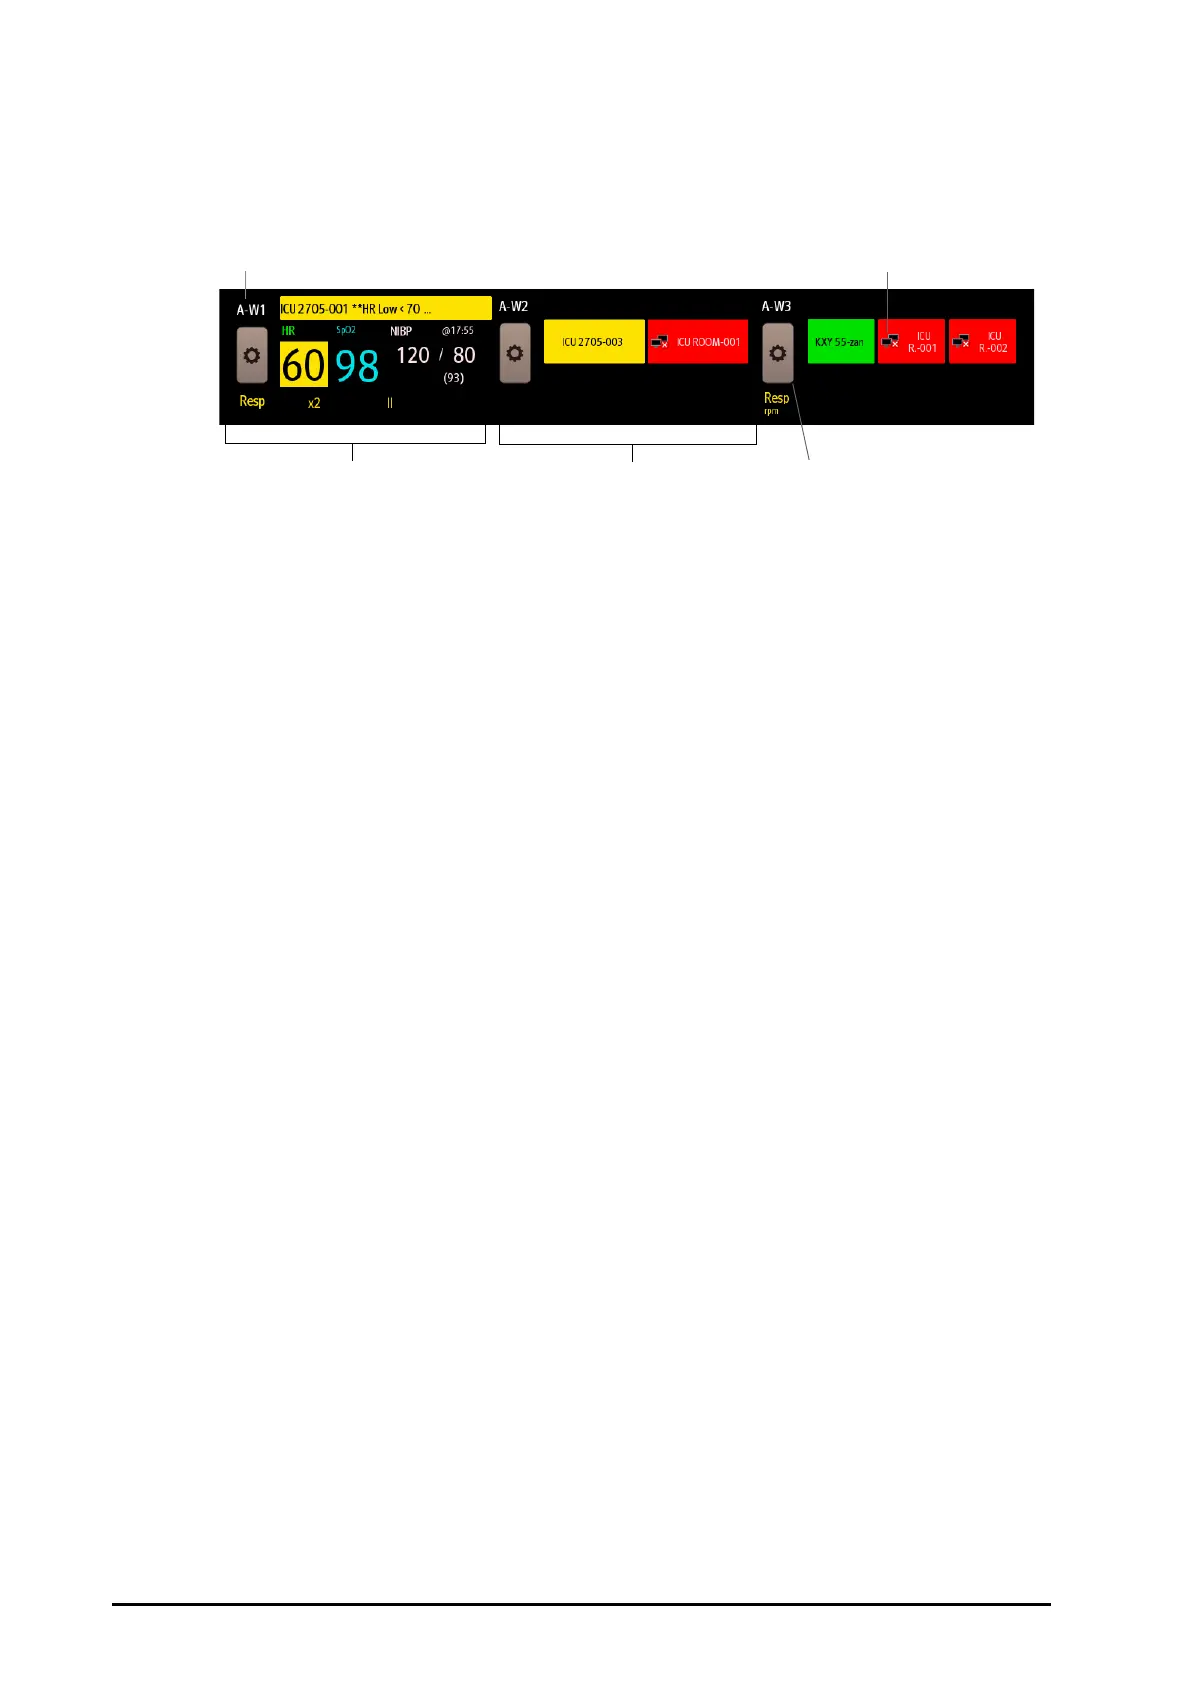
The main screen can display up to three alarm watch tiles, namely A-W1, A-W2 and A-W3. Each tile can
accommodate up to six beds.
The following figure shows the alarm watch tiles.
The alarm watch tile is similar to alarm watch area in the Remote View. For more information, see 6.6.1.2 About
the Remote View.
6.6.2.2 Displaying the Alarm Watch Tile on the Main Screen
To configure the alarm watch tile to be displayed on the monitor’s main screen, follow this procedure:
1. Select the Main Menu quick key → from the Display column select Choose Screen to enter the Screen
Setup menu.
2. Select the Tile Layout tab.
3. Select the numeric area where you want to display the alarm watch tile, and then in the drop-down list,
select Alarm Watch → A-W1, A-W2, or A-W3.
6.7 Configuring the Network
6.7.1 Selecting a Network Type
To select network type, follow this procedure:
1. Select the Main Menu quick key → turn to the third page → from the System column select Maintenance
→ input the required password → select Ok.
2. Select the Network Type tab.
3. Set Monitor to Auto, LAN1, or WLAN according to your network type. The default is Auto, which means
the monitor can automatically identify your network type.
(1) Alarm watch tile label
(2)
Disconnection icon: when the remote device is disconnected, this icon displays at the tile, and the tile
background color is red.
(3)
Select bed icon: select it to enter the Select Bed window.
(4)
More than one bed tile: when more than one bed is assigned to a tile, the tile displays the alarm status,
connection status, etc.
(5)
One bed tile: when only one bed is assigned to a tile, the tile displays the parameter value and alarm
message from this bed, etc.