INSTALLATION
Sysmex SF-3000 Operator's Manual -- Revised December 1995 B-31
11. POWER ON AND SYSTEM SETUP
The following procedures should be done by your Sysmex service representative at the
time of installation. The outline of each procedures are described below for your
reference.
11.1 Power On
(1) Connect the Main Unit power connector to the AC power outlet using the power
cord provided in the supply part.
(2) Turn ON the power to the Main Unit and start up the instrument in the Hot Start
mode. Perform "Format BBU".
(3 ) Turn OFF the power to the Main Unit.
(4) Turn ON the power of the printer(s) and/or host computer, if installed.
(5) Turn ON the power of the Pneumatic Unit, and then Main Unit. Start up the
instrument in the Hot Start mode. Skip the Auto Rinse.
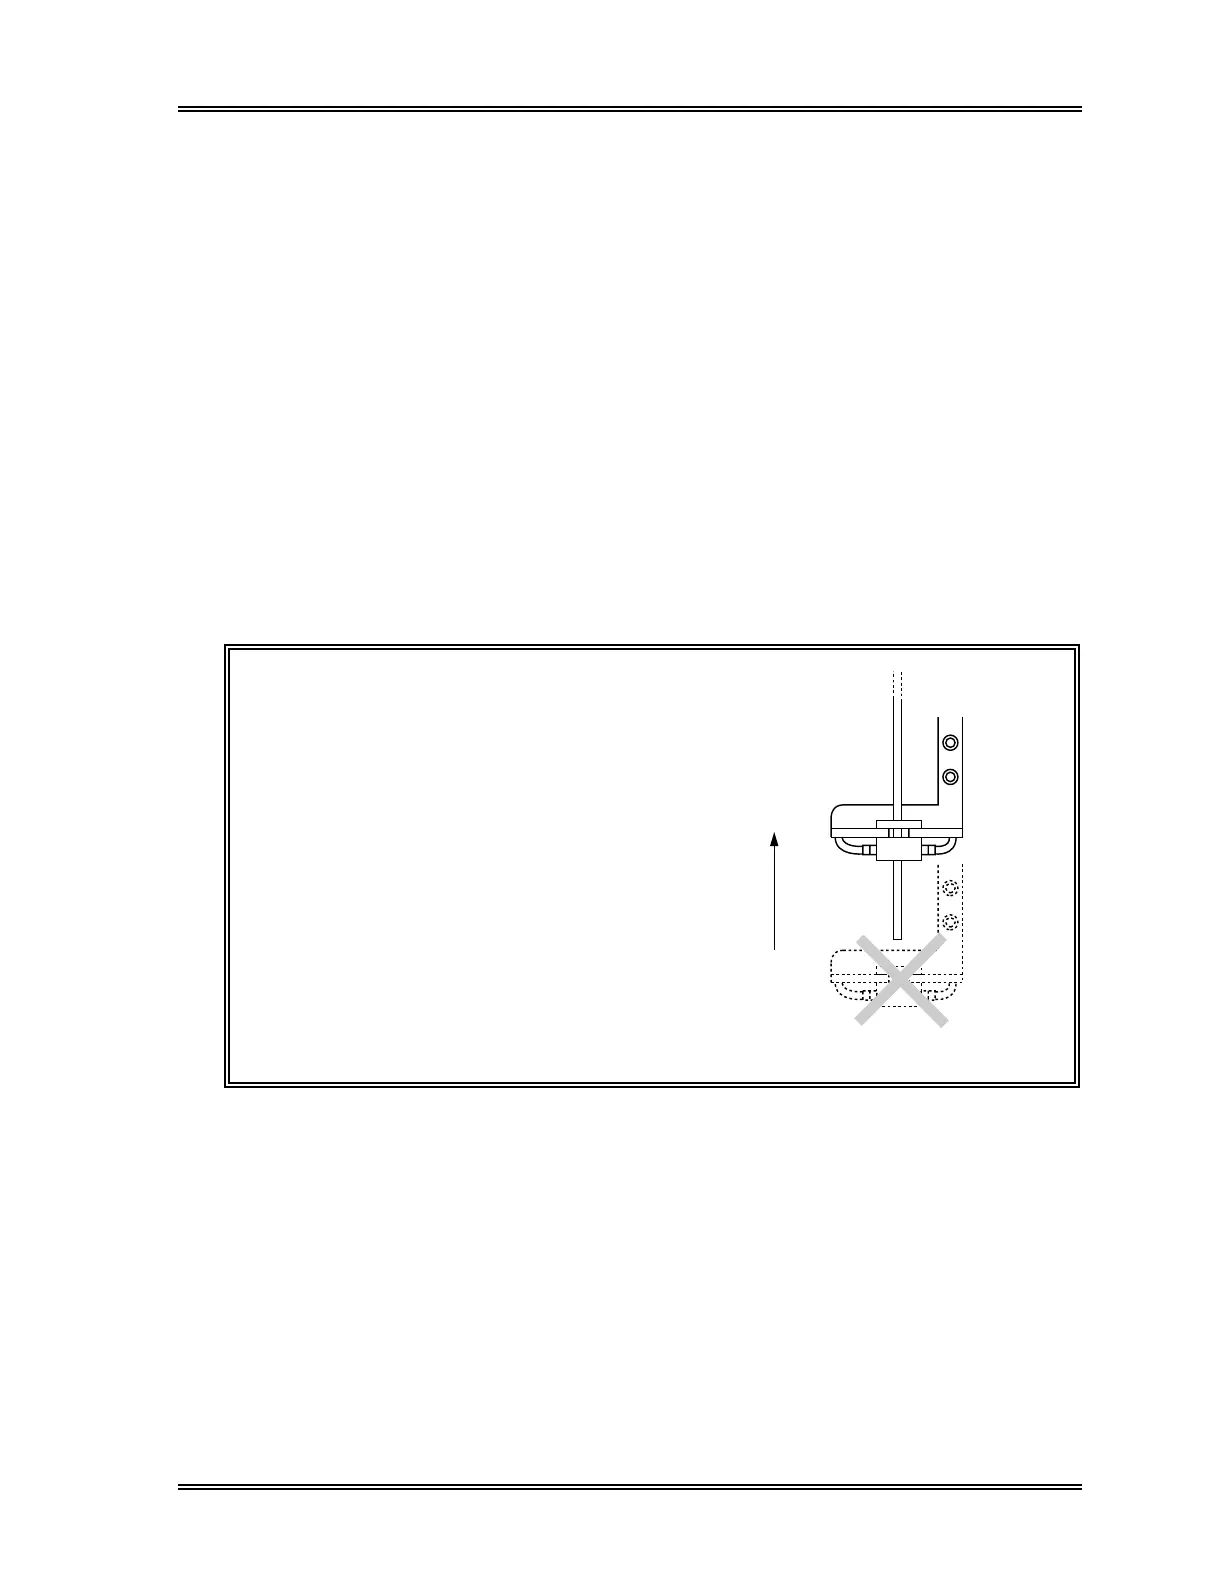
CAUTION:
When the Rinse Mechanism comes out
from the Whole Blood Aspiration Pipette
completely, insert the pipette into the
Rinse Mechanism hole by hands referring
to the Figure B-44.
If not inserted properly, "Rinse Motor
Function Error" may occur when turning the
power ON.
Figure B-44: Rinse Mechanism Position
11.2 System Setup
(1) When the instrument changes to the READY status, set "Time/Date". Refer to
Chapter 11: System Setup.
(2) When an optional host computer and/or printer(s) is used, refer to Chapter 11:
System Setup for the connection and configuration.
(3) When an optional Sampler Unit/Manual CP Unit and/or ID Bar Code Reader is
used for the SF-3000, change the software DIP switch settings.
(4) Prime the hydraulic lines.
Sysmex SF-3000 Operator's Manual -- Revised March 2001