Page 207 2
nd
Edition – Rev 0
23 – 10
COMM 1 and 2 – MANTEINANCE PRACTICE
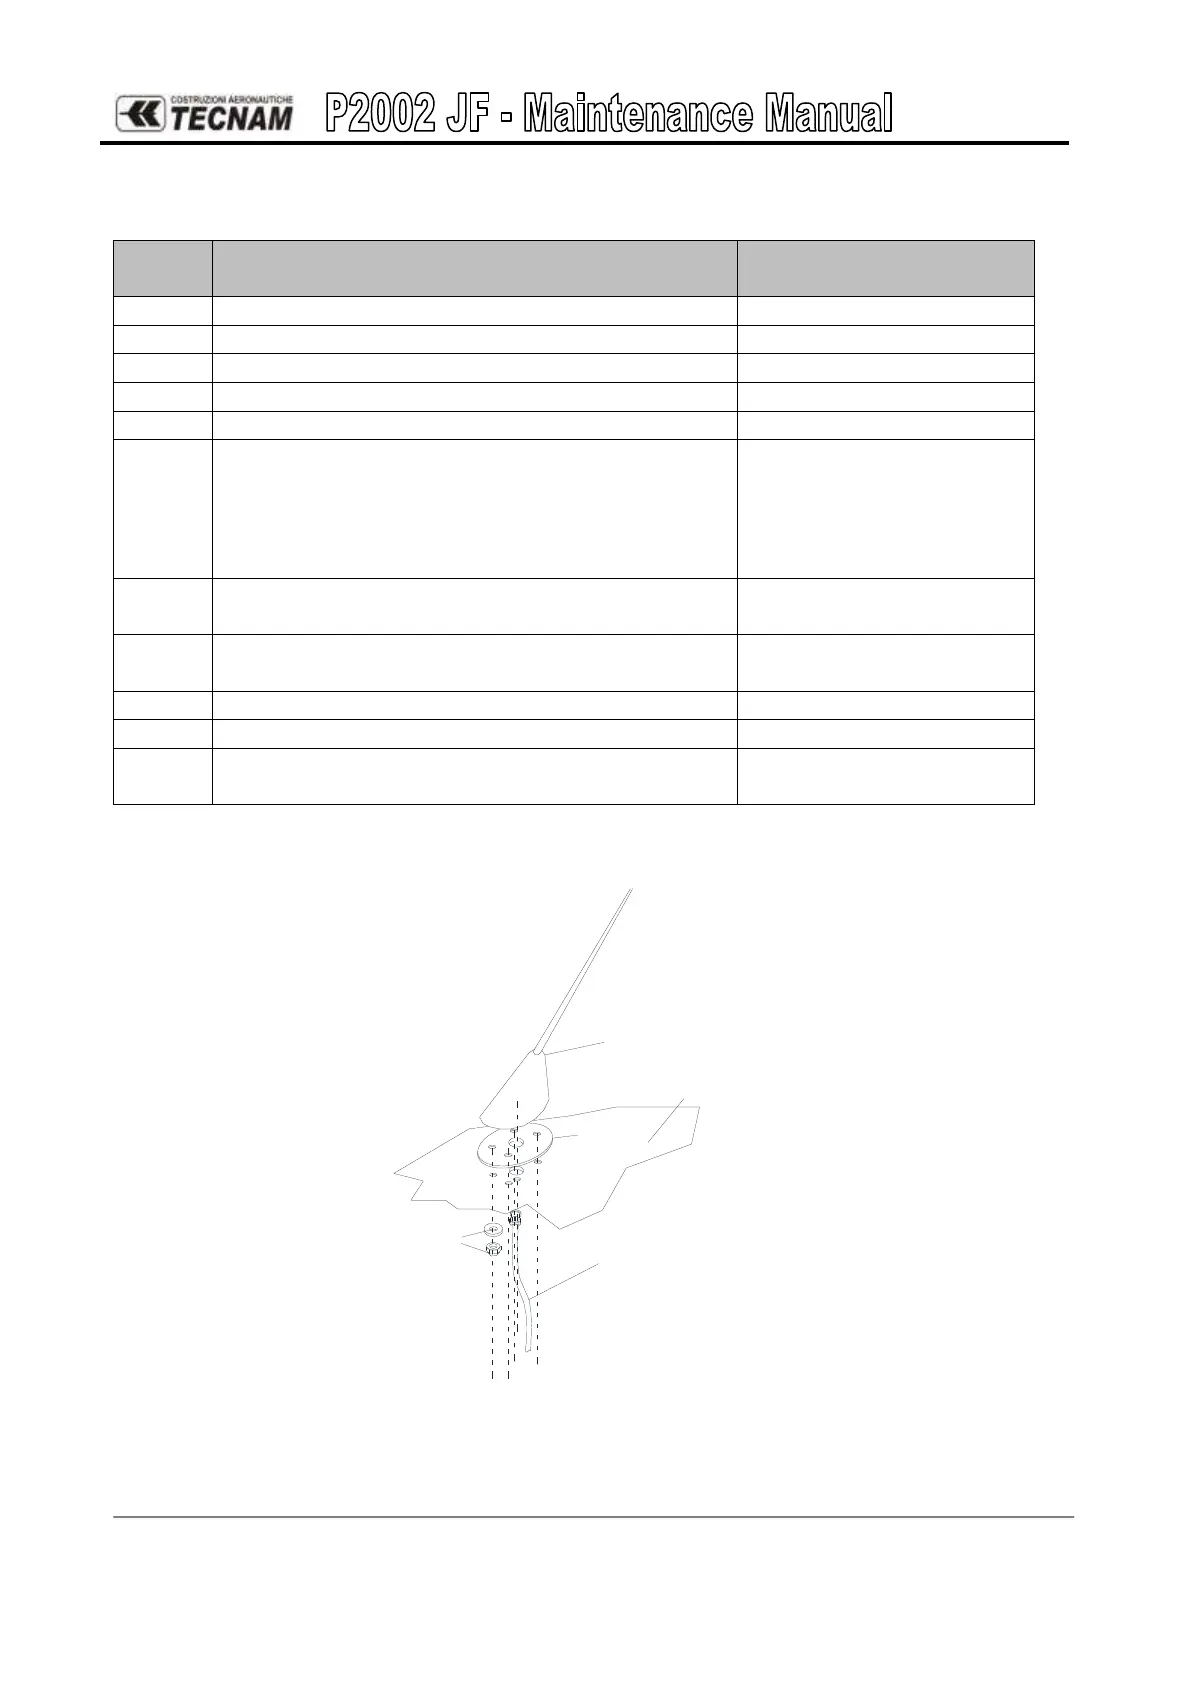
7. COMM antenna removal/installation
Additional info &
References
Make sure Master Switch is set to OFF
Cut sealant in correspondence of the antenna base
Loosen nuts and remove washers
Put the antenna clear of the fuselage skin
Make sure that the internal skin surface is not
painted in correspondence of the fixing bolts
Remove any interior paint in
the area where the fixing
nuts and washers are
placed to assure a good
ground.
Put in position the new/repaired antenna with the
cork gasket
Tighten fixing nuts with washers as per standard
values
See standard torque values
as addressed on Chapter 20
Perform COMM 1 antenna functional test
Apply sealant in correspondence of the antenna
base
Apply multipurpose sealant
type 1. See Chapter 51
ANTENNA
AIRCRAFT FUSELAGE
ANTENNA CABLE
FITTINGS
CORK
Figure 10. - Comm Antenna