Page 201 2
nd
Edition – Rev 0
55-10
STABILATOR – DESCRIPTION AND OPERATION
1. STABILATOR REMOVAL /INSTALLATION
Procedure
Additional info &
References
Remove the tail cone fairing (Upper and
lower)
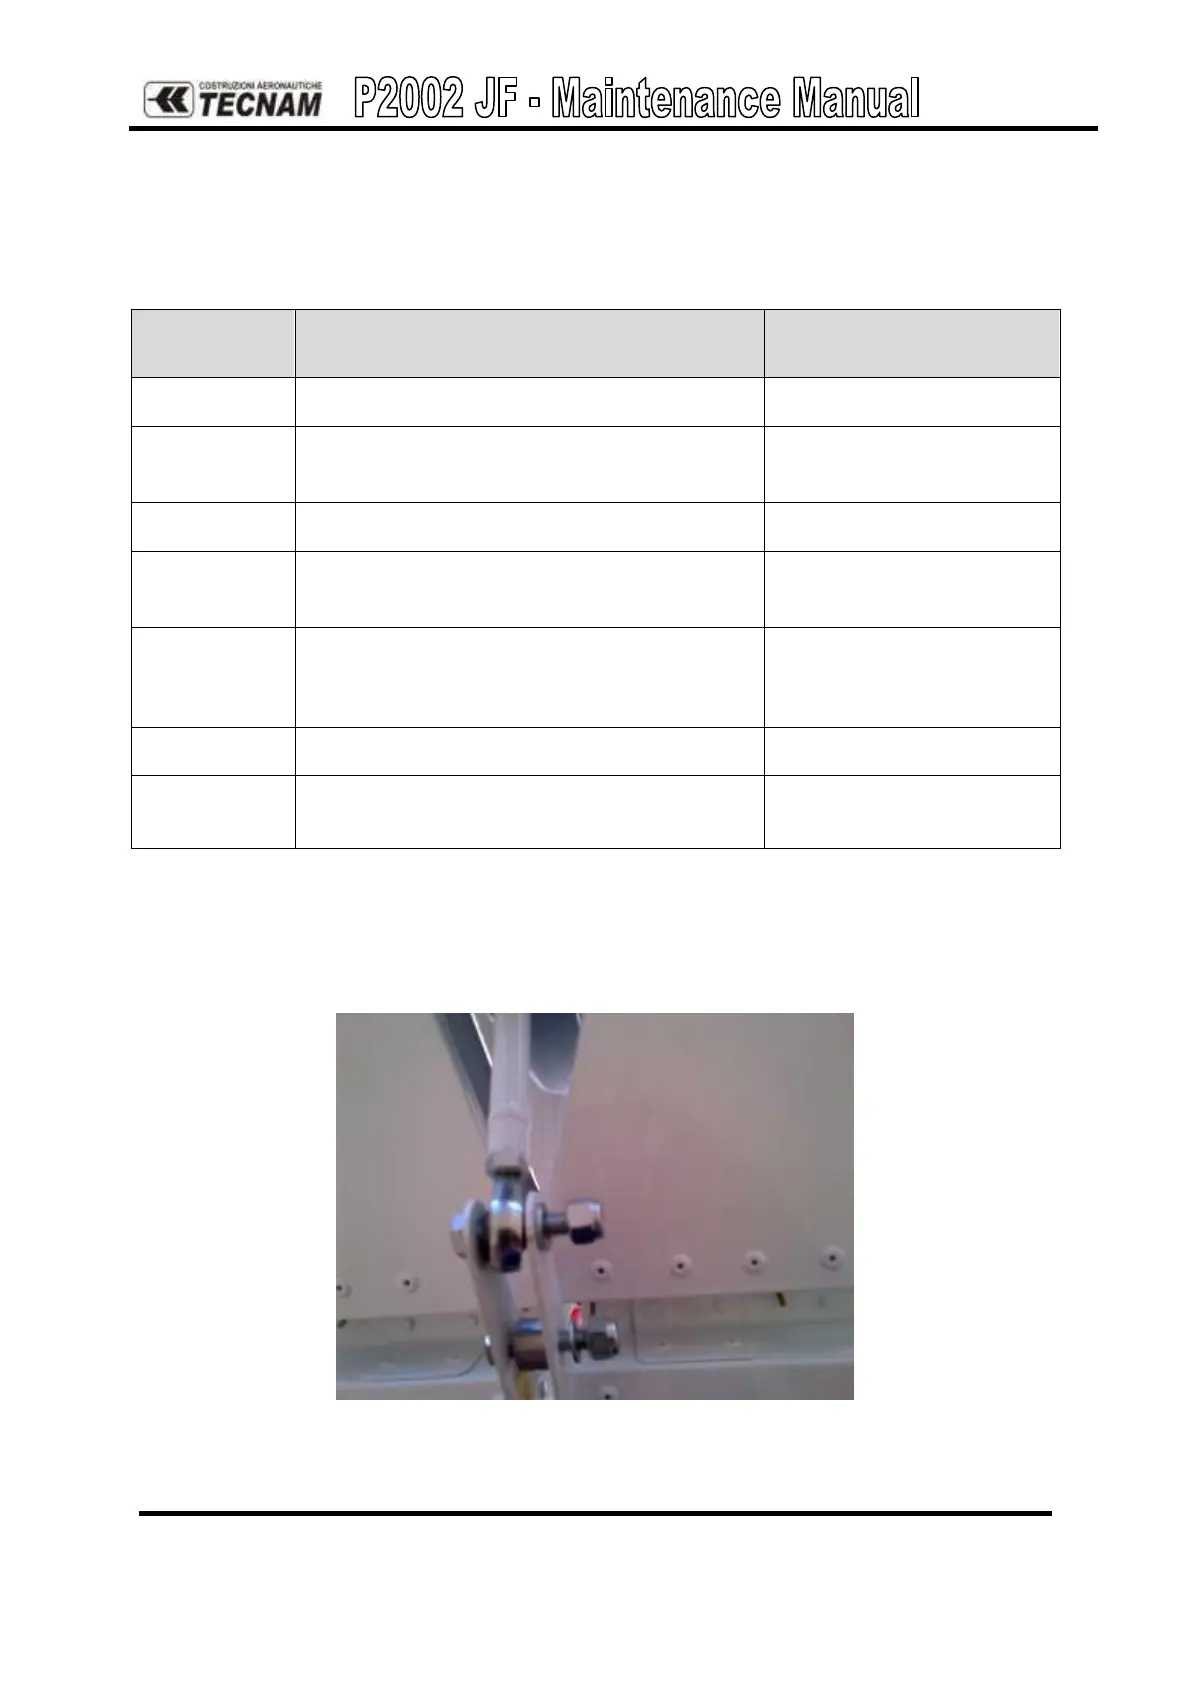
Unscrew the two screws of trim tab rod
Unscrew the two screws of the rear side of the
stabilator
Remove the pins on both stabilator upper side
and remove the two grains on stabilator
bottom side
Unfasten the two plane of the stabilator
Check and, if necessary, repair or replace the
stabilator.
Reverse procedure for reinstallation, setting the torque value according to AMM ATA20 and
applying a small amount of grease around the torque tube, inside the stabilator connection to
facilitate insertion and gently tapping parts into position being careful not to deform outward
ribs. Then check the surface travel limits
Figure 4. – Trim tab screws