For nominal voltage of -60 VDC, the input voltage range is from -40 to -72 VDC.Note
Use only the fastening hardware provided with the NCS 2006 to prevent loosening, deterioration, and
electromechanical corrosion of the hardware and joined material.
Note
When installing or replacing the unit, the ground connection must always be made first and
disconnected last. Statement 1046
Warning
The air plenum is installed on a rack or a cabinet using thread-forming screws that remove any
paint or non-conductive coatings inside the hole threads, and establish a metal-to-metal contact.
Also, clean both surfaces outside the screw points that come in contact, so that they are free of paint
and other nonconductive coating. Apply an appropriate antioxidant compound to the surfaces.
Warning
Procedure
Depending on the rack or cabinet, complete the necessary task:
•
DLP-L64 Installing Air Plenum for NCS 2006 Shelf in ANSI 19-inch Cabinet, on page 145
•
DLP-L66 Installing Air Plenum in NCS 2006 Shelf for ANSI 23-inch Configuration, on page 149
•
DLP-L67 Installing Air Plenum for NCS 2006 Shelf in ETSI Configuration, on page 157
•
DLP-L68 Installing Pre-assembled Air Plenums in ANSI 23-inch Configuration, on page 154
Stop. You have completed this procedure.
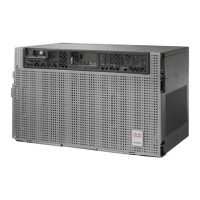
DLP-L64 Installing Air Plenum for NCS 2006 Shelf in ANSI 19-inch Cabinet
This task installs the air plenum for the NCS 2006
shelf in ANSI 19-inch cabinet.
Purpose
•
#2 Phillips Dynamometric screwdriver
•
Medium slot-head screwdriver
•
Small slot-head screwdriver
•
Screws: #12-24 x 0.50 pan-head Phillips screws
(8)
•
Wing head screws (8)
•
One air plenum kit (horizontal and vertical air
plenum)
Tools/Equipment
Cisco NCS 2000 Series Hardware Installation Guide
145
Installing the Air Flow Regulator
DLP-L64 Installing Air Plenum for NCS 2006 Shelf in ANSI 19-inch Cabinet
 Loading...
