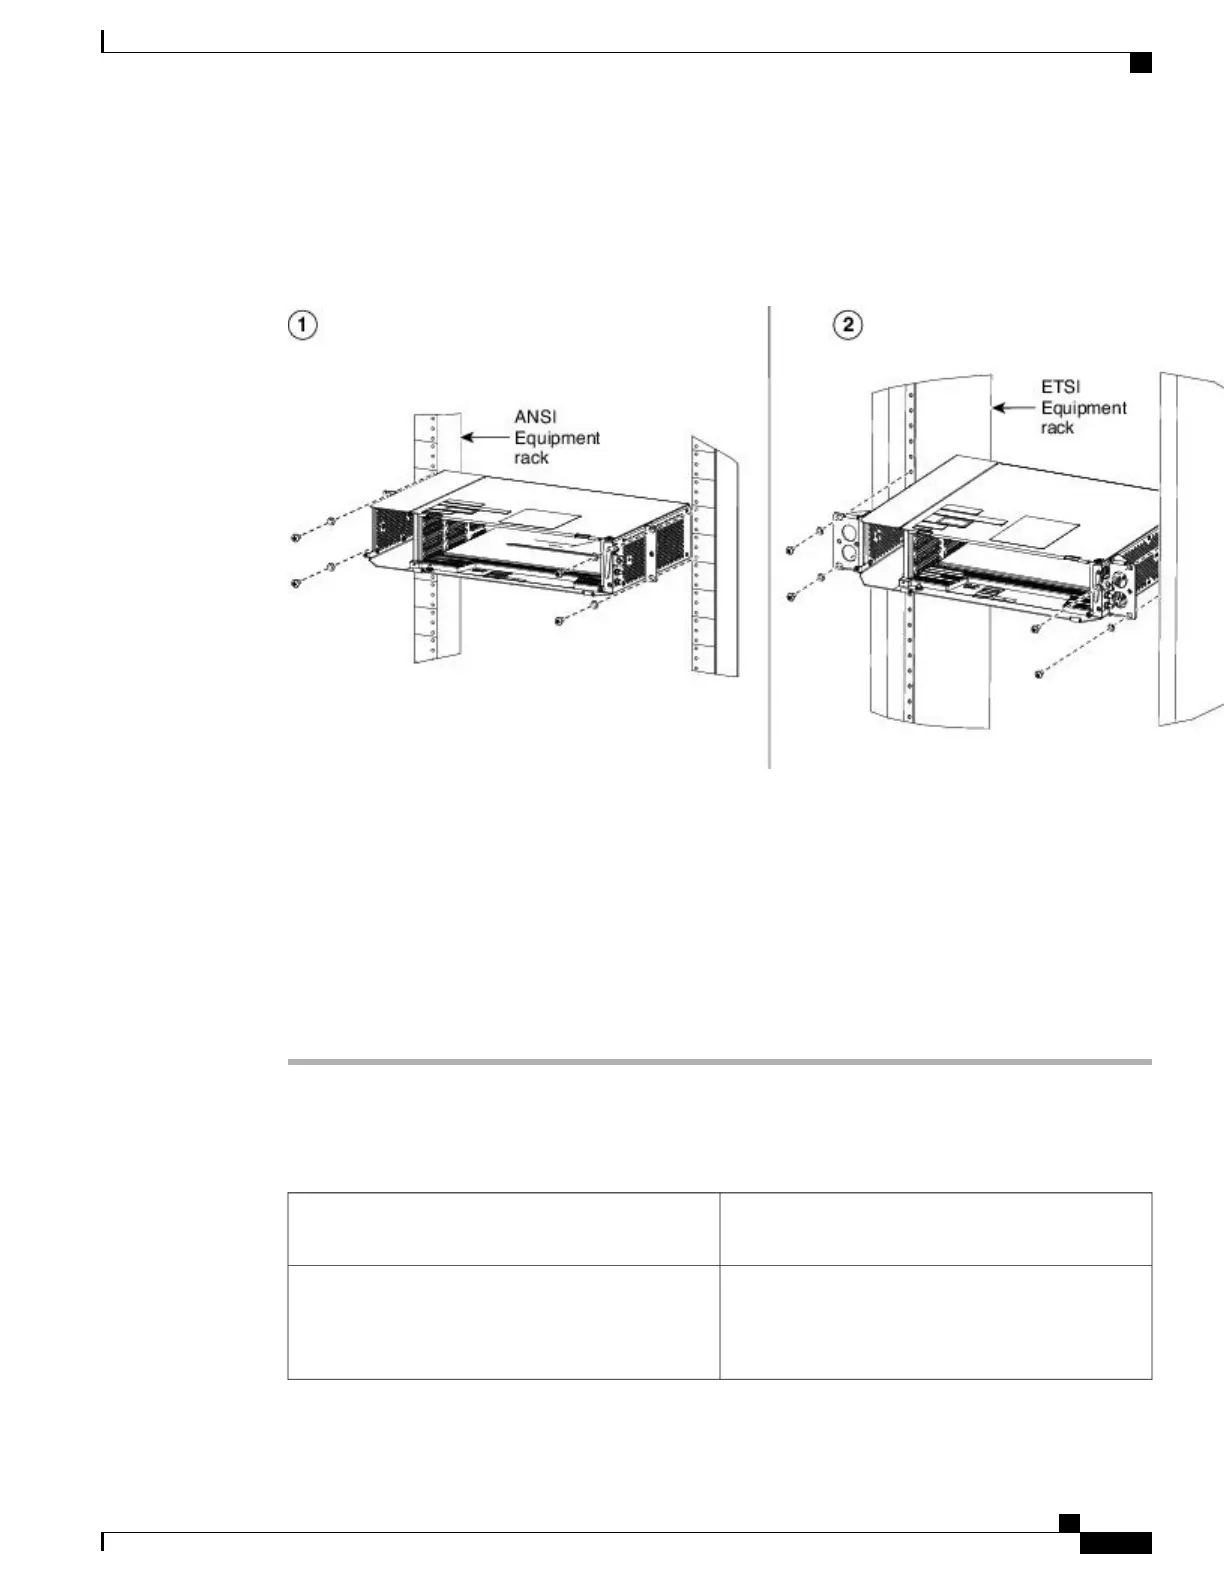
Diagram 2 of the figure below shows the NCS 2002 shelf mounted on an ETSI rack in the front position using
mounting brackets
Figure 40: Mounting an NCS 2002 in a Rack
Step 3
Return to your originating procedure (NTP).
Step 4
Lift the shelf to the desired position in the rack.
To ensure proper cooling of the NCS 2002 shelf, make sure that the space in front of the air flow
vents are free of cables, fibers, and mechanical fixtures for fiber and cable management.
Note
Step 5
Align the screw holes on the mounting brackets with the mounting holes in the rack.
Step 6
Using the Phillips Dynamometric screwdriver, install one mounting screw in each side of the assembly.
Tighten the screw to a torque value of 22 in-lb (2.5 N-m).
Step 7
When the shelf is secured to the rack, install the remaining two mounting screws on either sides of the shelf.
Step 8
Return to your originating procedure (NTP).
DLP-L43 Mounting the NCS 2002 Shelf on the Wall
This task explains how to mount the NCS 2002 shelf
on the wall.
Purpose
•
# 2 Phillips Dynamometric screwdriver
•
6 pan-head Phillips mounting screws
Tools/Equipment
Cisco NCS 2000 Series Hardware Installation Guide
69
Mounting the Cisco NCS 2002 Shelf
DLP-L43 Mounting the NCS 2002 Shelf on the Wall