Step 7
Unscrew the nuts from the terminal block.
Step 8
Insert the lugs as shown in the figure above. Follow the fuse assignments to ensure the correct cabling of the
battery and return to the shelf.
The power lugs must be crimped horizontally with the power cables.Note
Step 9
Insert the lock washers and nuts to the terminal block (see the figure above). Tighten the nuts to a torque value
of 20 in-lb (2.25 N-m).
Step 10
Reinstall the terminal block protective covers over the DC distribution lugs.
Step 11
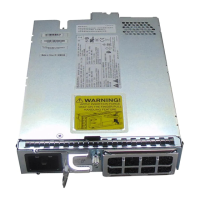
Install the DC power modules in the NCS 2015 shelf.
Step 12
Return to your originating procedure (NTP).
DLP-L80 Turning On and Verifying DC Office Power on the NCS 2015 Shelf
This task turns on the power and verifies correct
power and returns on the NCS 2015 shelf.
Purpose
VoltmeterTools/Equipment
DLP-L79 Connecting Office Power (DC) to the NCS
2015 Shelf, on page 341
Prerequisite Procedures
RequiredRequired/As Needed
OnsiteOnsite/Remote
NoneSecurity Level
Do not apply power to the shelf until you complete all the installation steps.Caution
To ensure safety of personnel and equipment, do not connect any power cables into the power module
until the module is completely installed into the chassis. Statement 389
Warning
To reduce the risk of electric shock, switch on the power only after the power cord is completely
installed into the power module. Statement 390
Warning
Procedure
Step 1
Using a voltmeter, verify the office battery and return at the following points on the fuse and alarm panel:
Cisco NCS 2000 Series Hardware Installation Guide
344
Connecting Power and Ground
DLP-L80 Turning On and Verifying DC Office Power on the NCS 2015 Shelf
 Loading...
