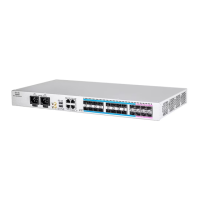
•
# 2 Phillips Dynamometric screwdriver
•
ETSI only:
◦
Six M6 x 20 pan-head Phillips mounting
screws
•
only:
◦
Six #12-24 x 3/4 pan-head Phillips
mounting screws
Tools/Equipment
NTP-L2 Mounting the Brackets in ANSI
Configuration , on page 163
Prerequisite Procedures
As neededRequired/As Needed
OnsiteOnsite/Remote
NoneSecurity Level
The NCS 2006 shelf requires a minimum of 10.4-inches (265 mm) vertical rack space. To ensure that the
mounting is secure, use two to three M6 mounting screws on each side of the shelf. A shelf should be
mounted at the bottom of the rack if it is the only unit in the rack.
Note
Procedure
Step 1
Verify that the proper fuse and alarm panel has been installed in the top mounting space. If a fuse and alarm
panel is not present, you must install one as per the instructions of the manufacturer:
•
For a a DC power supply, the fuse rating must not exceed 40A.
•
For an AC power supply, the fuse rating must not exceed 10A, 15A, or 20A. For North America, the
branch circuit protection must be rated 20A. The overcurrent/short circuit protection must be in accordance
with local and national electrical codes.
Step 2
Ensure that the shelf is mounted on the appropriate rack equipment:
•
23-inches (584.2 mm) or 19-inches (482.6 mm) for racks.
•
600 x 600-mm (23.6 x 23.6-inch) or 600 x 300-mm (23.6 x 11.8-inch) for ETSI racks.
Step 3
Lift the shelf to the desired position in the rack. If the rack is empty, place the shelf at the bottom of the rack.
The placement of the shelf is dependent on where you want to install the new equipment in the rack.
To ensure proper cooling of the NCS 2006 shelf, make sure that the space in front of the air flow
vents are free of cables, fibers, and mechanical fixtures for fiber and cable management.
Note
Cisco NCS 2000 Series Hardware Installation Guide
194
Mounting the Cisco NCS 2006 Shelf
DLP-L10 Mounting the NCS 2006 Shelf on a Rack (Two People)