Procedure
Step 1
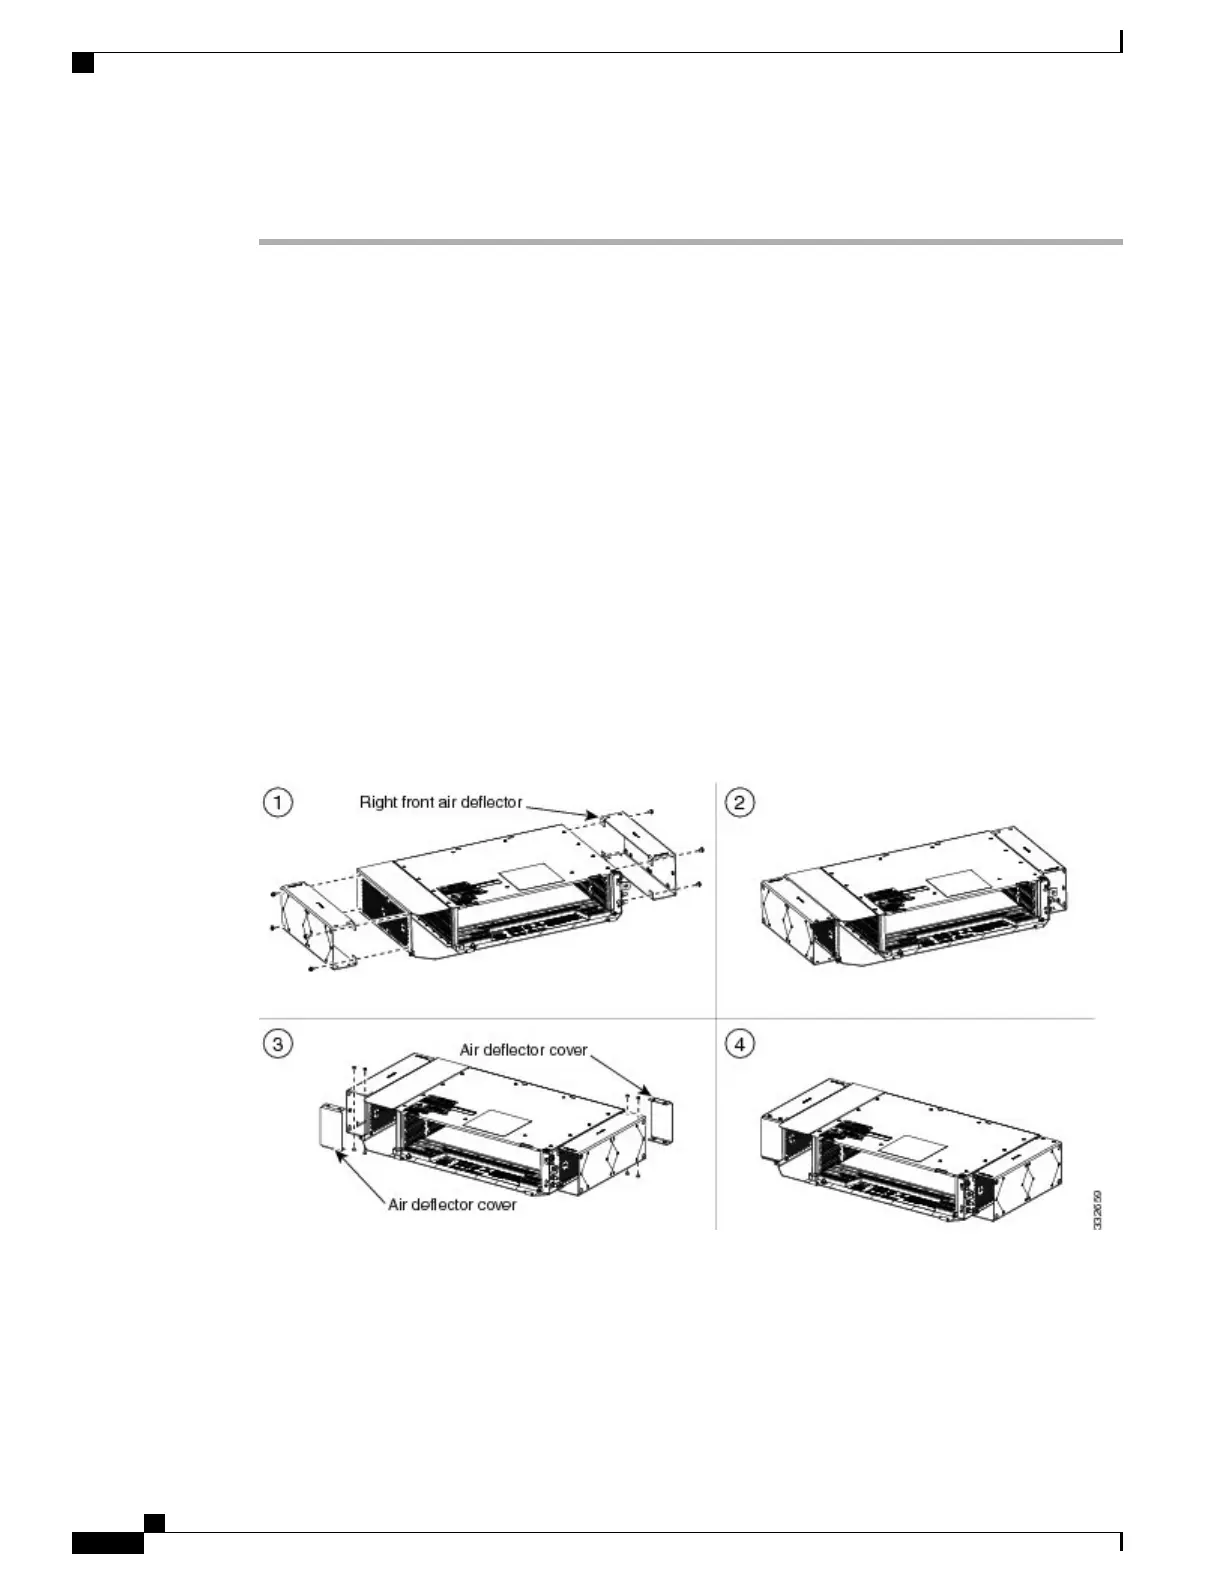
Place the right front air deflector flush against the right side of the chassis as shown in Diagram 1 of the
following figure.
Step 2
Align the screw holes on the right front air deflector with the screw holes on right side of the chassis.
Step 3
Insert the screws and tighten them to a torque value of 11.5 in-lb (1.3 N-m). See Diagram 2 of the following
figure.
Step 4
Place the left back air deflector flush against the chassis as shown in Diagram 1 of the following figure.
If the 100G-LC-C, 10x10G-LC, or CFP-LC cards are to be installed in the NCS 2002 shelf, do not
mount the left back deflector (exhaust air deflector). Use the standard brackets directly to mount the
NCS 2002 shelf.
Note
Step 5
Align the screw holes on the left back air deflector with the screw holes on the chassis.
Step 6
Insert the screws and tighten them to a torque value of 11.5 in-lb (1.3 N-m). See Diagram 2 of the following
figure.
Step 7
Place the air deflector covers on the front and rear ends of the chassis as shown in Diagram 3 of the following
figure.
Step 8
Align the screw holes on the air deflector covers with the screw holes on the chassis.
Step 9
Insert the screws and tighten them to a torque value of 11.5 in-lb (1.3 N-m). See Diagram 4 of the following
figure.
Figure 31: Mounting the Air Deflectors (Front-to-Back) on the NCS 2002 Shelf for ANSI Rack Configuration
Cisco NCS 2000 Series Hardware Installation Guide
50
Mounting the Cisco NCS 2002 Brackets
DLP-L37 Mounting the Bracket with Air Deflectors (Front-to-Back) on the NCS 2002 Shelf for ANSI Rack Configuration