Use only the fastening hardware provided with the NCS 2002 to prevent loosening, deterioration, and
electromechanical corrosion of the hardware and joined material.
Caution
When mounting the NCS 2002 in a frame with a nonconductive coating (such as paint, lacquer, or enamel)
either use the thread-forming screws provided with the NCS 2002 ship kit, or remove the coating from
the threads to ensure electrical continuity.
Caution
Procedure
Step 1
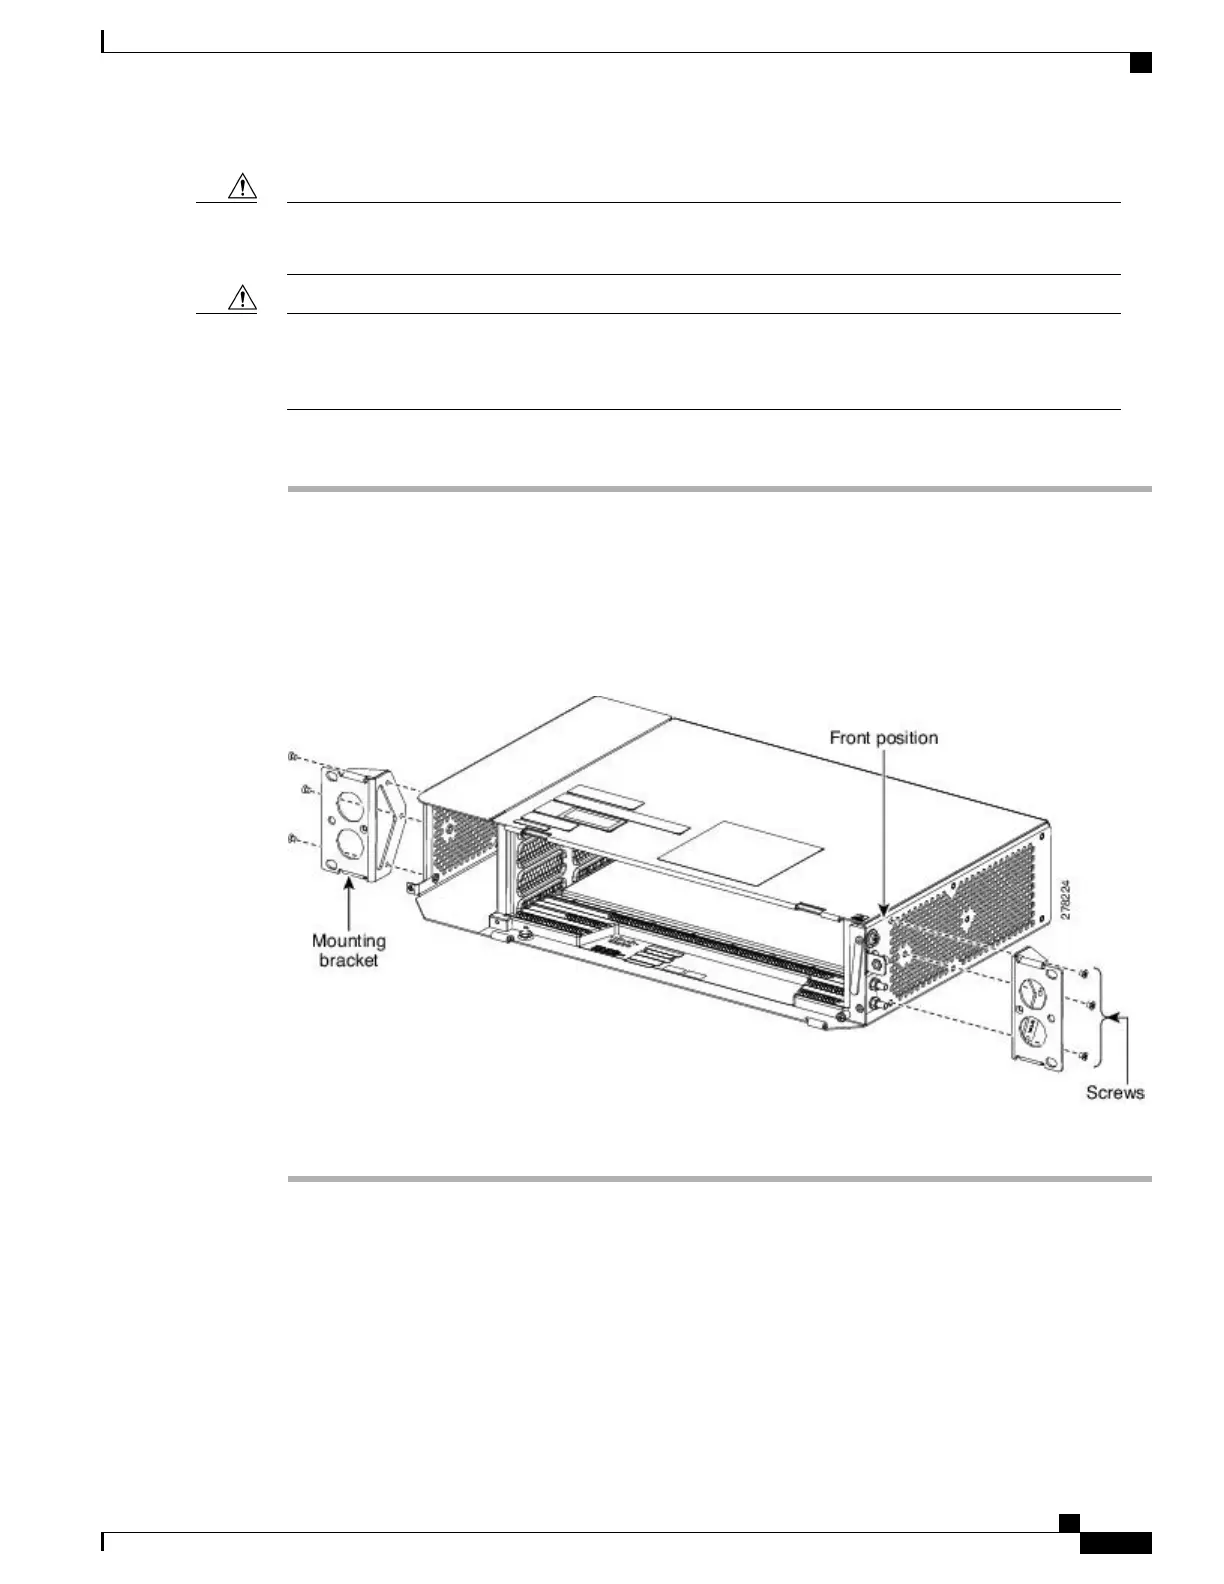
Place the mounting bracket flush against the shelf as shown in the figure below.
Step 2
Align the mounting bracket screw holes against the shelf screw holes.
Step 3
Insert the screws and tighten them to a torque value of 11.5 in-lb (1.3 N-m).
Step 4
Repeat steps 1 through 3 for the mounting bracket on the opposite side.
Figure 33: Mounting the Brackets on the NCS 2002 Shelf for ETSI Rack Configuration
Step 5
Return to your originating procedure (NTP).
Cisco NCS 2000 Series Hardware Installation Guide
53
Mounting the Cisco NCS 2002 Brackets
DLP-L38 Mounting the Brackets on the NCS 2002 Shelf for ETSI Rack Configuration