Group 7 Data entry/Programming Page 79
JET2 neo Release R1.12 en
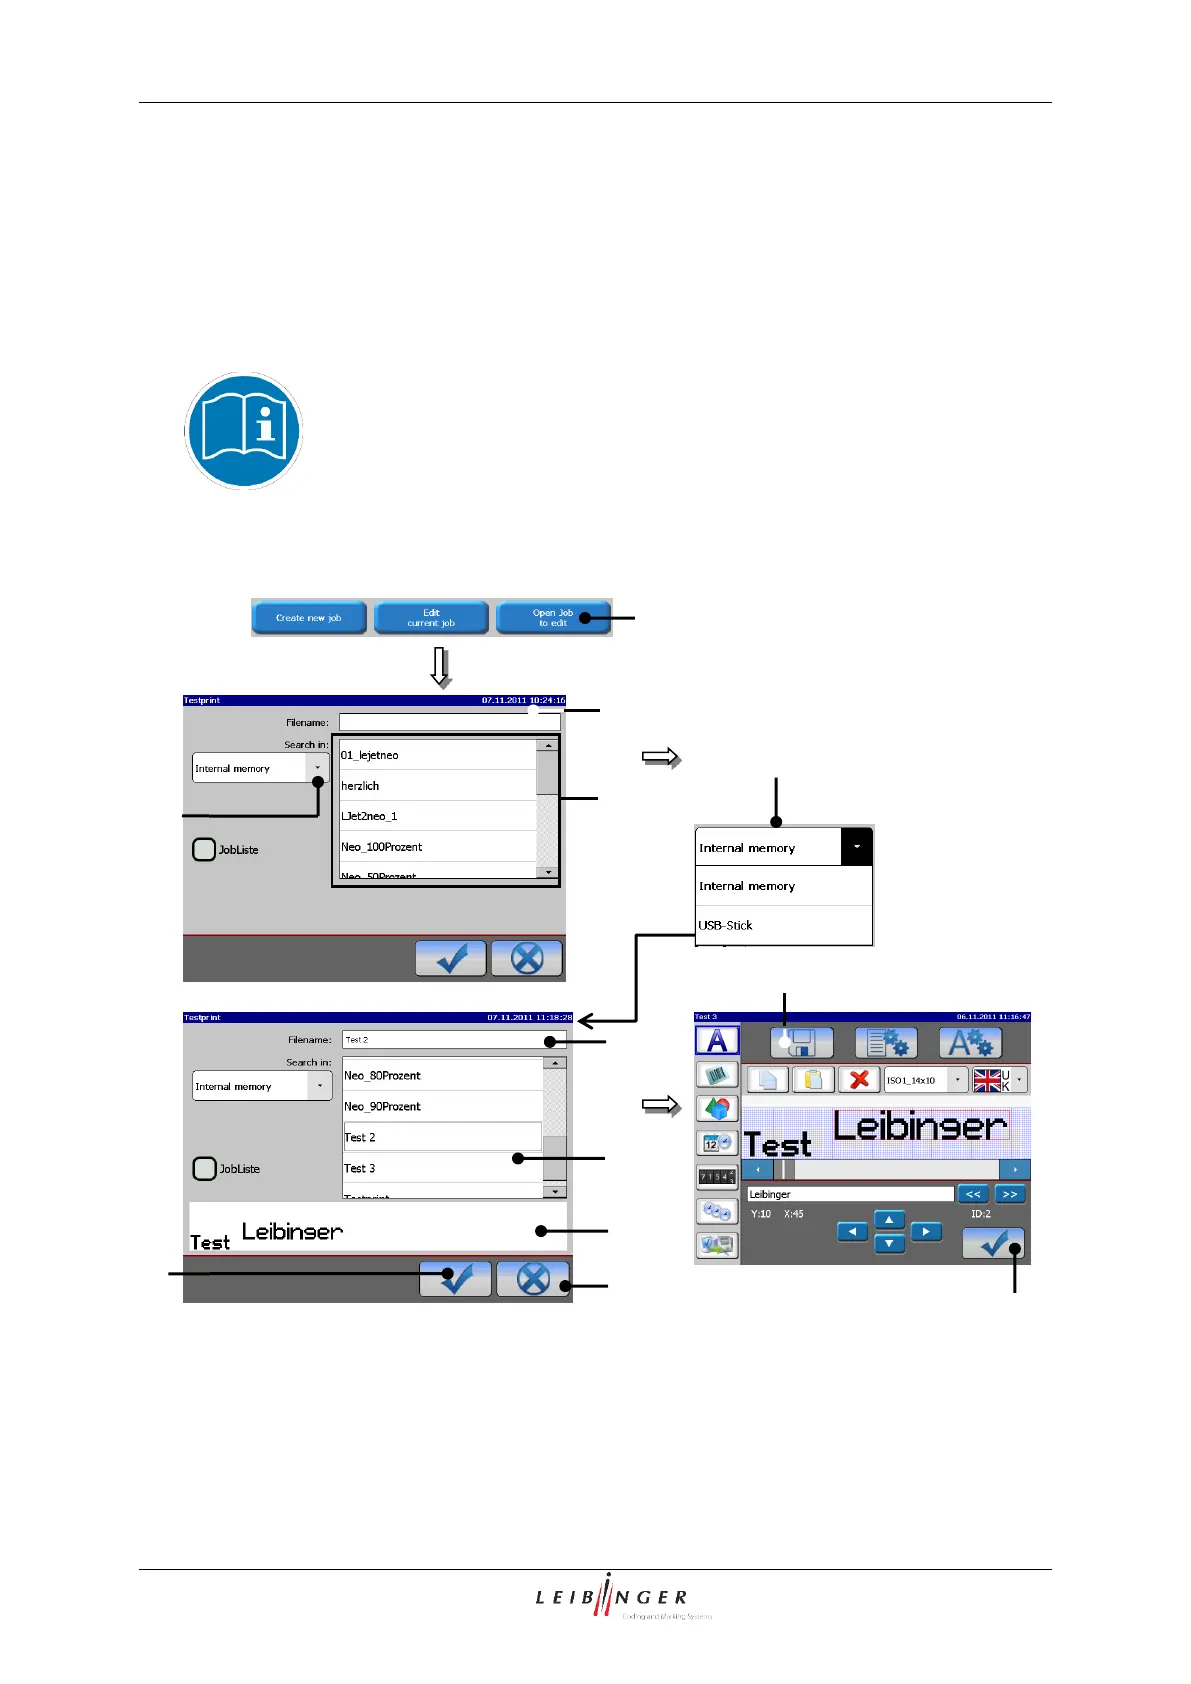
Press the button <OK ()> (9) to take over the selected job or press the button
<Cancel> (8) to cancel the process.
The menu <Jobeditor> (10) opens to change the printing data. The name of the
opened job is displayed in the title bar of the editor.
Carry out the requested changes and save it. You will find further information regarding
the memory process in the group Job editor in the chapter Save job/Save job as
(page 253).
You will find further information regarding the operation of the job editor
in the group Jobeditor.
1 – Button <Open job to edit >
7 – Display <Job preview>
2 – Window <Job selection>
3 – Selection field <Job list>
4 – Pop-up window <Search in>