Job lists provide the possibility of combining several print jobs in one print list. Each print
job on the list has its own address. The addressing happens through the respective digital
inputs on interface X4.
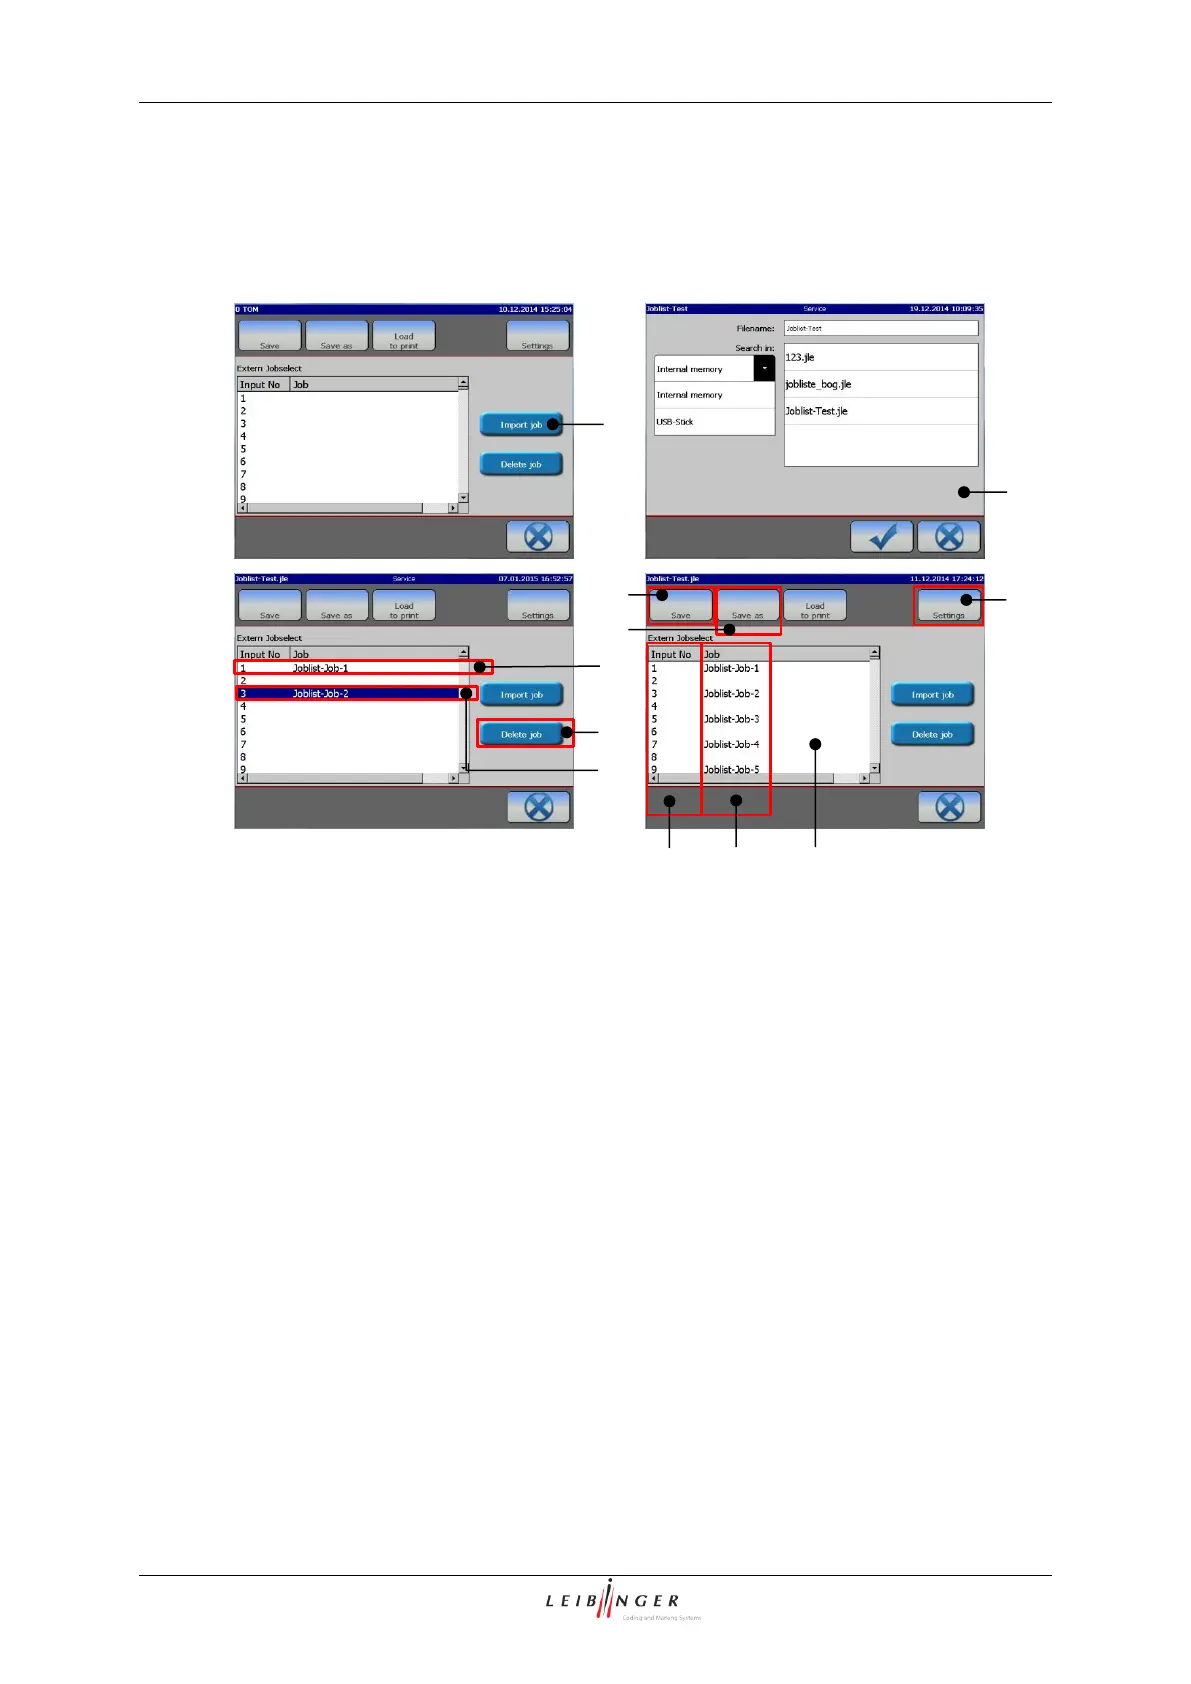
A job is added with the <Import job> (1) button. A <Open file> dialog box (2) pops up.
The print job is inserted at the current <Cursor position> (3). With the <Delete Job> (4)
button the currently marked job can be removed from the <List display> (5). The job list
shows the <Input address> (6) and the name of the <job> (7). The <Input No> (6)
corresponds with the print job address. The addressing is done in binary form through the
digital inputs of connector X4. For details about interface X4 please see chapter 5.5.4
Interface X4 (Inputs) and the Appendix. With each <PrintGo> signal the currently
addressed print job will be printed. Up to 1023 print jobs can be listed in an <Extern
Jobselect> list (8). Job lists can be saved through the <Save> (10) or the <Save as> (11)
button either on the printer’s hard disk or on an USB stick.
The <Settings> button (9) erreicht opens a dialog box for general settings. These
settings apply to all print jobs on the job list.