Page 222 Job editor Group 8
Release R1.12 en JET2 neo
The applied date input is displayed in the menu <Job editor>.
Now click on the date element to mark it. It is now displayed with a red object frame.
Position the element with the direction buttons of the job editor or use the Drag-function
to shift the element.
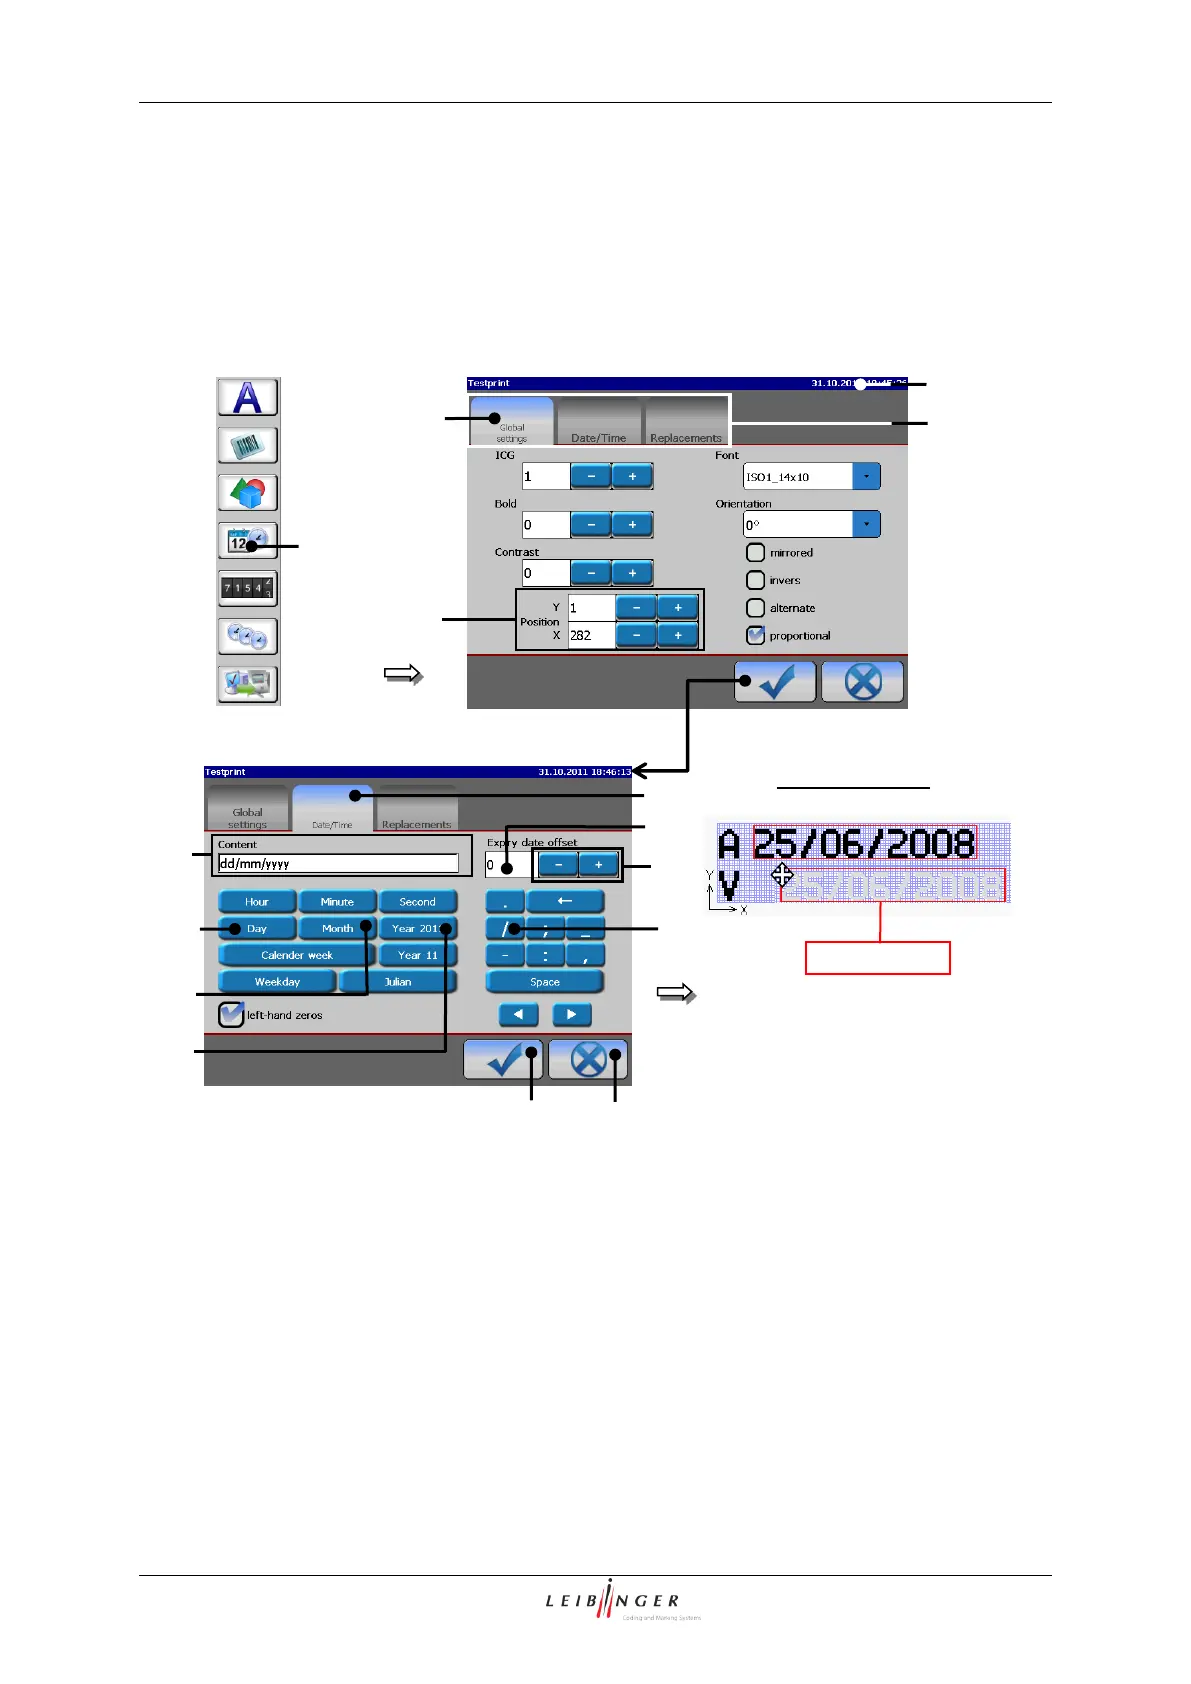
Print elements (Date/time input (Step 1))
1 – Direct button <Date/Time>
2 – Menu <Object settings (Date/Time)>
10 – Display field <Content>
3 – Functional area <Global settings>
4 – Setting fields <Position X/Y>
12 – Display field <Expiry date offset>
5 – Functional area <Date/Time>