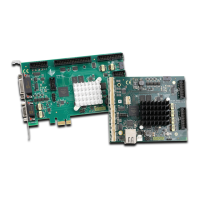
RTC6 boards
Doc. Rev. 1.0.21 en-US
2 Product Overview
40
2.7 Jumper Settings and Type
Designations
SCANLAB ships RTC6 PCIe Boards in various jumper
configurations. Jumpers are connections which are
either open or closed. The factory solder jumper
configuration of an RTC6 PCIe Board can be
identified by its article number.
In addition, a three-digit type code scheme is used,
for example,
• “RTC6 PCI-Express TYPE 000”
– No signals (that is, all solder jumpers are open)
• “RTC6 PCI-Express TYPE 124”
– 5 V output signal level at the EXTENSION 1
socket connector
– DATA7 at pin 15 of the EXTENSION 2
socket connector
– LATCH at pin 17 of the EXTENSION 2
socket connector
Trained users can reconfigure solder jumpers by using
a soldering iron. The assignment of a desired signal is
done by closing or opening (applying or removing
solder or zero-ohm resistor) of corresponding solder
jumpers as described in the following
(1)(2)(3)
.
Digit 1 Refers to the output signal level at the
EXTENSION 1 socket connector
(1)
.
=0: No signals.
=1: 5 V.
=2: 3,3 V.
Digit 2 Refers to pin 15 of the EXTENSION 2
socket connector
(3)
.
=0: No signals.
=1: +5 V.
=2: DATA7.
=3: GROUND.
Digit 3 Refers to pin 17 of the EXTENSION 2
socket connector
(2)
.
=0: No signals.
=1: +5 V.
=2: DATA7.
=3: GROUND.
=4: LATCH.
(1) For the solder jumper setting, see Chapter 2.7.1
”Solder Jumper Field A – Configuring Output Signal
Level at EXTENSION 1 Socket Connector”, page 41.
(2) For the solder jumper setting, see Chapter 2.7.2
”Solder Jumper Field B – Configuring Pin (17) of
EXTENSION 2 Socket Connector”, page 42.
(3) For the solder jumper setting, see Chapter 2.7.3
”Solder Jumper Field C – Configuring Pin (15) of
EXTENSION 2 Socket Connector”, page 43.
Notice!
• Only configure allowed jumper settings.
Otherwise, the board gets damaged!